SHIPPING MULTIPLE PRIMARY PACKAGES IN CASES OF ONE SIZE
QPM Version: 4 and above
Adding Shipping Routes To Containers
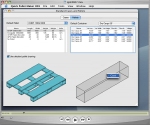
| Here's an example on how to use the new Quick Pallet Maker feature that saves the shipping routes with their costs in the Standard Container file. This allows the user to choose a route so that the shipping cost can be updated automatically when a container is selected. In the first part of the movie, we open the Standard Cases, Pallets and Containers window and click on any container to select it. Once the container has been selected, click on the drawing with the right mouse button (Ctrl+click on a Mac) to open a small window. |
 |
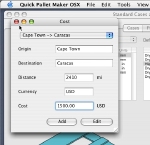
| In this window, we will enter the origin, destination and freight cost for this route. For this example, we have chosen a route that starts in Cape Town, South Africa and ends in Caracas, Venezuela. Please don't pay attention to the values themselves as their sole purpose is to serve as an example. |
 |
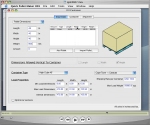
| Once we have entered the shipping information, we click OK and move on to the container fill window. Every time the specific container has been selected (in this case, the 40' High Cube), a pull-down menu will appear to provide the user with route options. When an option is selected, the shipping cost appears in the appropriate cell. |
 |
|
| Note in the example that the shipping cost of each pallet or box in the container will not appear until we add a code and/or description to the element that will be shipped. This is why in the example, we first calculate the container, see that there is no cost attached and calculate again. |
