Using a Shipment List to Calculate Pallets and Containers
Here's another example for calculating a container shipment using an order that has been pasted from a MS Excel spreadsheet. The first step is to create the columns with the information that QPM will use for reading the box information from the orders.
In this case, we had two different files, one with the order information and the other one with a list of SKUs and their case dimensions. We created the extra columns linking the information in the order file with the dimensions file. The MS Excel file with just the final data for this example can be downloaded through this link.
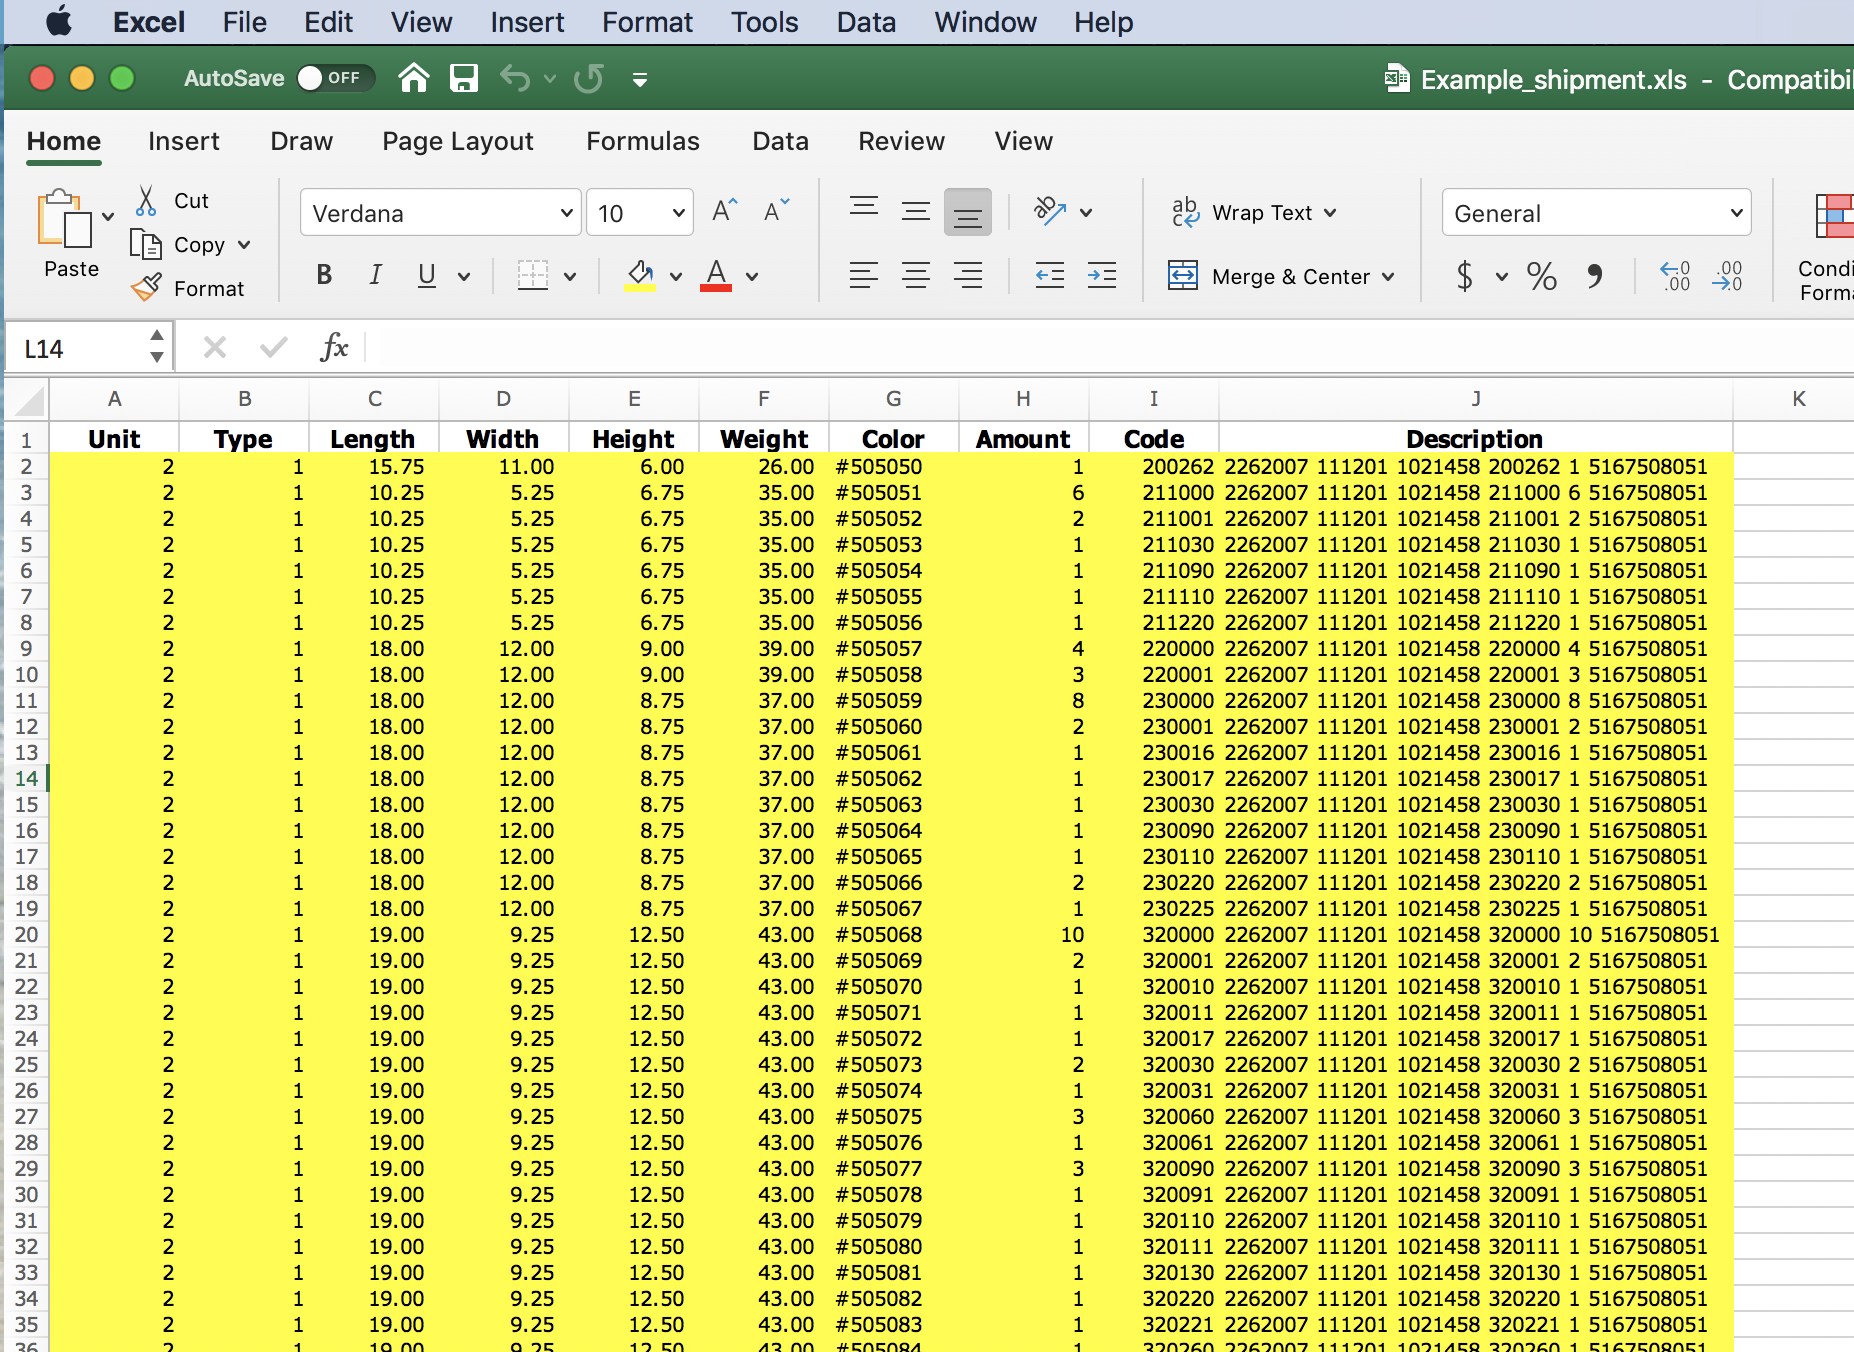
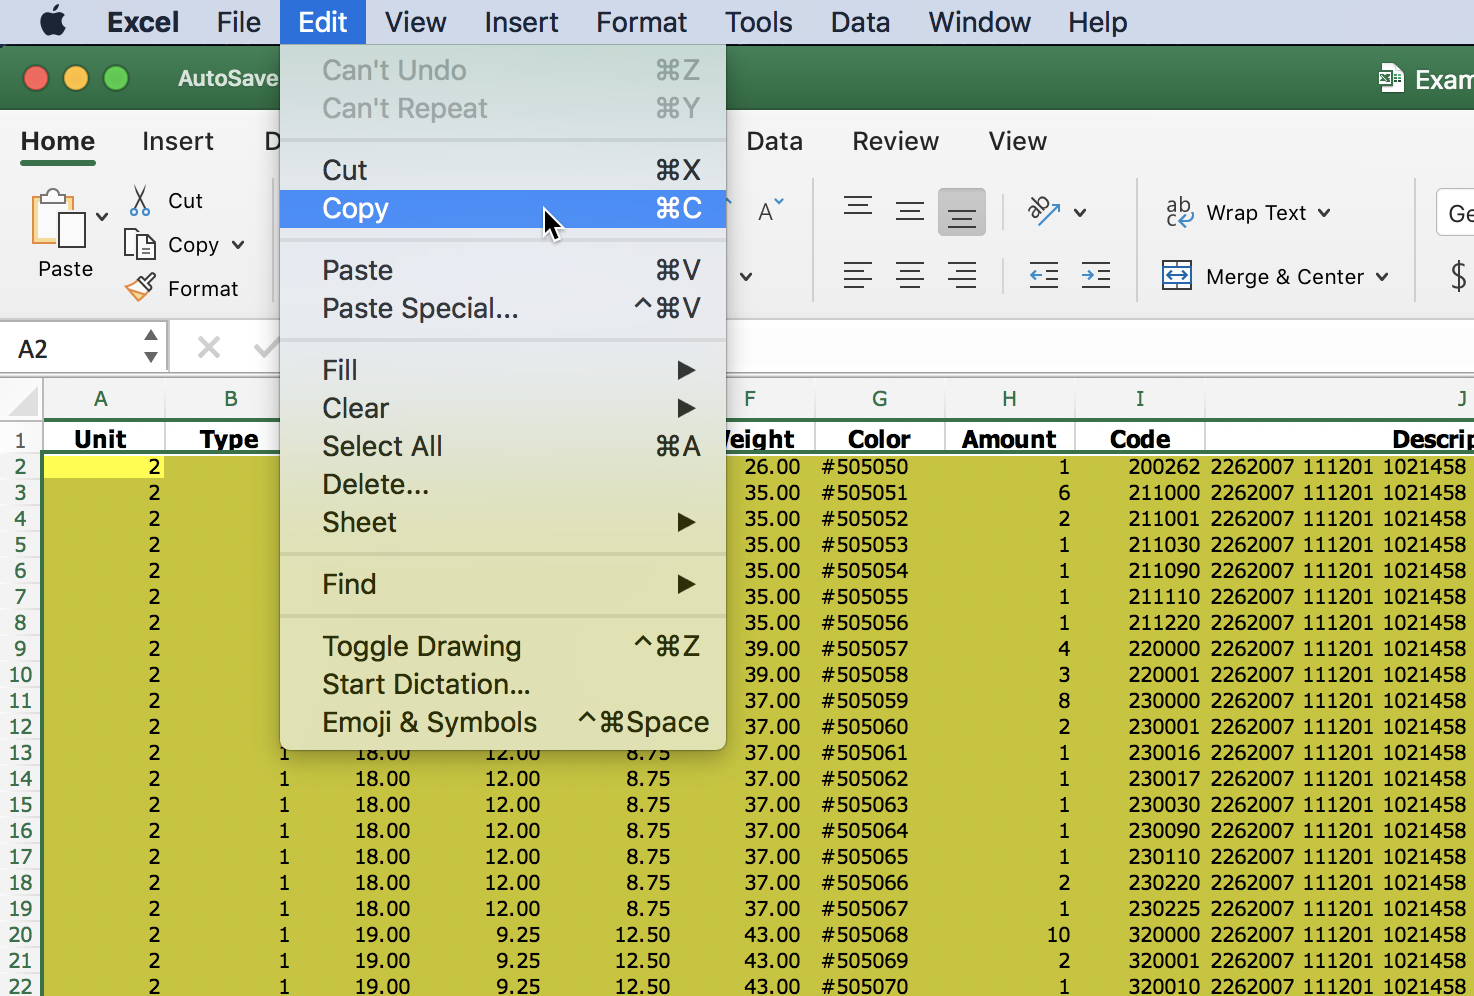
Once we have created the data table and selected the area in yellow (the area with data, although selecting the headers won't make a difference), we use the copy command in the spreadsheet application. The data will be copied onto the clipboard.
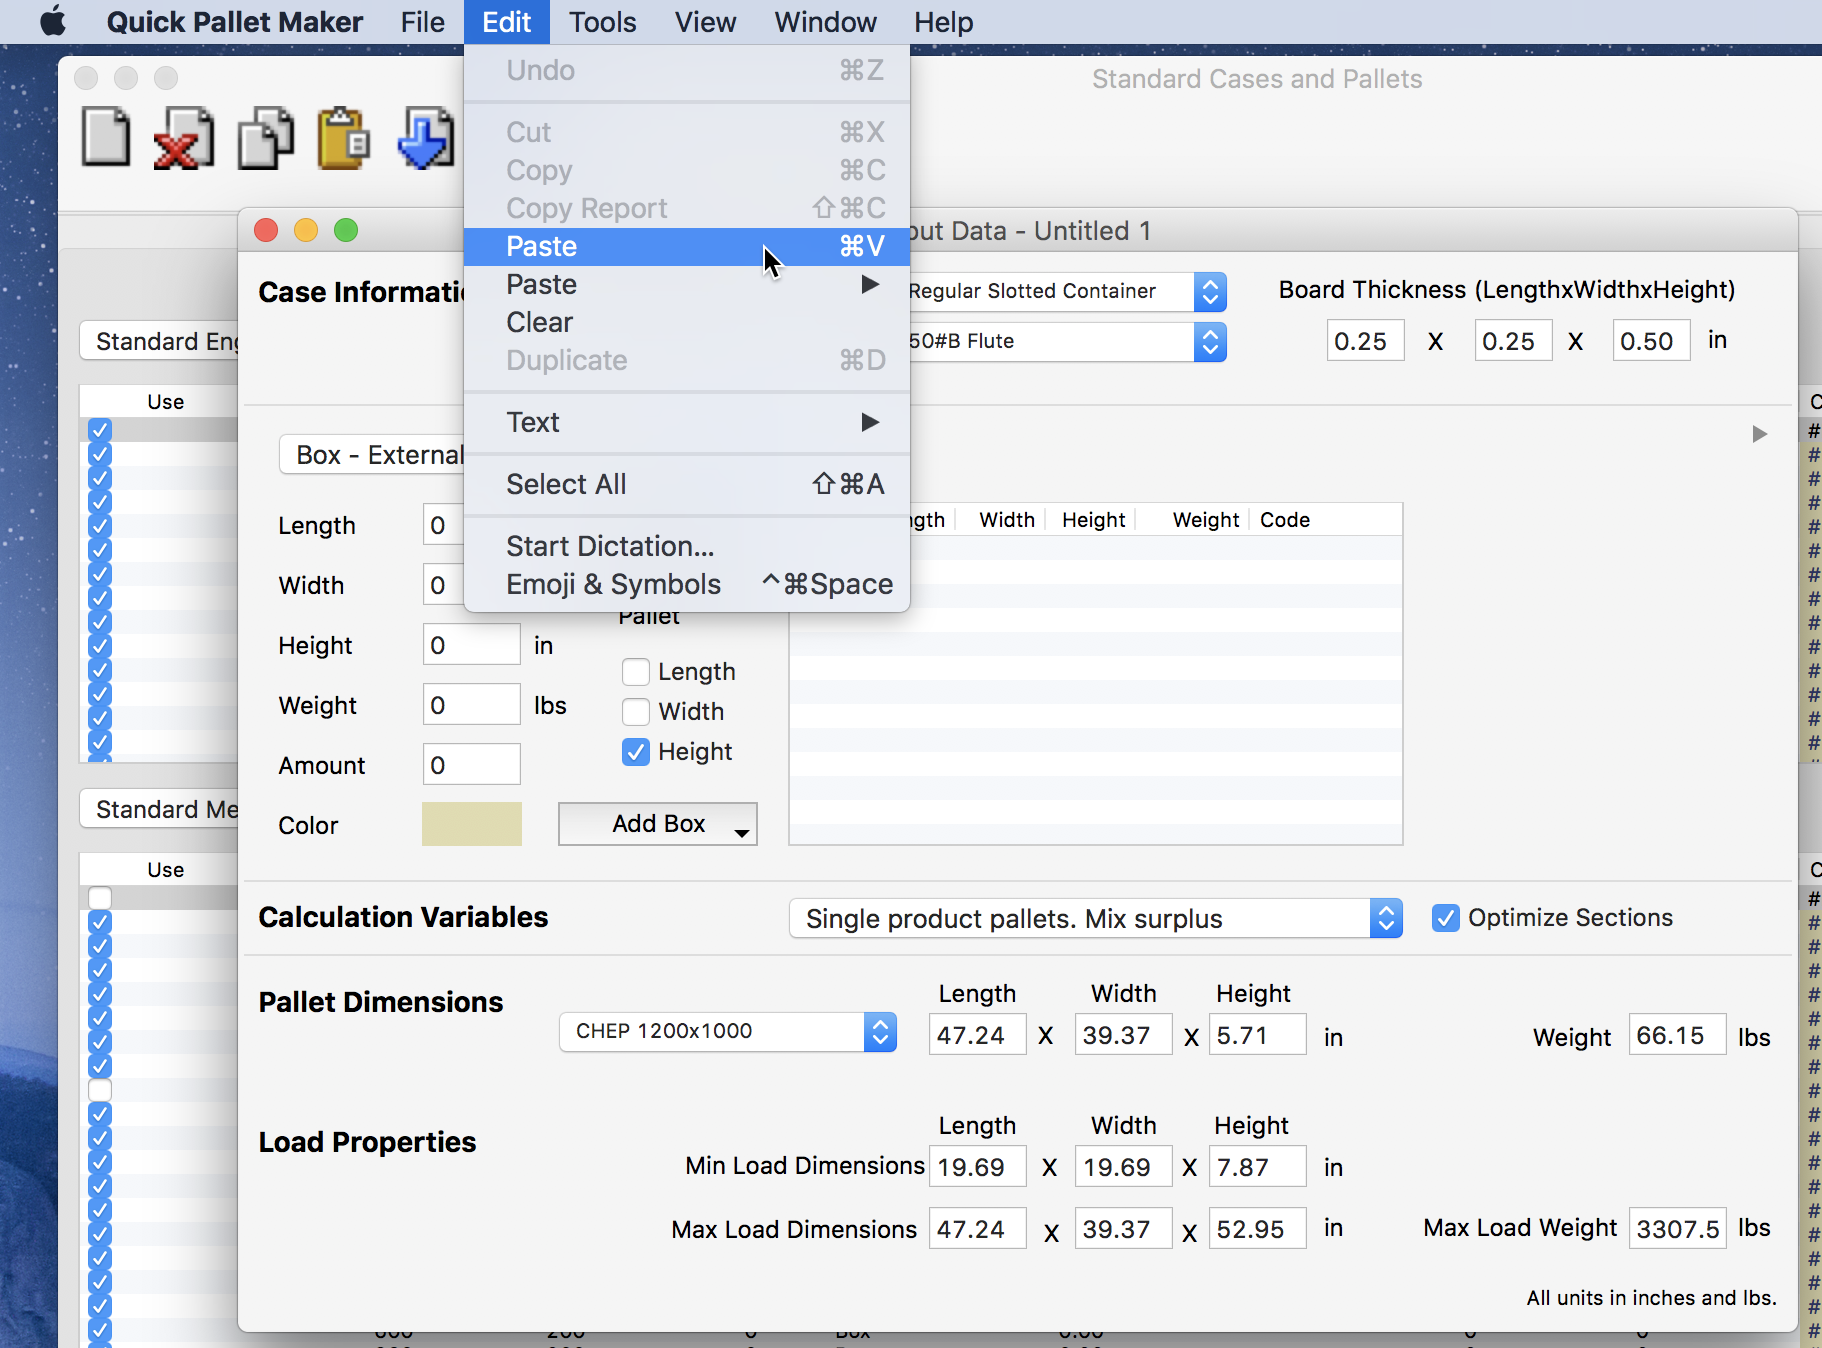
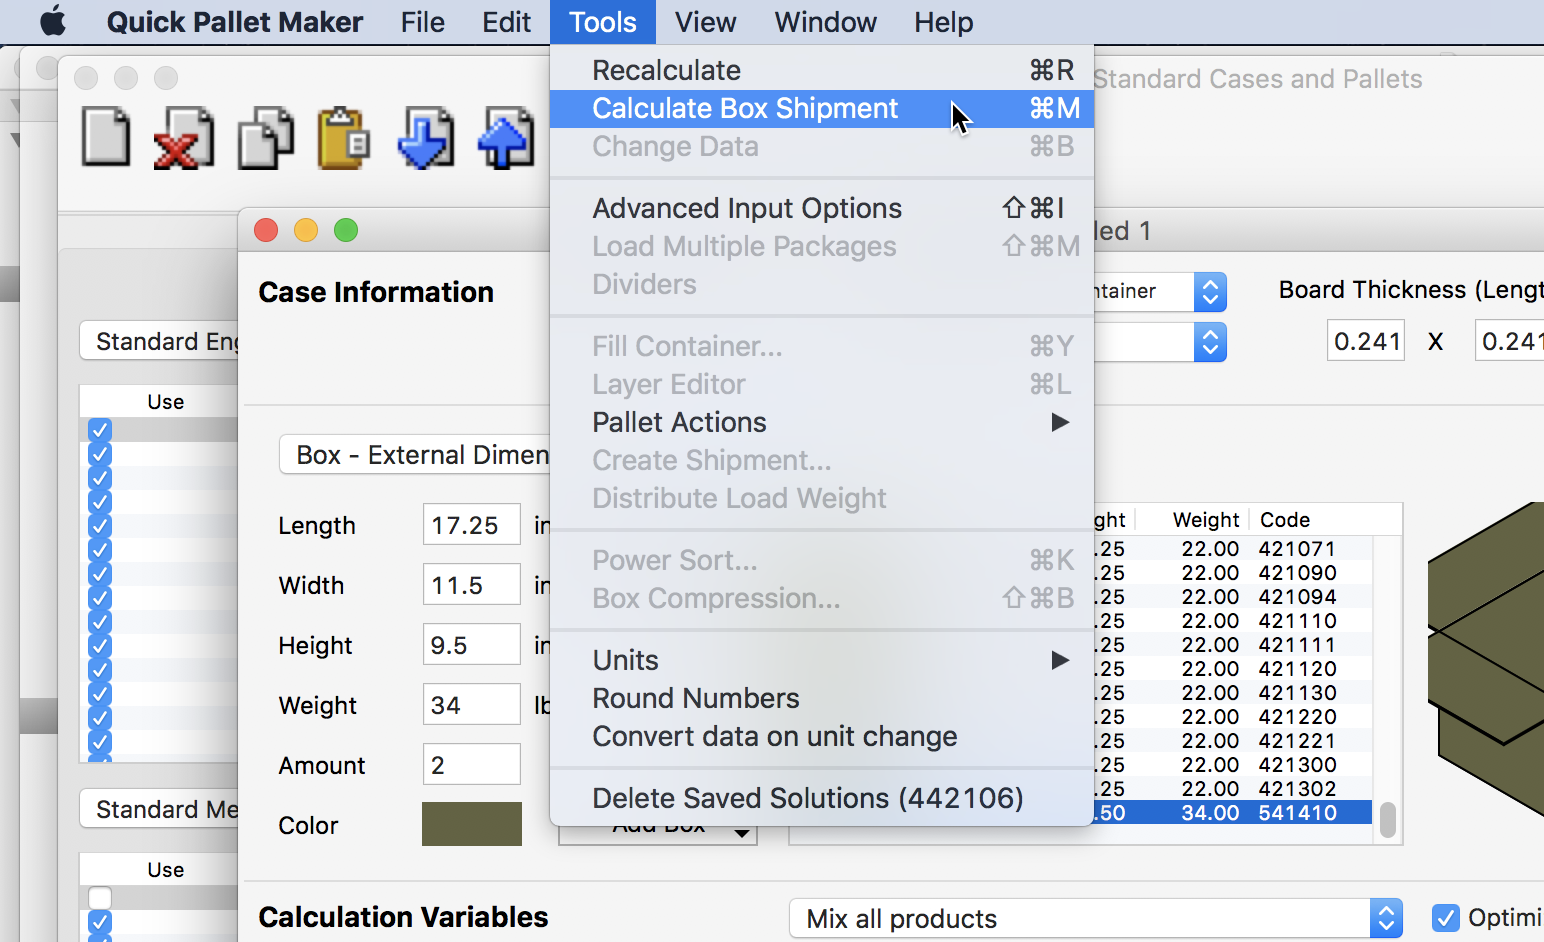
The next step is to open Quick Pallet Maker and then a new window starting from box dimensions. This is done through the File menu File - New Data Sheet - Box on Pallet. In this example, we are working with Imperial units, so it is important to make sure that the units have been set correctly, either through the Preferences window (Tools -> Options for Windows and Apple Menu -> Preferences for macOS) or through the Tools -> Units command. Changing the units through the Preferences will keep them that way for future work. If you use different units in the input data, then QPM will convert the box dimensions to the units being used in the application. The next step is to click on the empty table in the middle of the Start From Box window and use the Edit - Paste command to place all of the data onto this table.
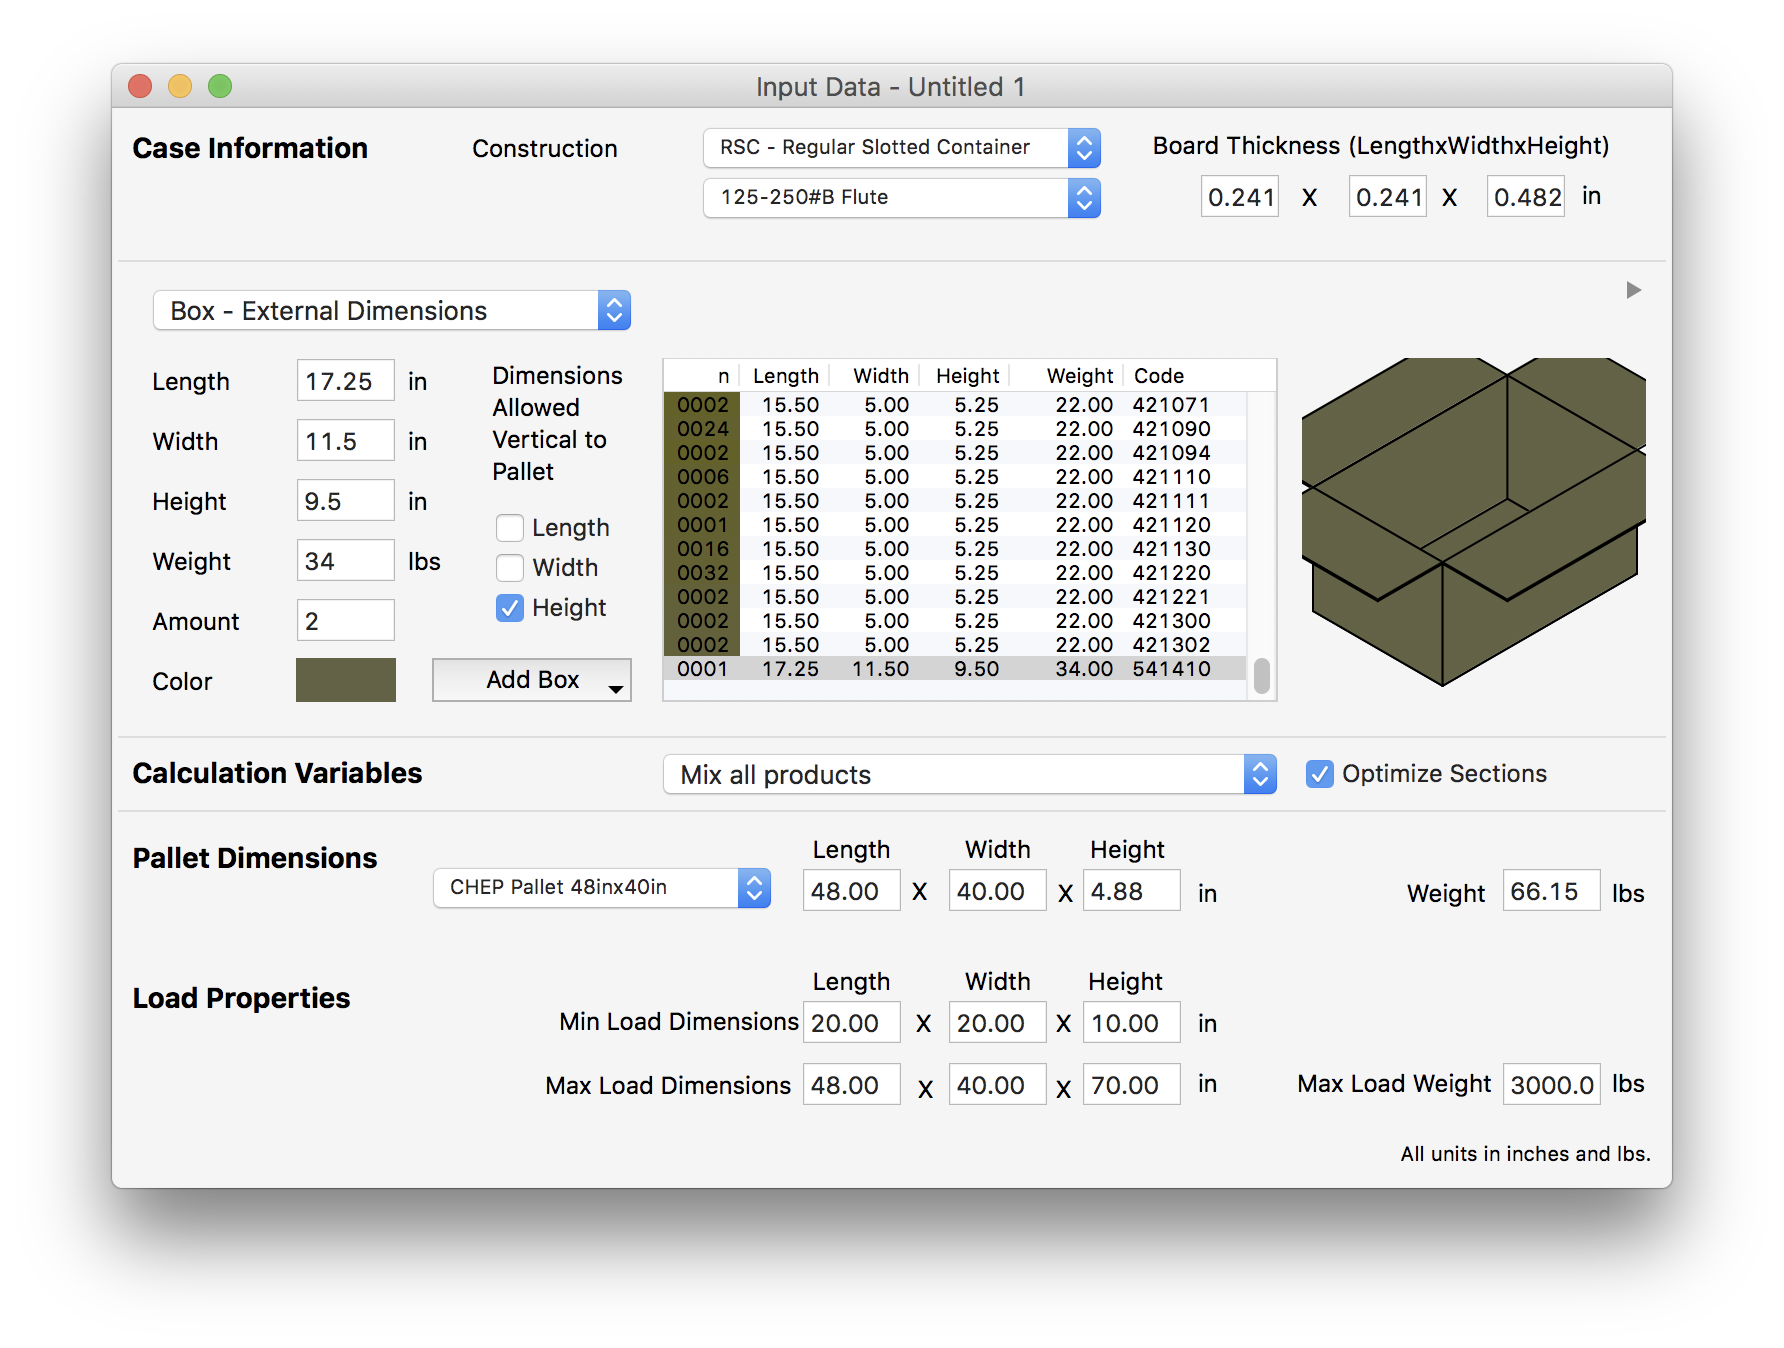
Once the data has been pasted, we will see a long list of boxes in the central table. The next step is to make sure that we have selected the appropriate pallet, which is the 48x40 option. The maximum height has been set to 70 inches, but it can be a higher amount, more in line with the maximum height of a 20' shipping container, which is roughly 94 inches. Since we are working with small amounts of a large variety of products, we will select Mix All Products from the Calculation Variables menu below the box table.
To calculate the box shipment, we select Tools - Calculate Box Shipment.
The result of the calculation should be a long list of pallets.
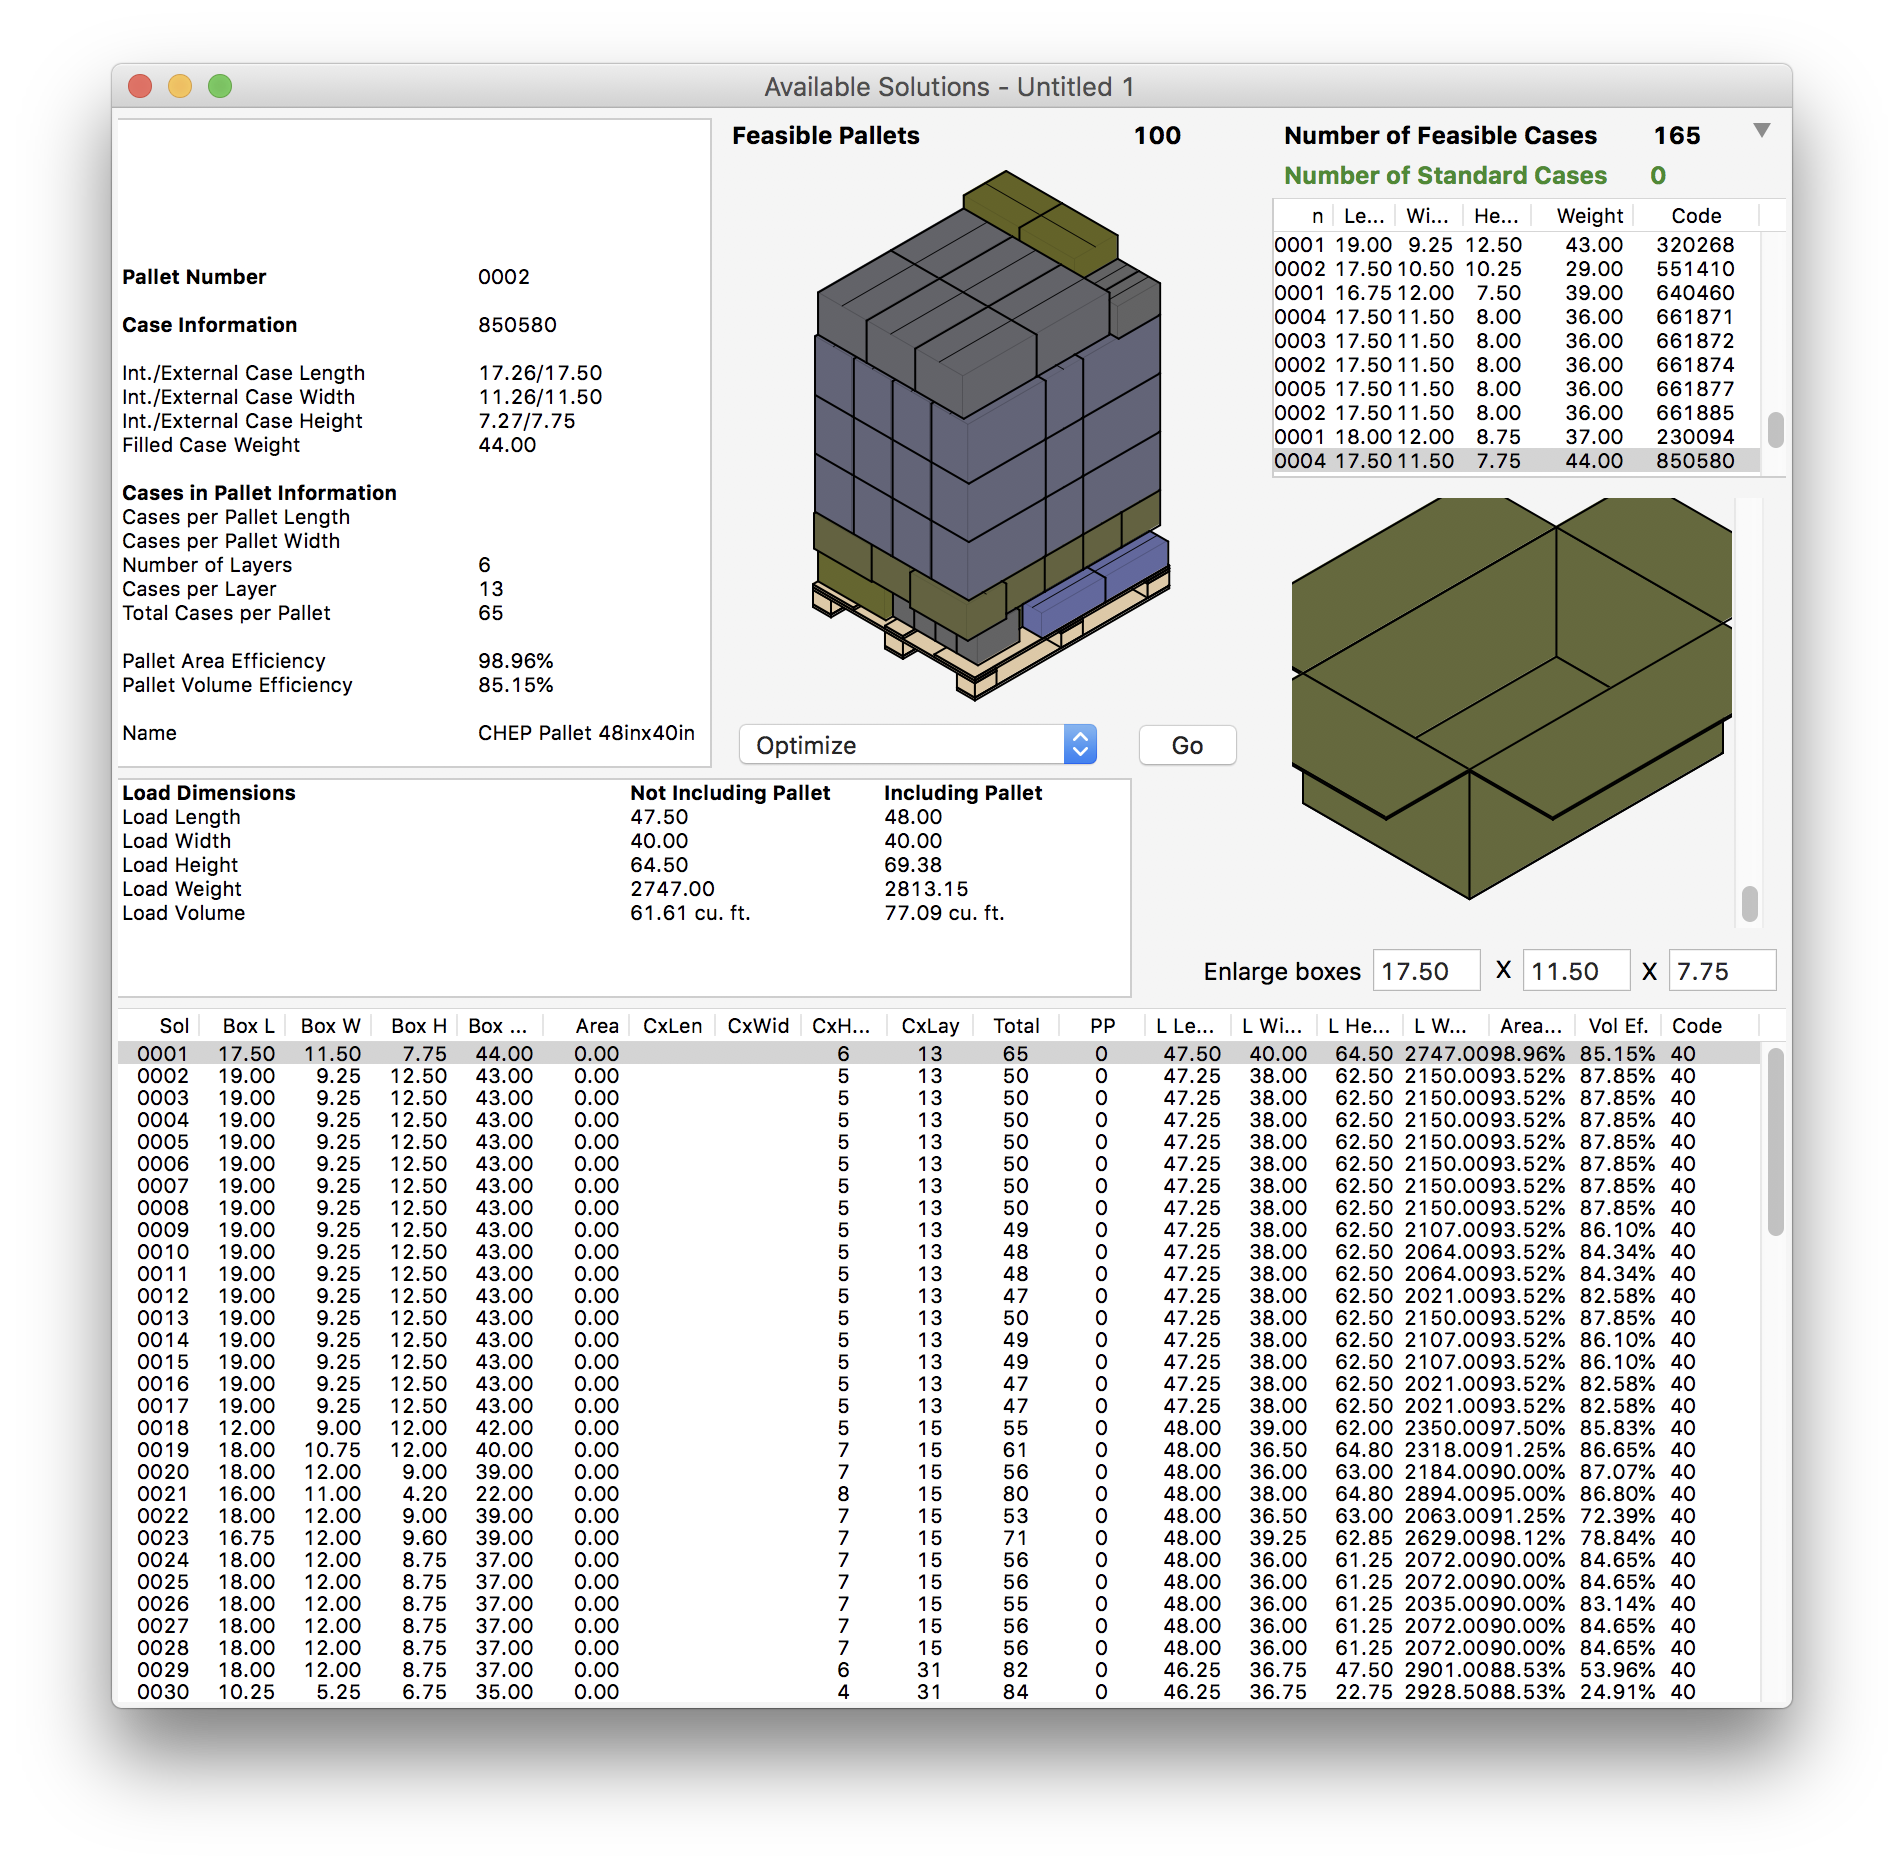
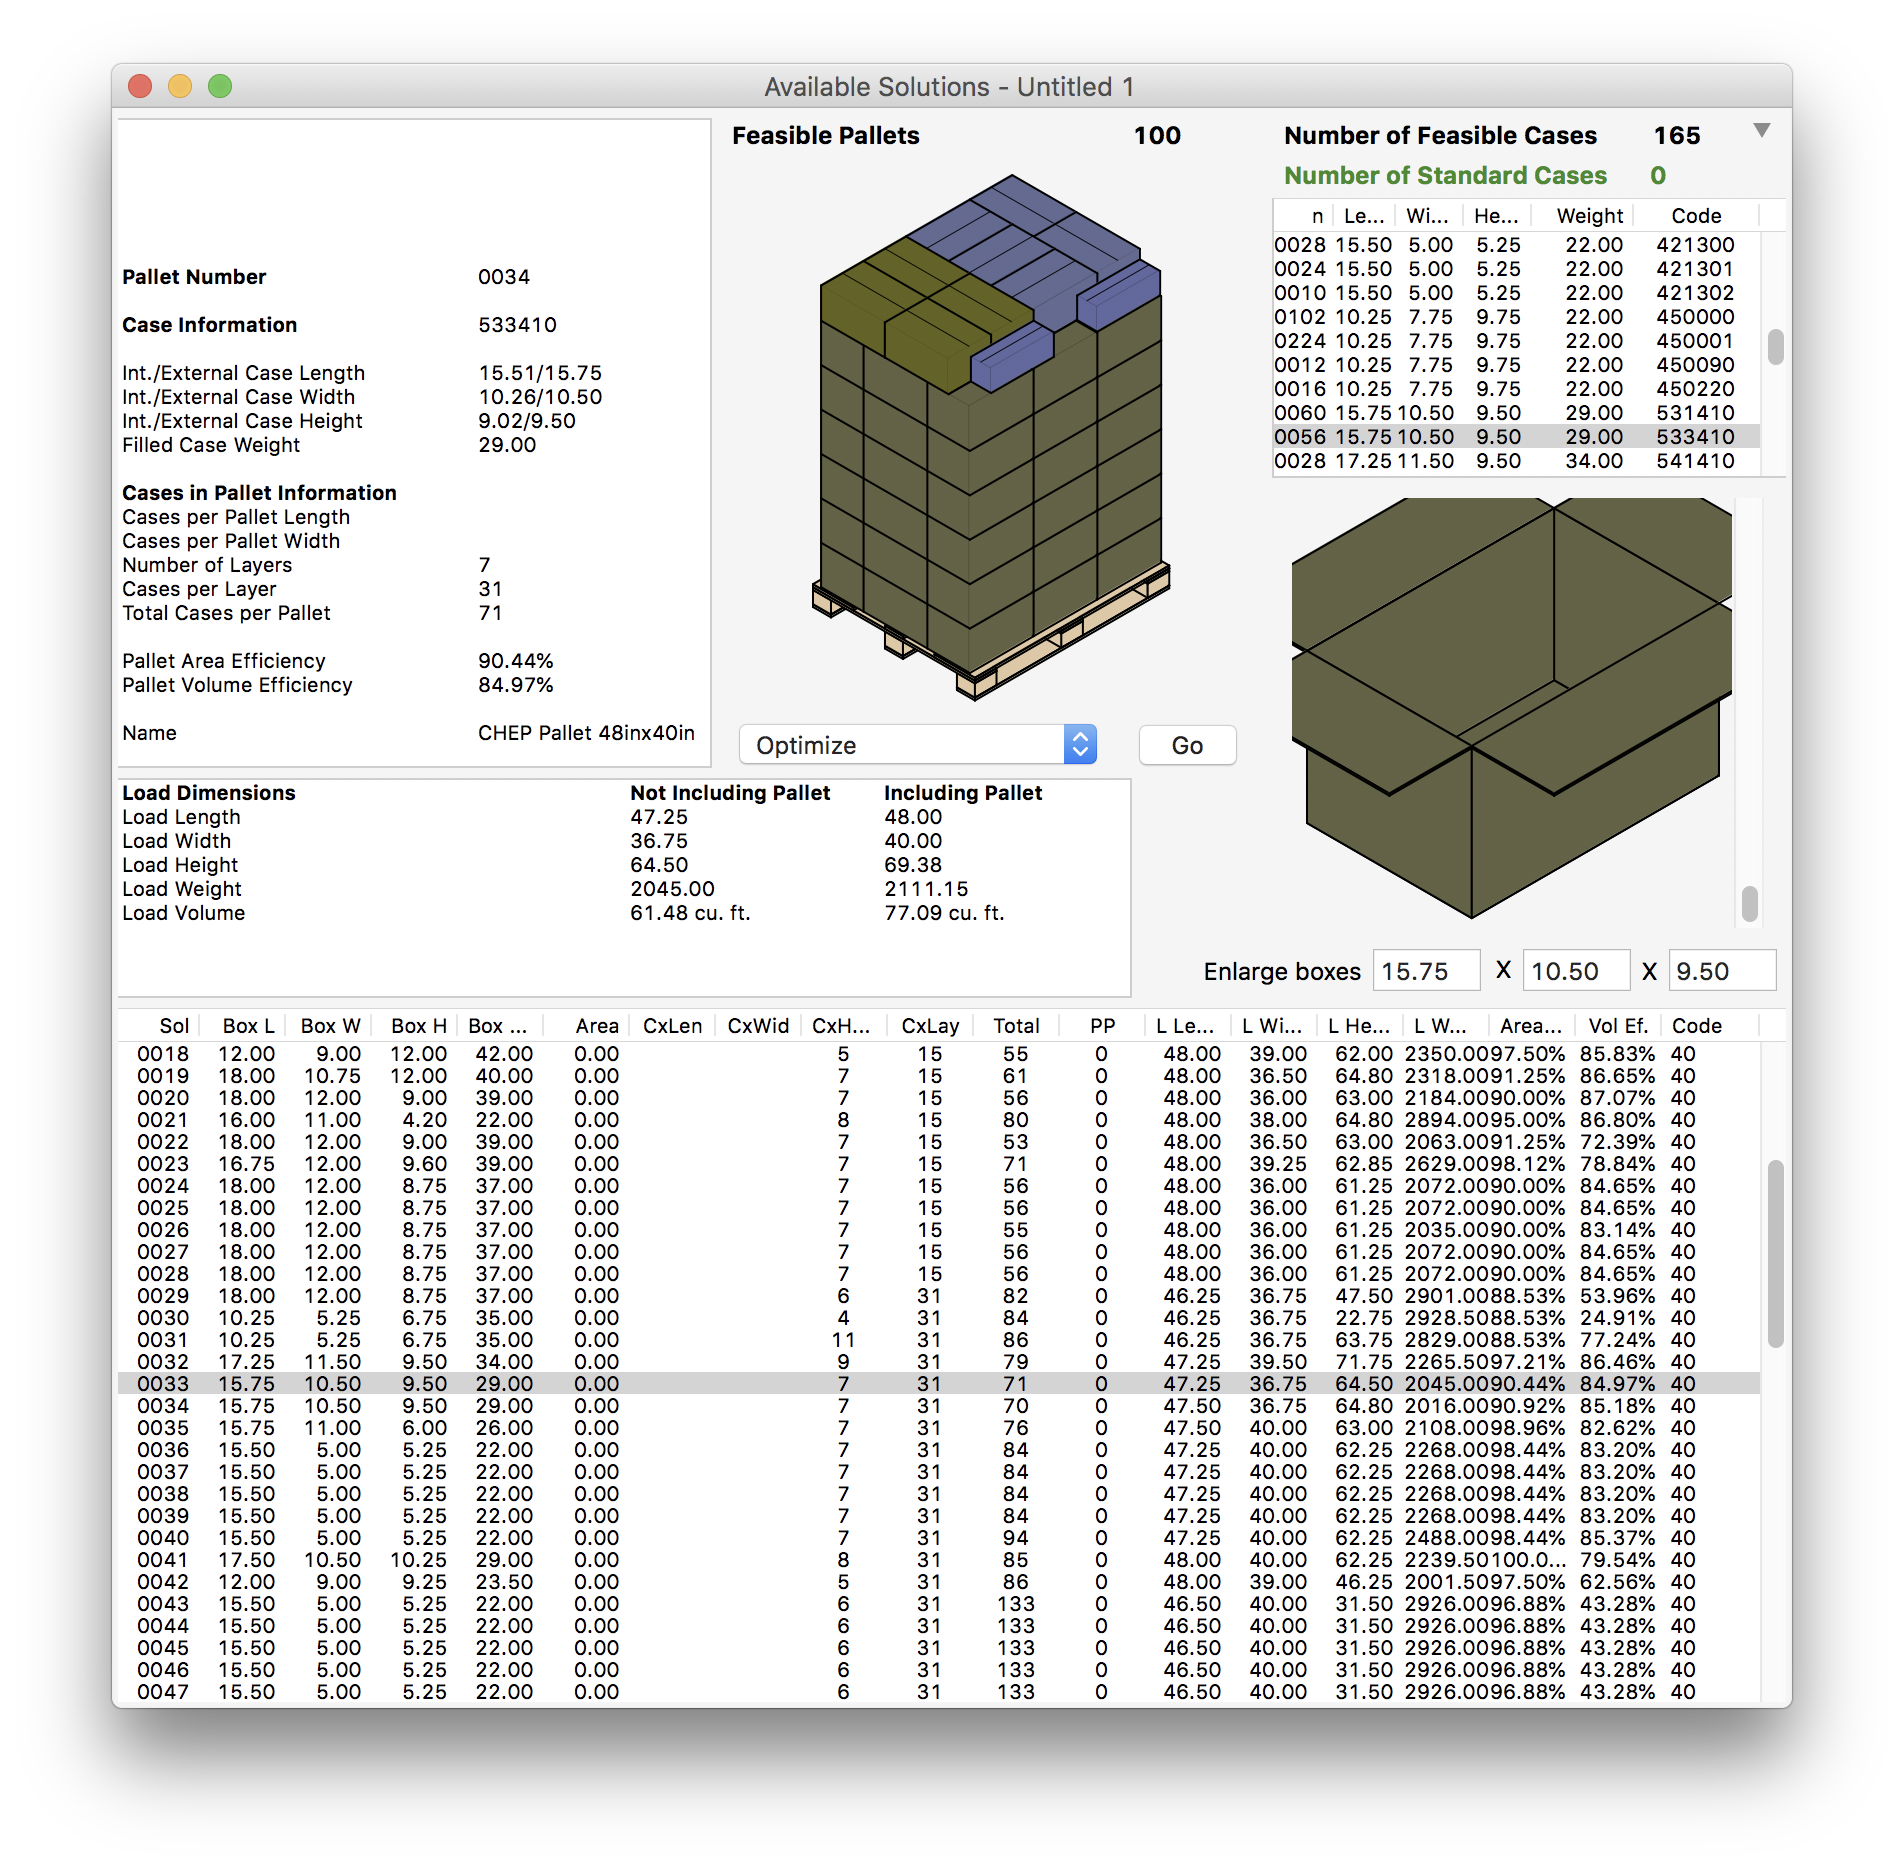
We can select different pallets in the list to view the arrangements as a function of their contents.
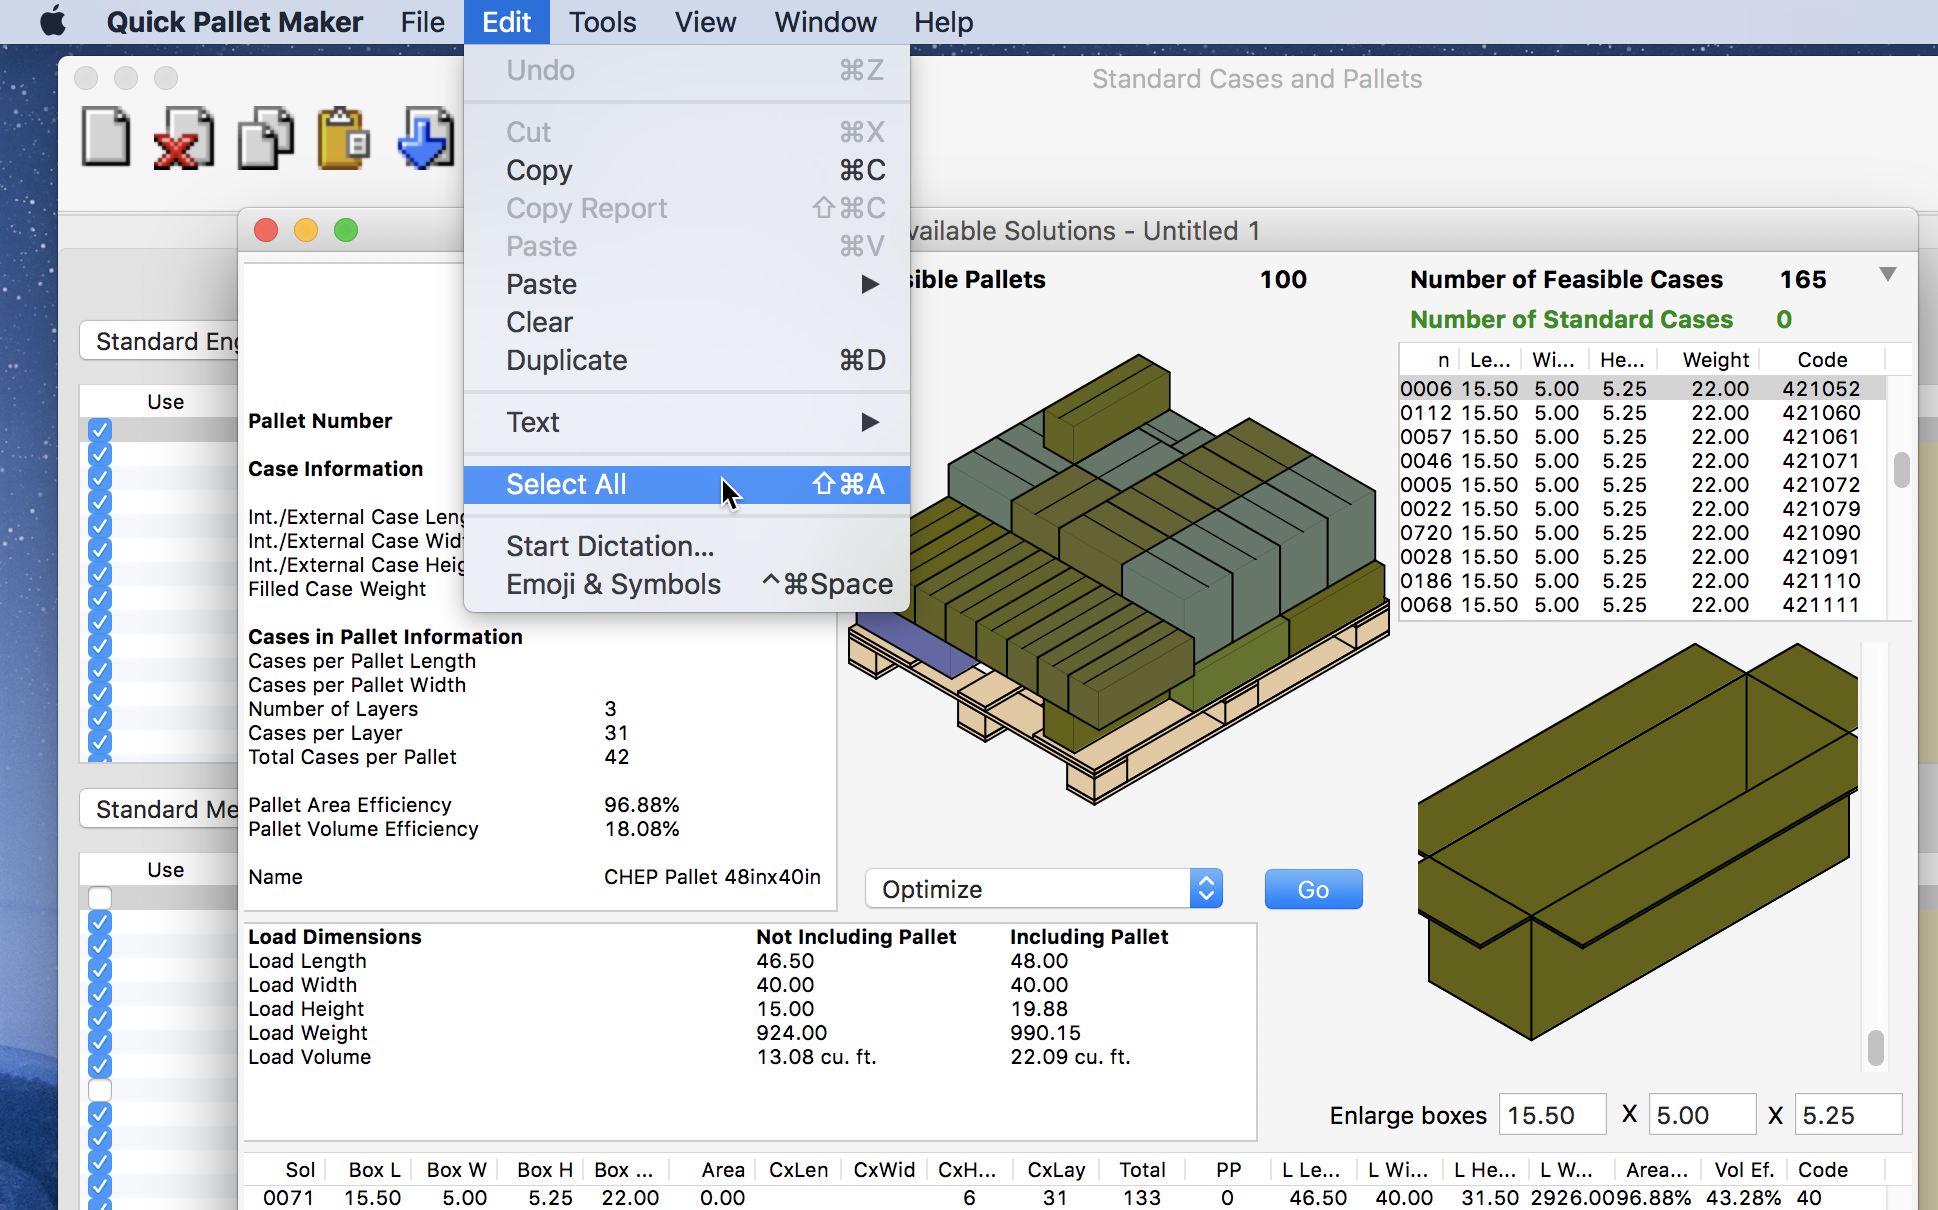
Since we will be loading these pallets into containers, we will first need to select all the pallets in the list. The easiest way to do this is by using the Edit - Select All menu item. Then, we use the Tools - Fill Container menu command to load all the selected pallets into a container.
The Container Fill window should appear, featuring the list of pallets in the central table. For the purpose of this example, we will use the standard 20 foot container. To calculate the pallets, we select Tools - Recalculate or just click on the second tab.
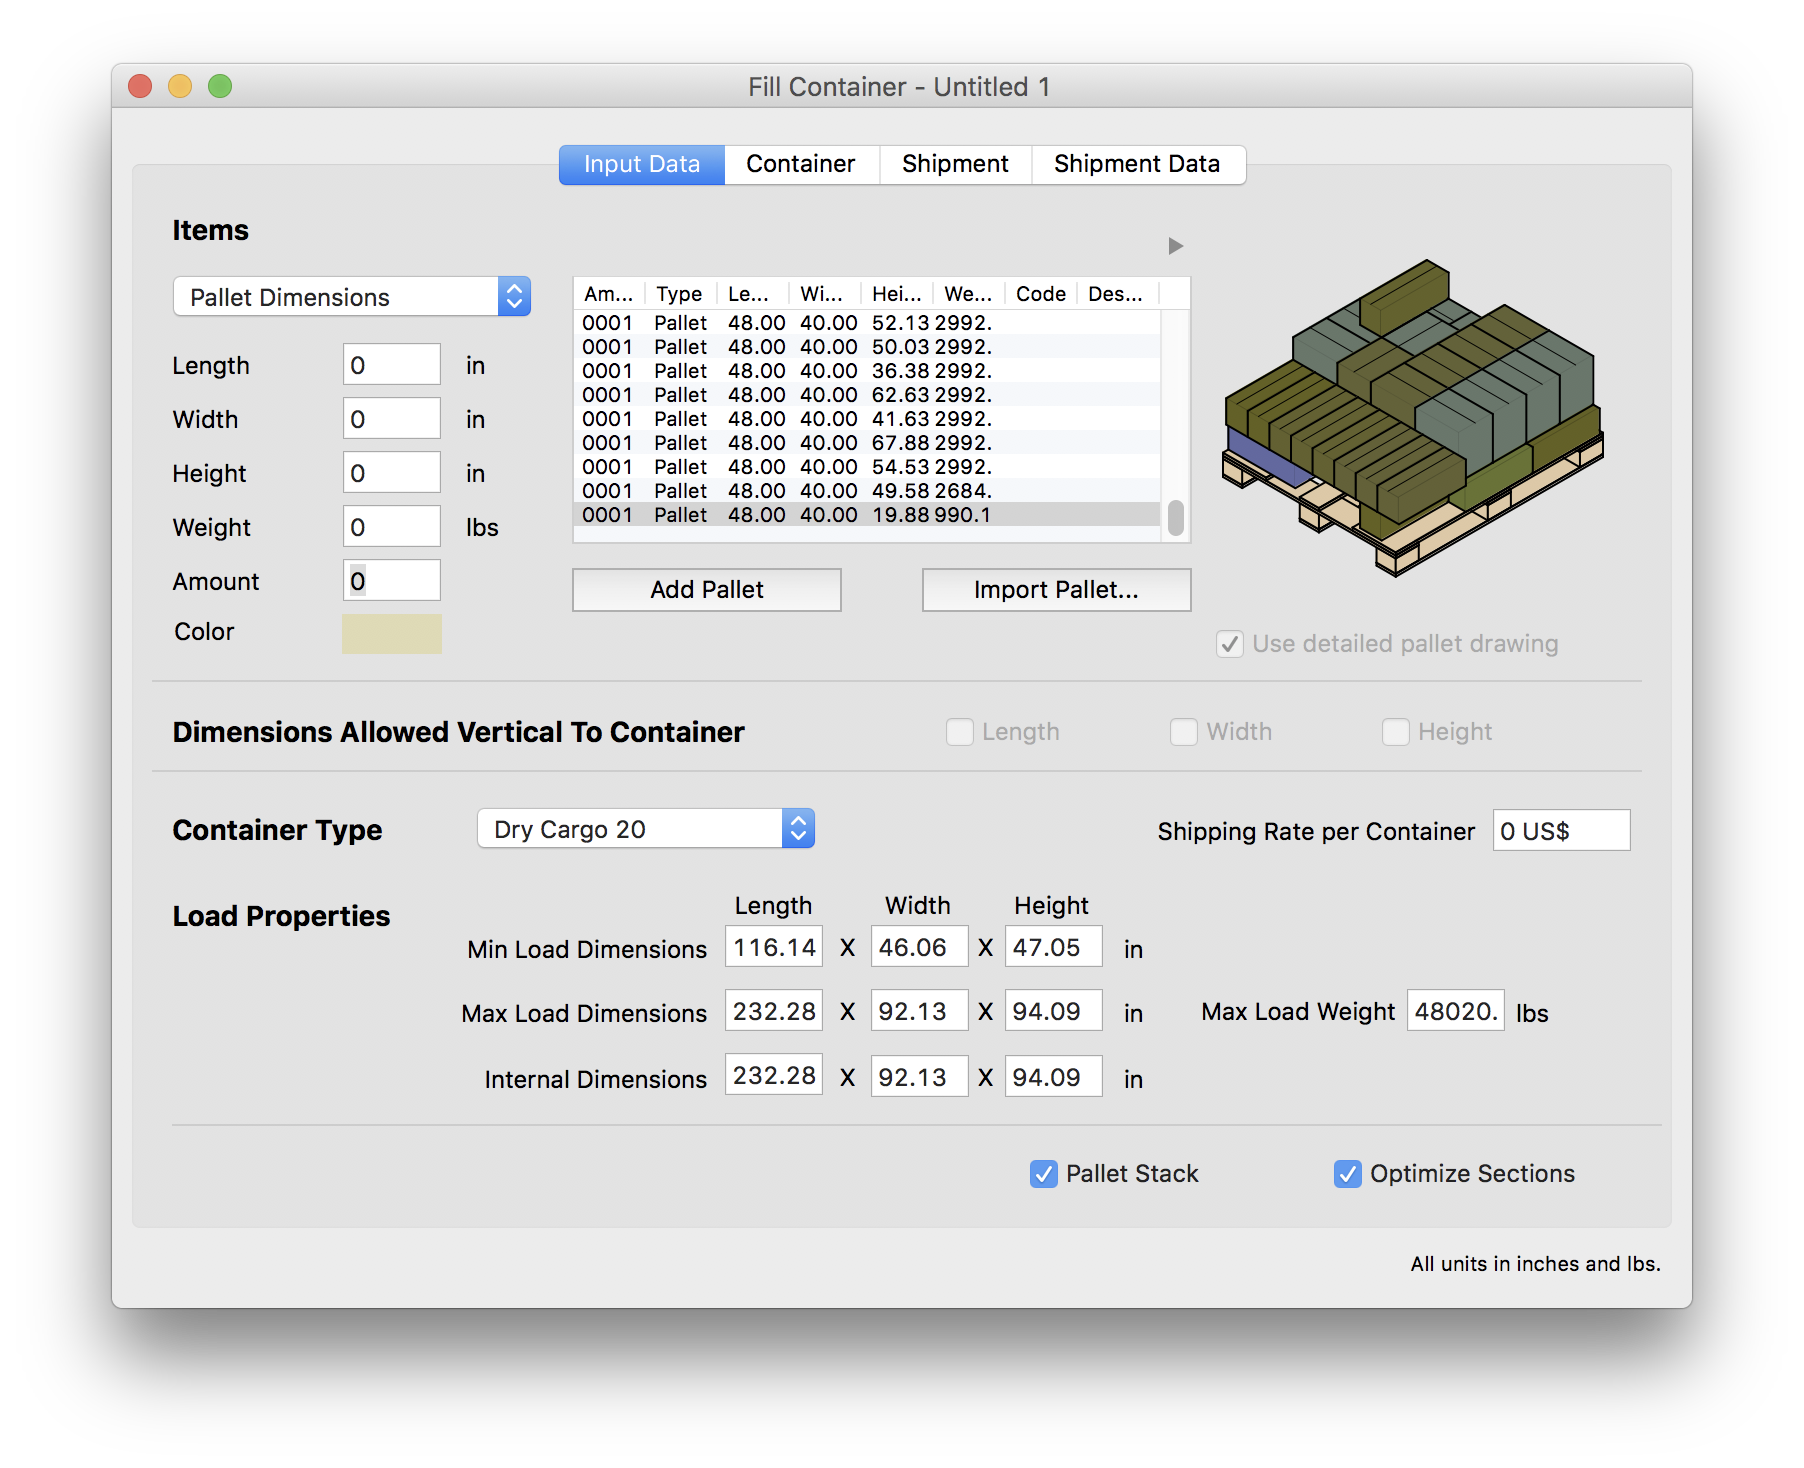
After calculating, we should see the drawing of the first container. At left, there is data regarding the container fill, including disclosable contents.
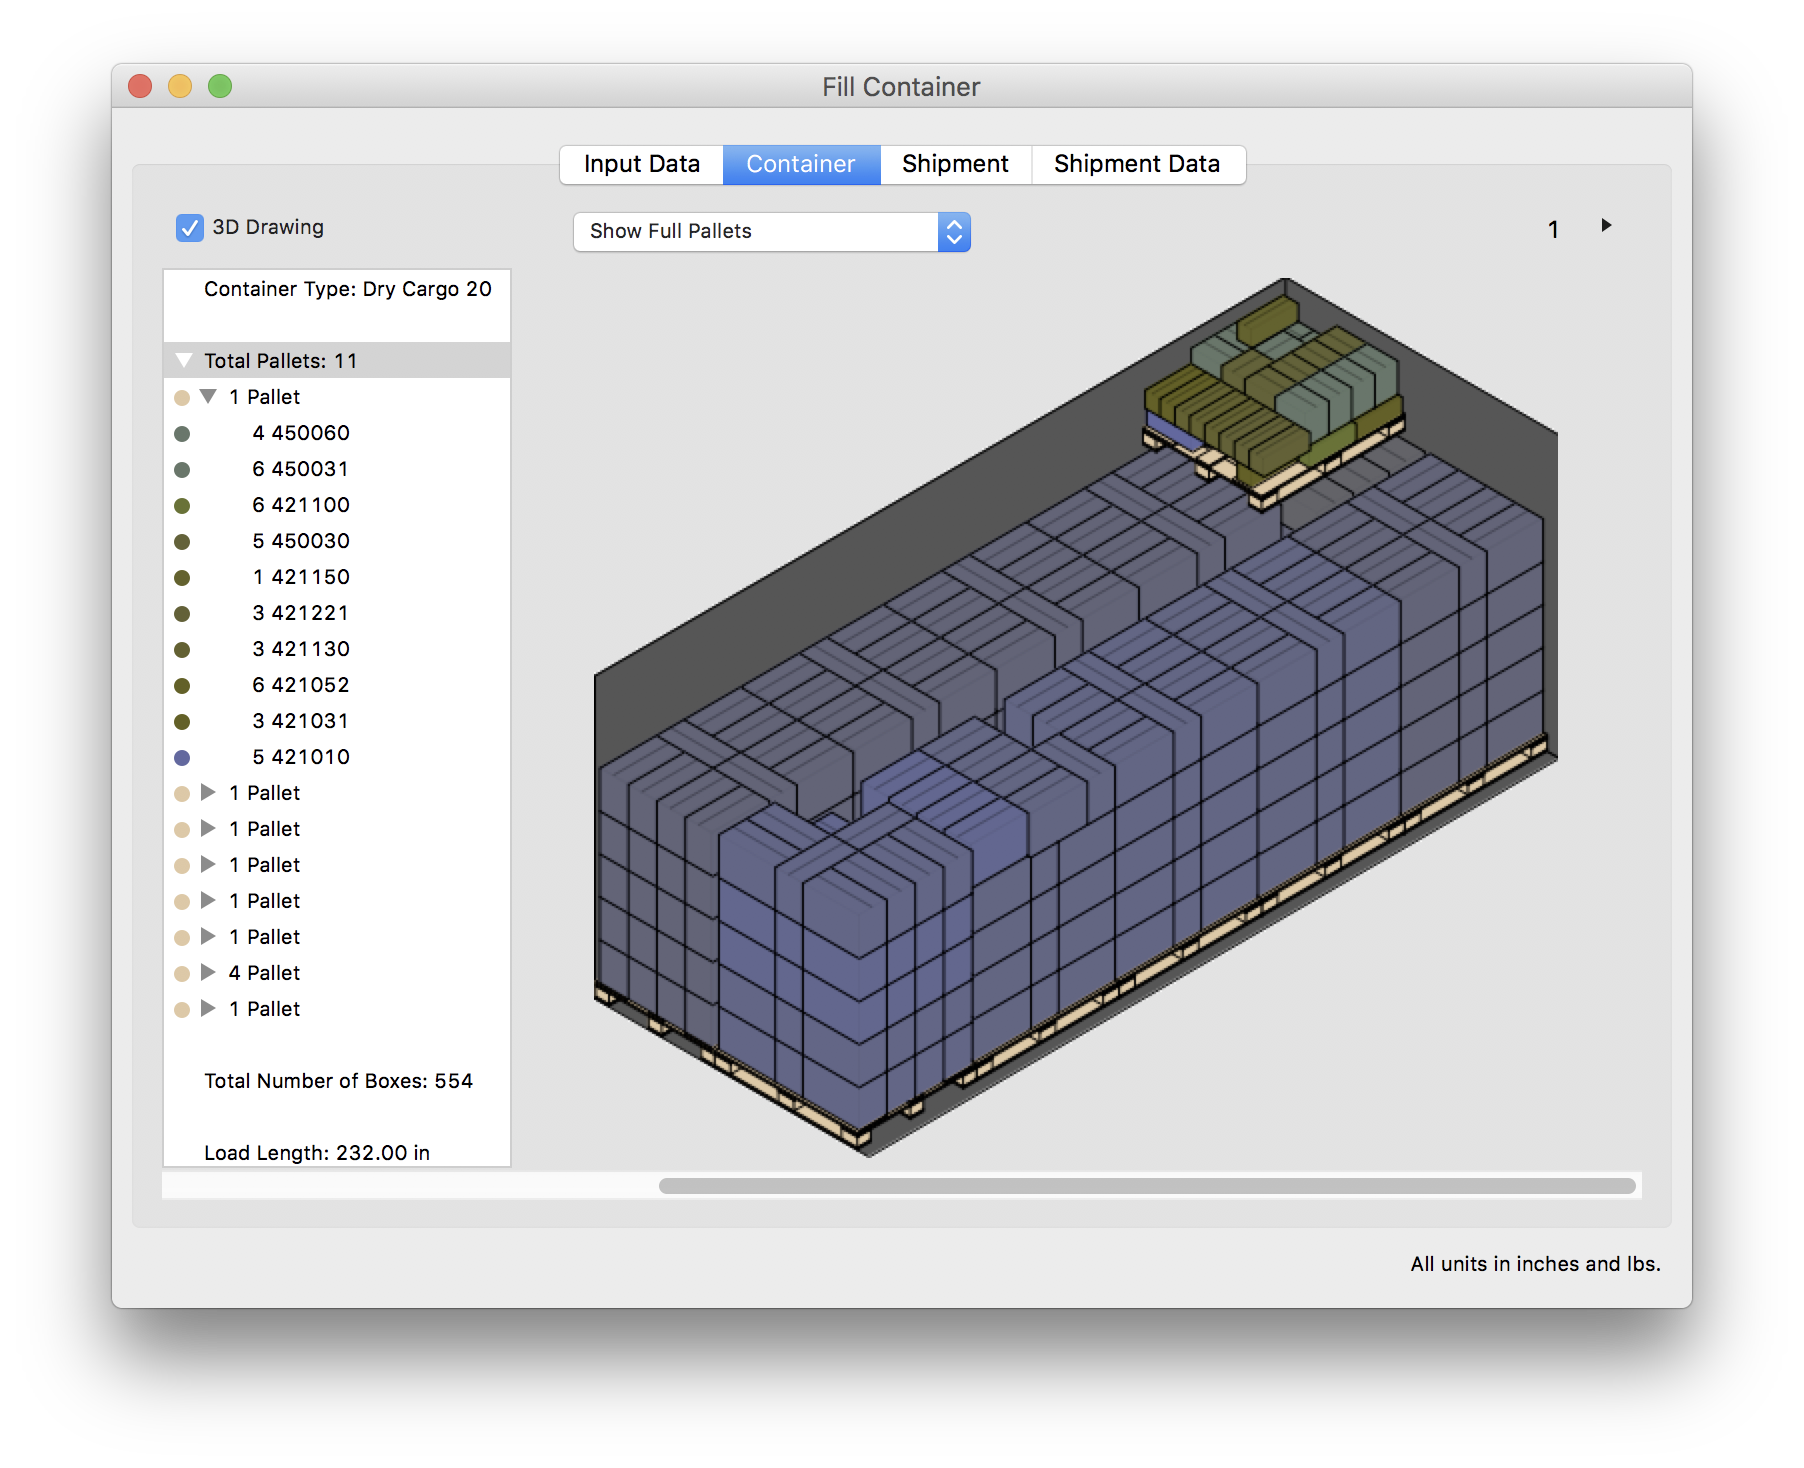
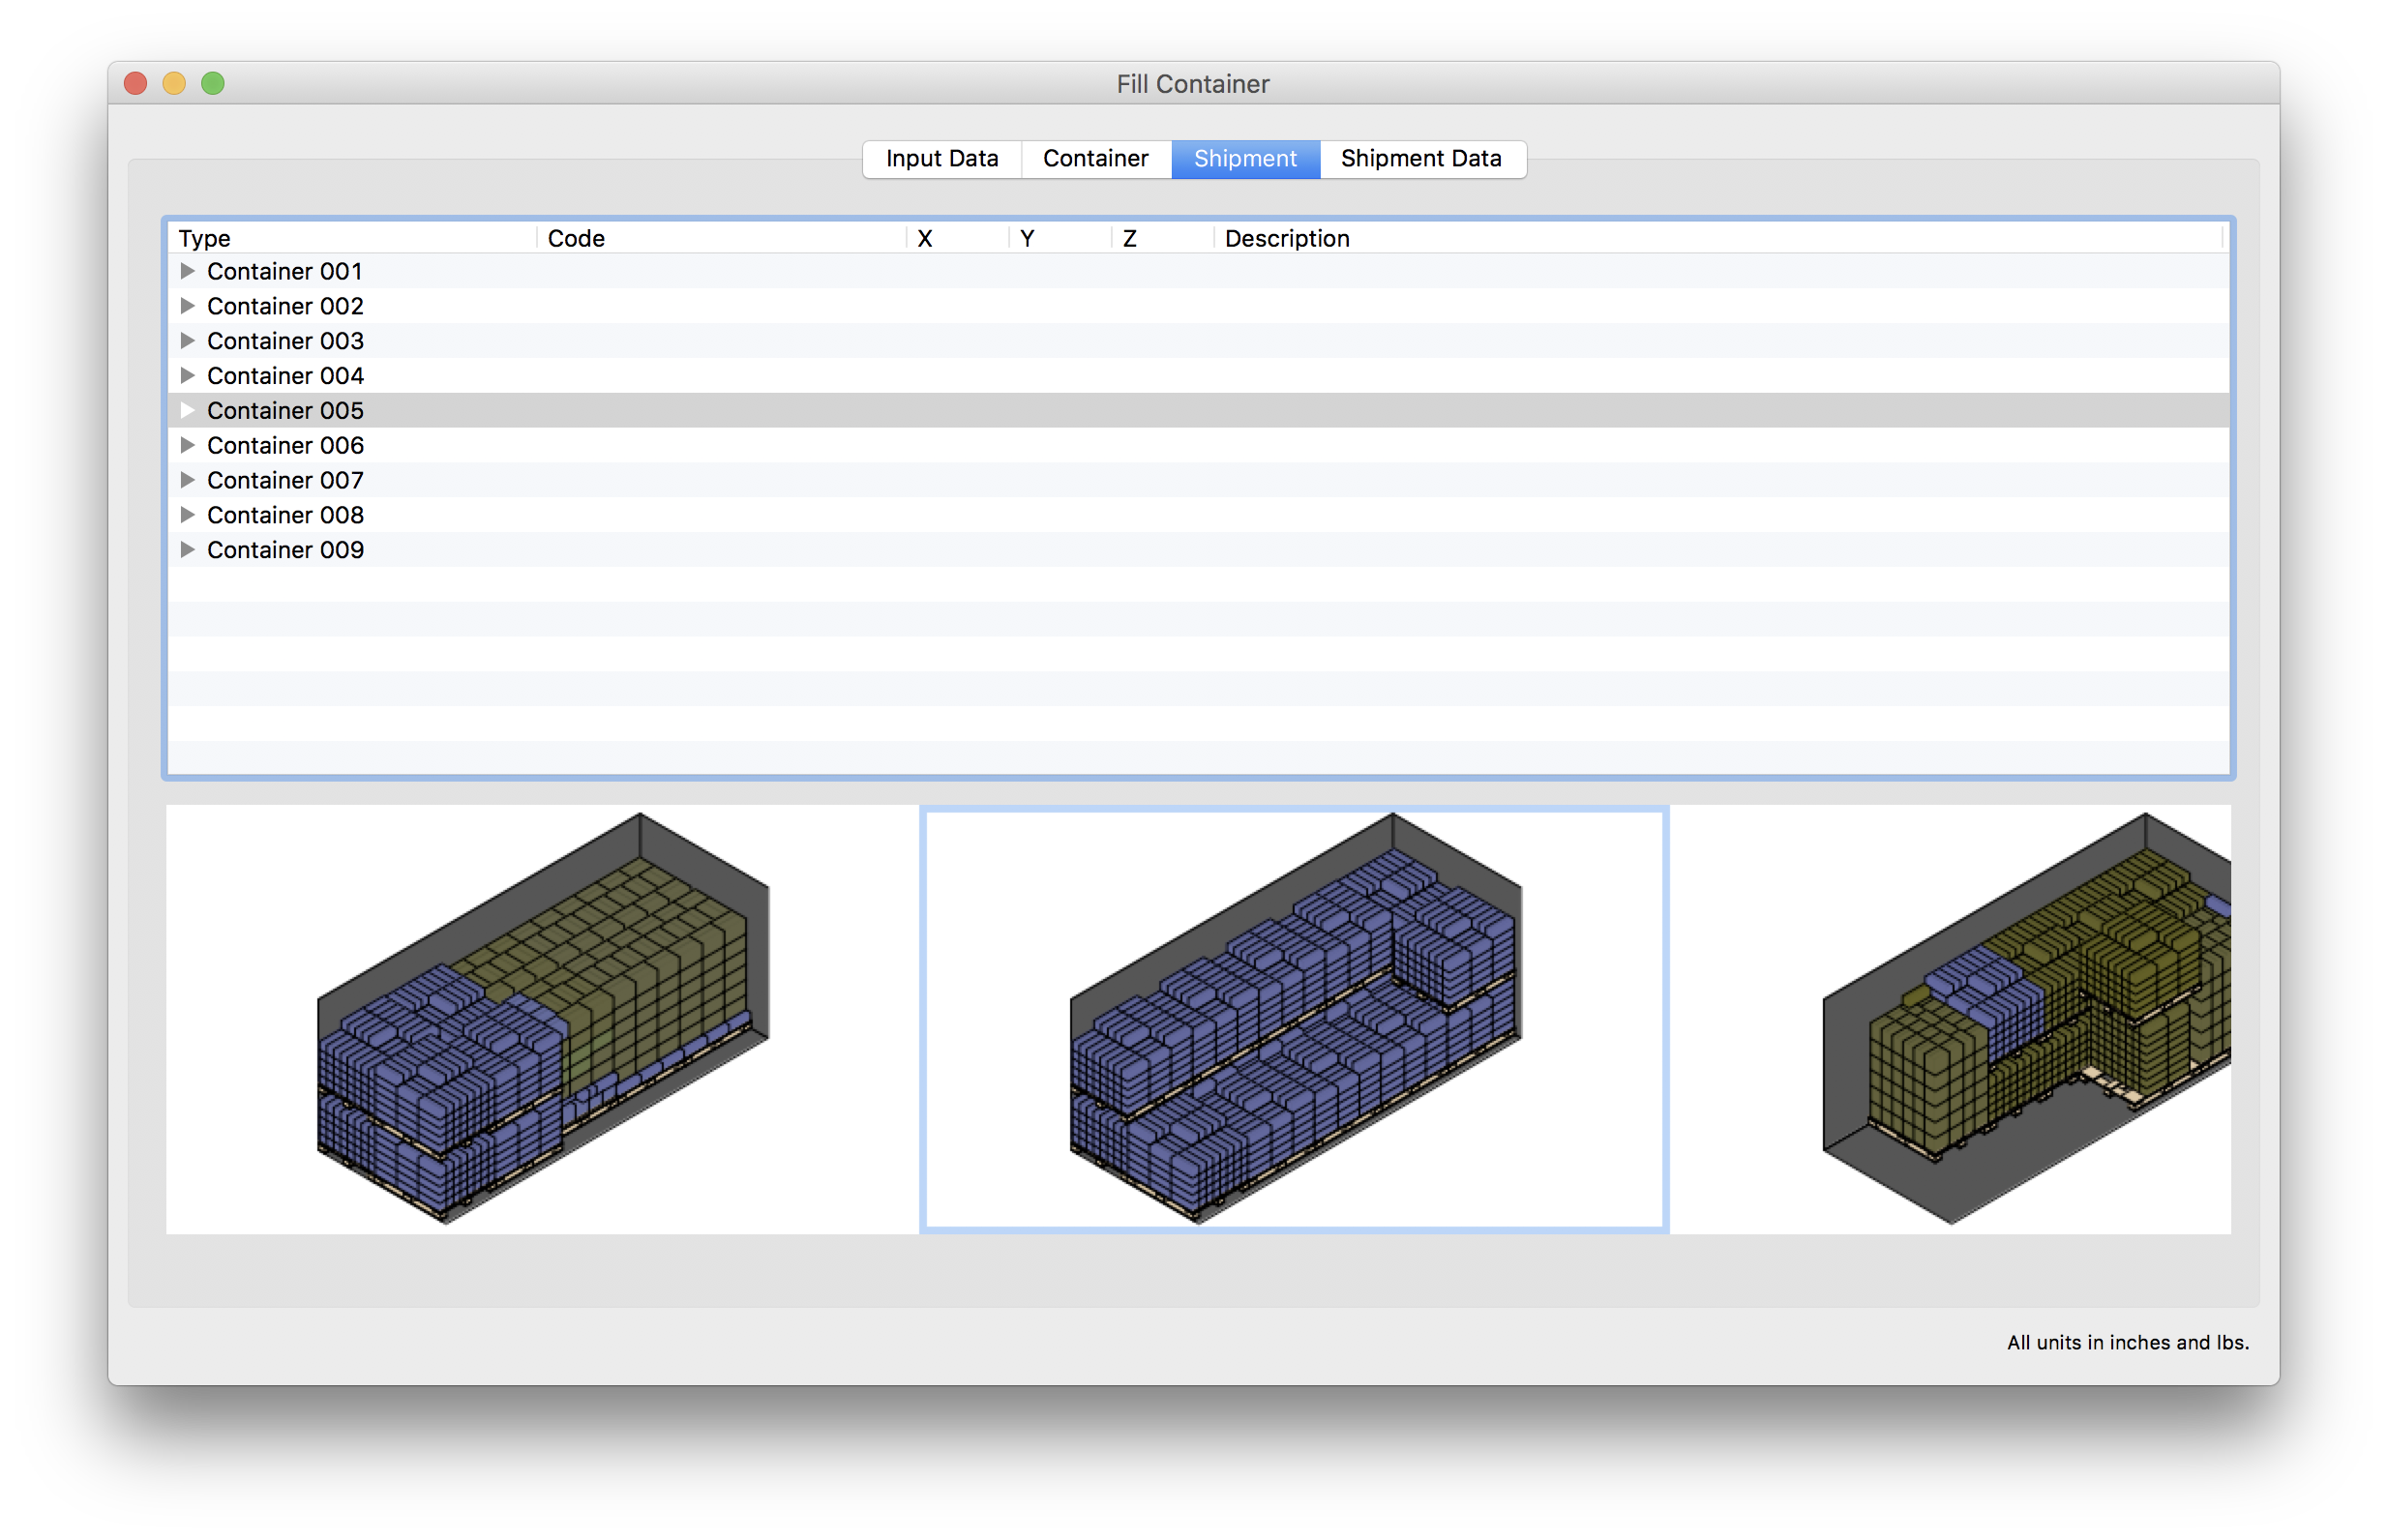
If we click on the third tab, we will see the full list of containers (in this case, they were a total of 9). Clicking on any one in the list will show the drawing. Disclosing the arrows will reveal the contents.
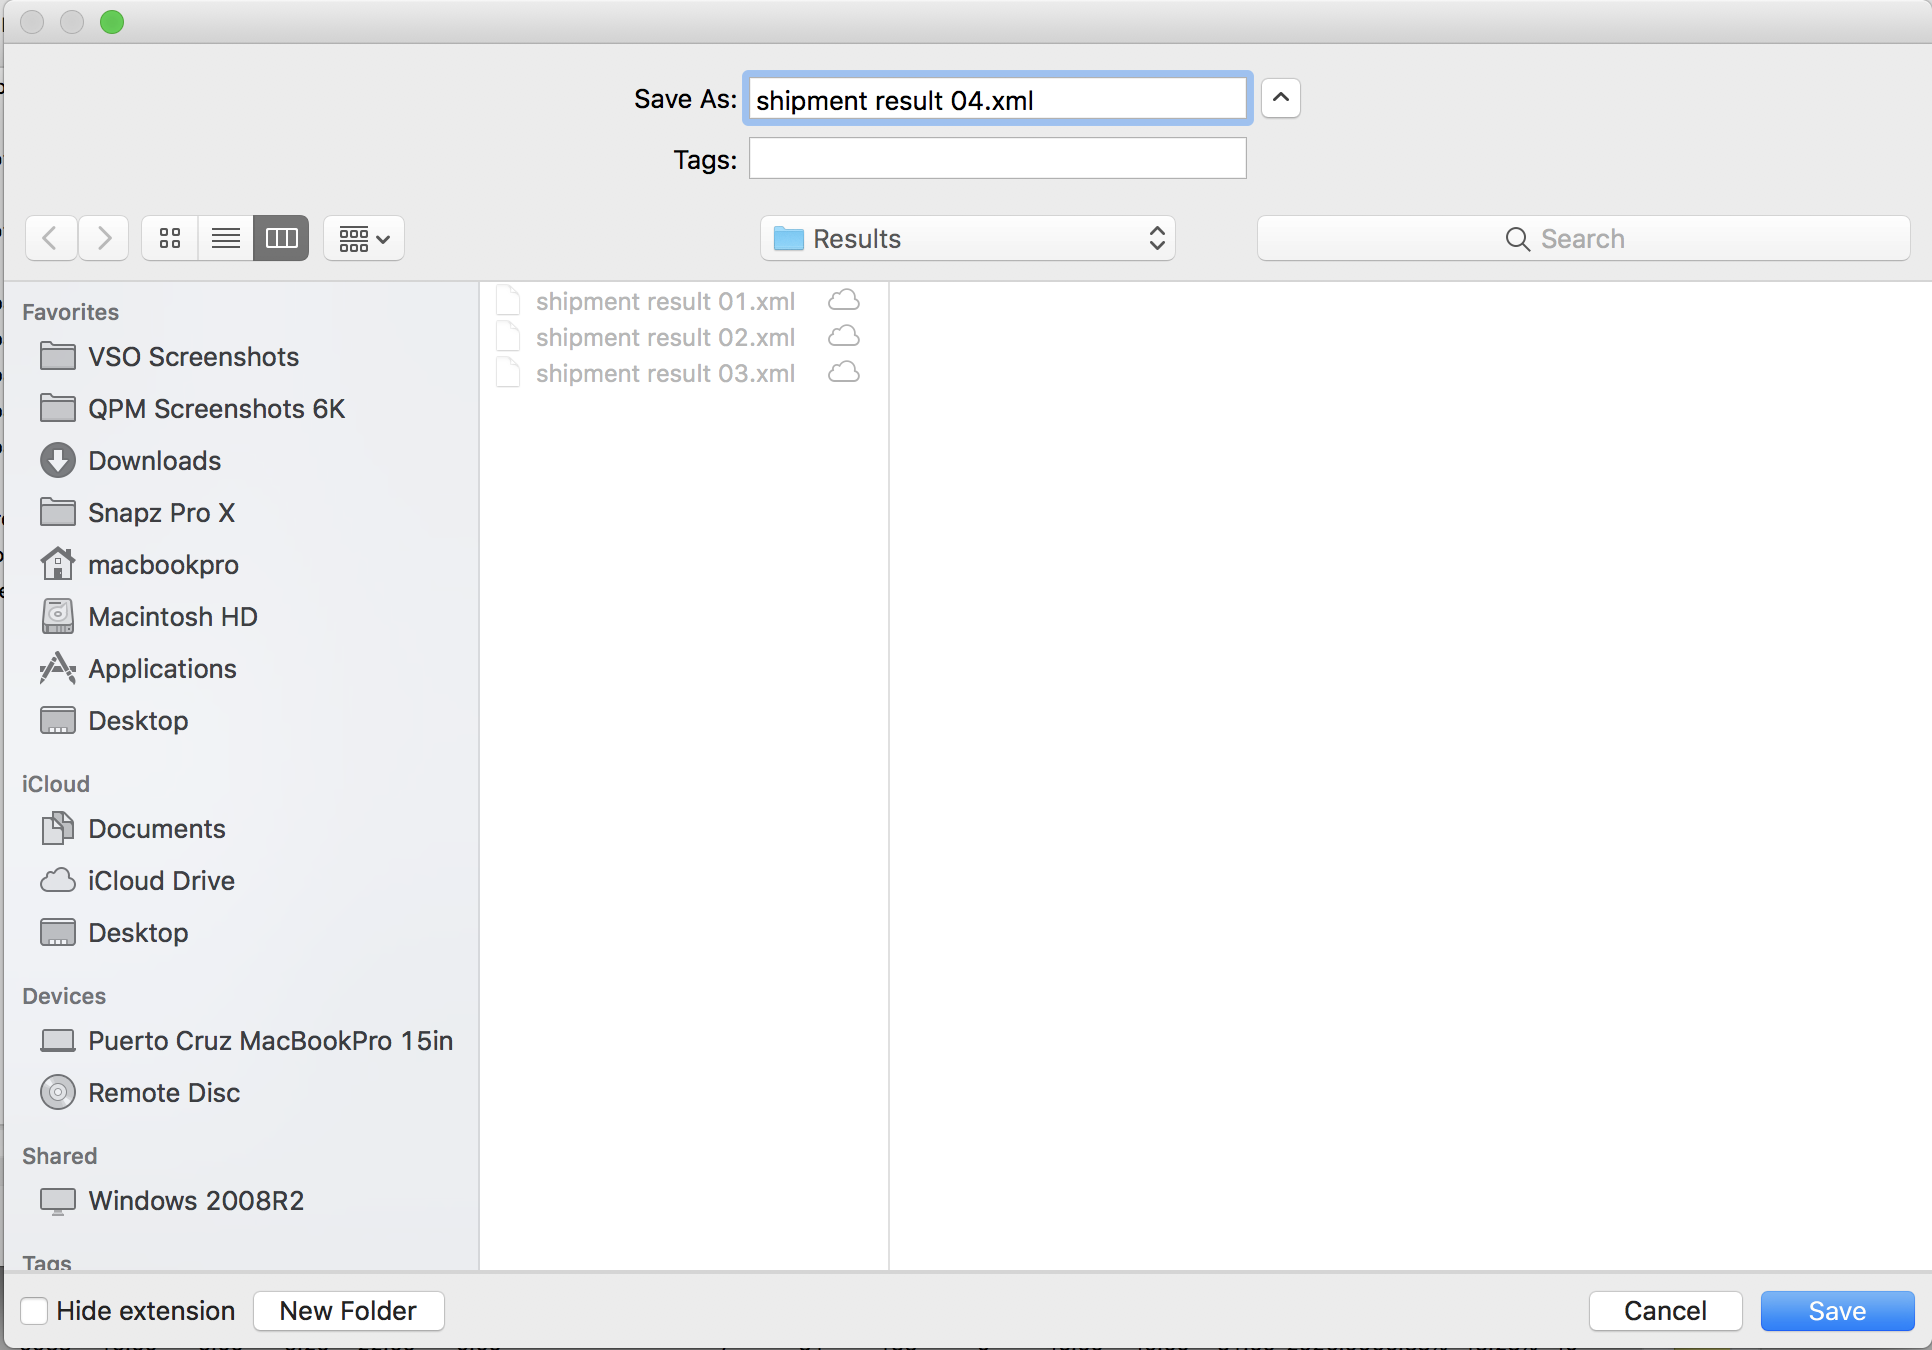
Now we click again on the Container tab and then select the File - Export - Shipment - to MS Excel menu command to save a XML text file in Microsoft Excel 2003 format, which can be read with any recent version of that application & with other spreadsheet programs.

A window will appear that allows us to select a location for the file. It is important to save it with the XML extension.
Finally, we can open the recently saved file. Notice that it contains one tab for each container and in each container fill, the pallets are listed with their contents. This is a very practical list, similar to a Bill of Lading.

Watch the video
This example is also available as a YouTube video.YouTube Video