Quick Pallet Maker Example - Alternating Pallet Layers
A customer approaches us on how he can reduce the shipping costs for products that he imports from India. He doesn't use pallets to load the boxes in order to save space and because the labor costs in the country of origin and in the destination country are quite low. He also didn't care about the case count as long as it would fit as many packs as possible into the container. The reason for this was that the packages would be sold in small amounts anyway in high-frequency stores.
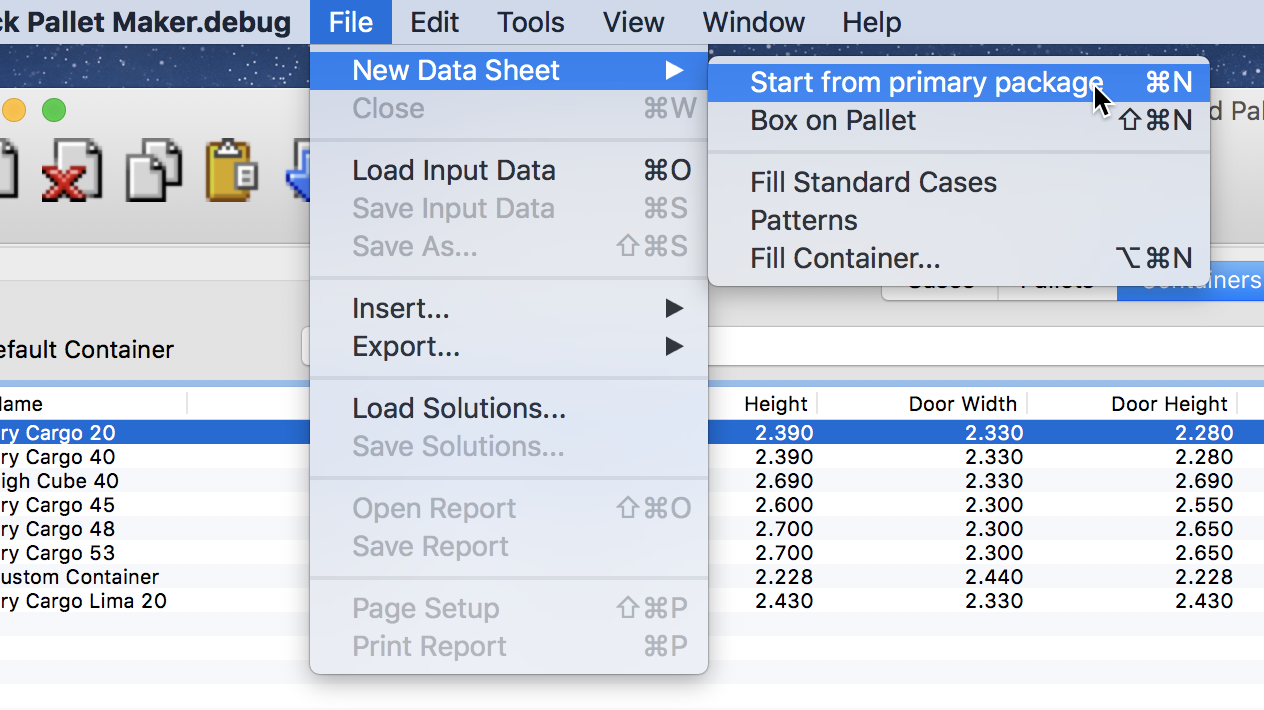
This example requires that we use the "Start from Primary Package" window instead of using the "Fill Container" window to load a container with floor-loaded boxes. This is because we will be using the Advanced Input Options window. Hence, the first step is to load a new window starting from Primary Package dimensions.
Once the window appears, we will enter the primary dimensions, weight, case constraints and the limitations of the load. Since we will not use pallets, we enter zero for the pallet dimensions and the internal container dimensions as the maximum load dimensions. In this case, we copied the dimensions that are available from the Container list in the second tab of the Standard Cases and Pallets window.
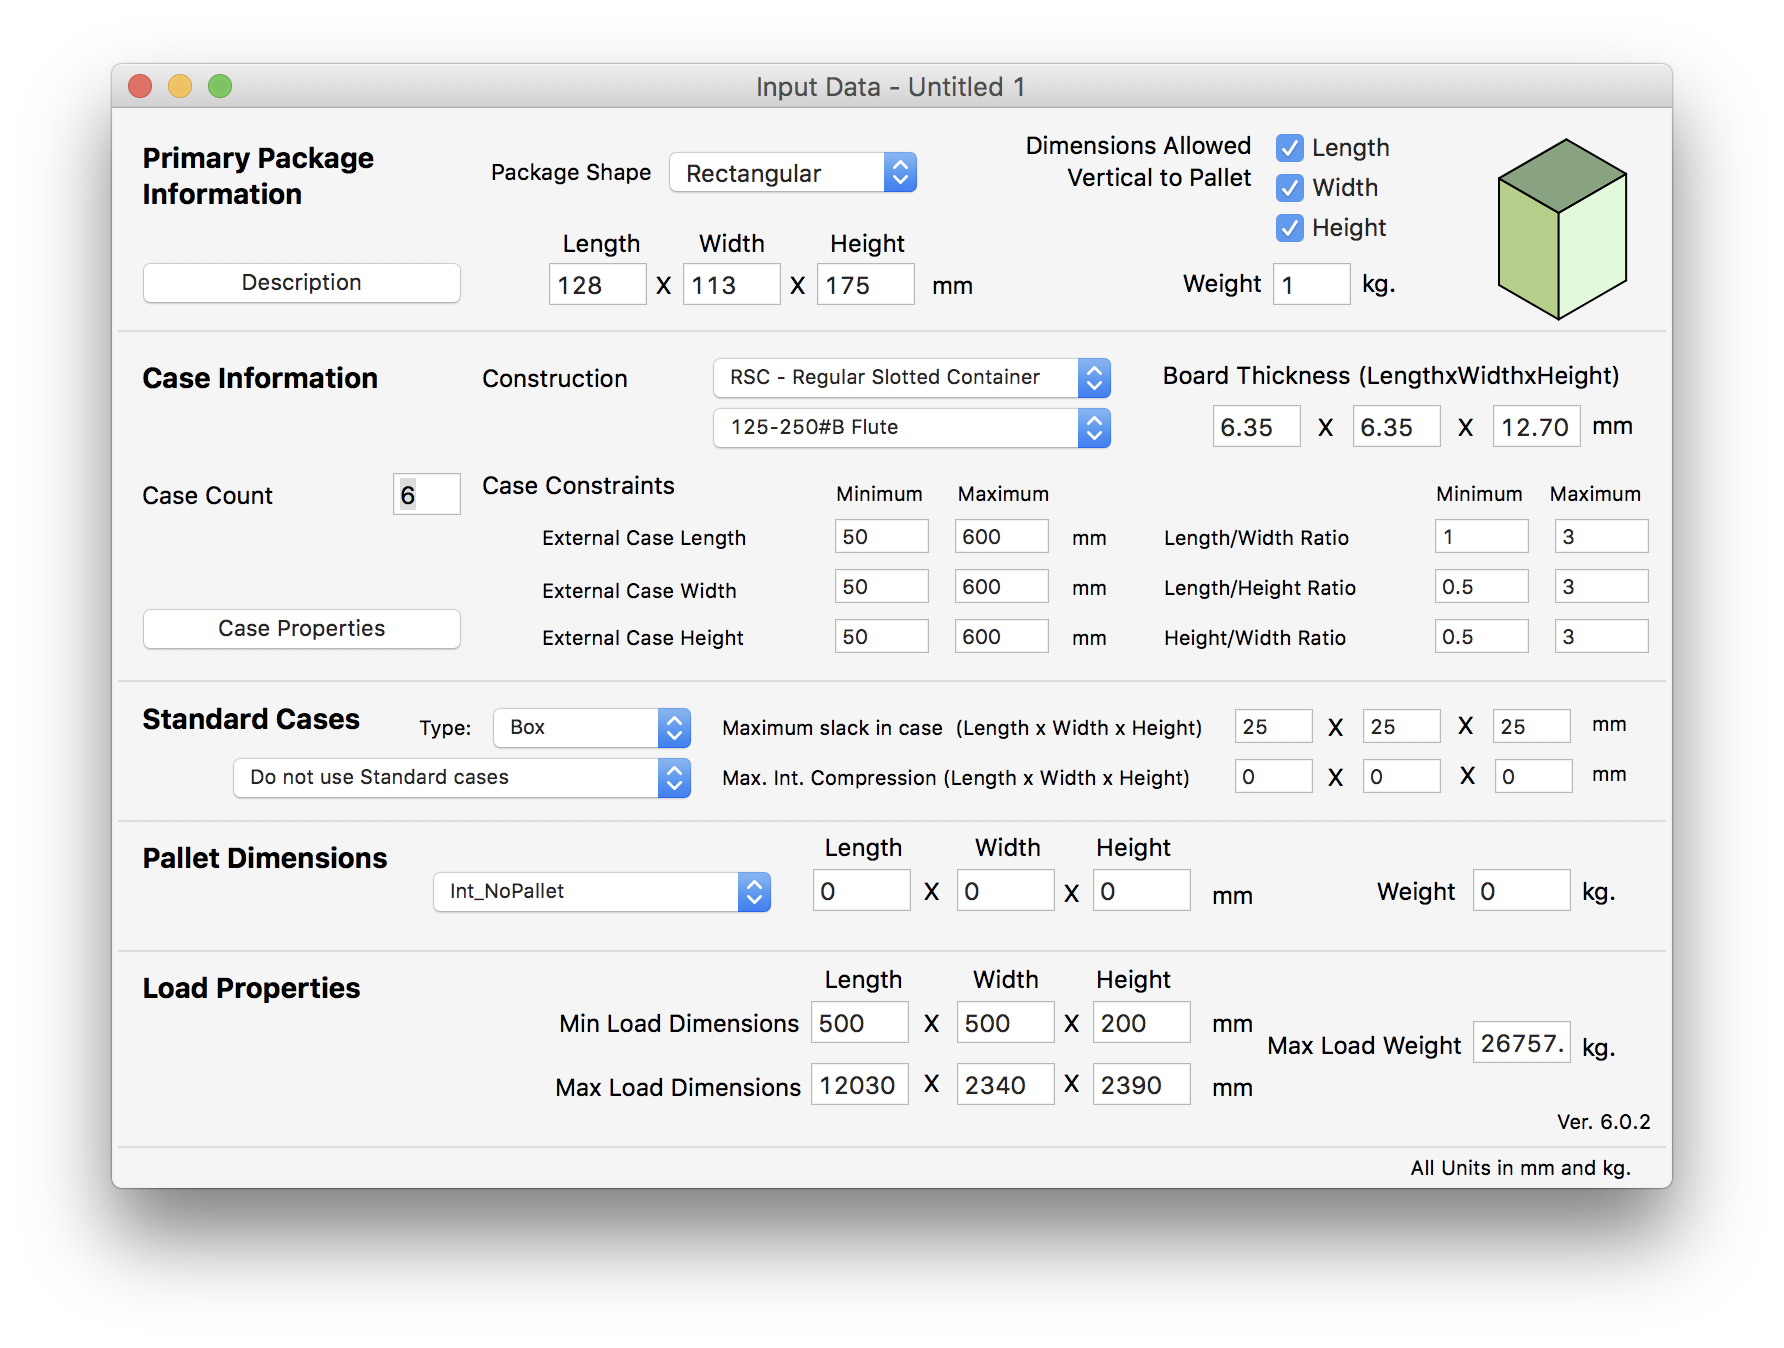
After entering the input data in the appropriate window, we're ready to commence the calculations. Please note that in this case, we didn't enter the case count because we will be running different scenarios with varying case counts. To run these scenarios, we open the Advanced Input Options window from the Tools menu.
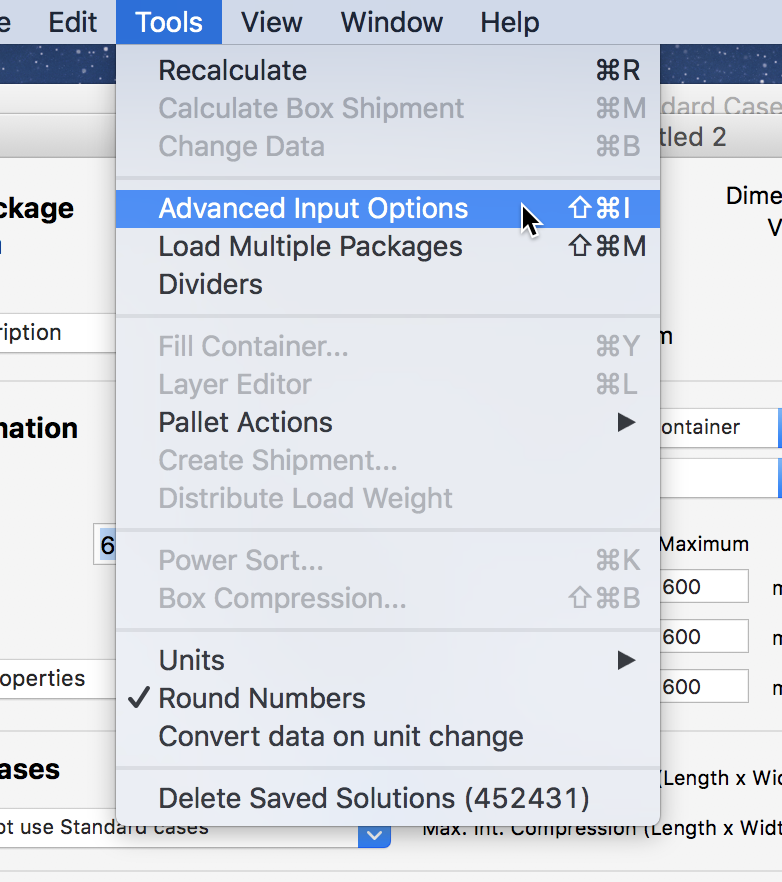
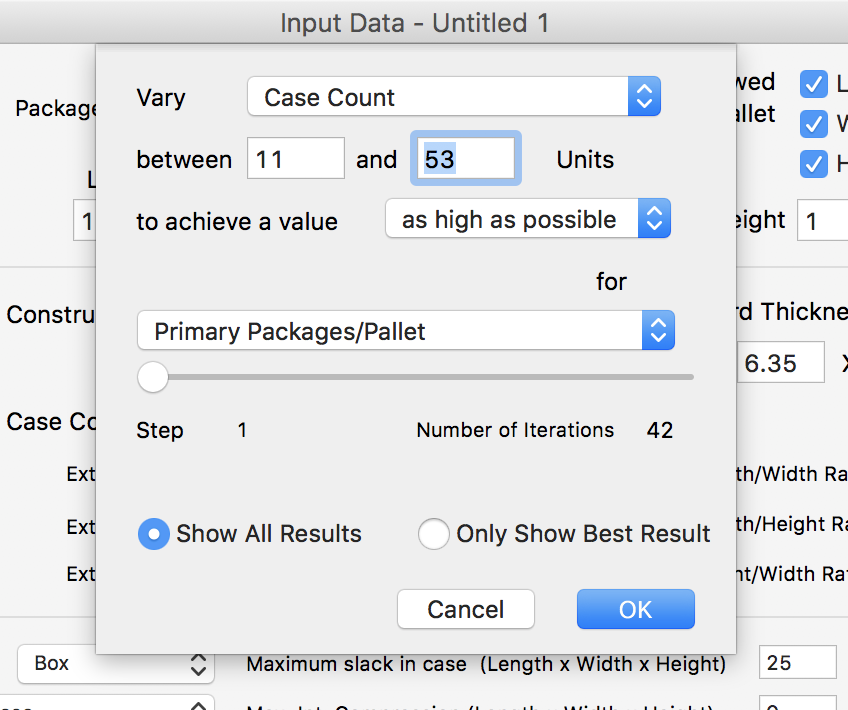
From the Advanced Input Options window, we will select to vary the Case Count between 11 units per box (a smaller number is not practical because of the excessive shipped carton per pack) and 51 (we do not pick a larger count to not make the boxes too heavy). We pick "achieve a value as high as possible for Primary Packages per Pallet" because PP/Pallet is our best indication of filling efficiency. Since all the case counts are evaluated, there is no need to change the number of iterations. Finally, we pick to show all the results (in case we see another value we prefer) and click on the OK button.
After calculating all the possible options (it should take a while), Quick Pallet Maker produces the possible floor-loaded box configurations. Note that the calculation process can be stopped by pressing Escape on Windows machines or Command+Period on a Mac.
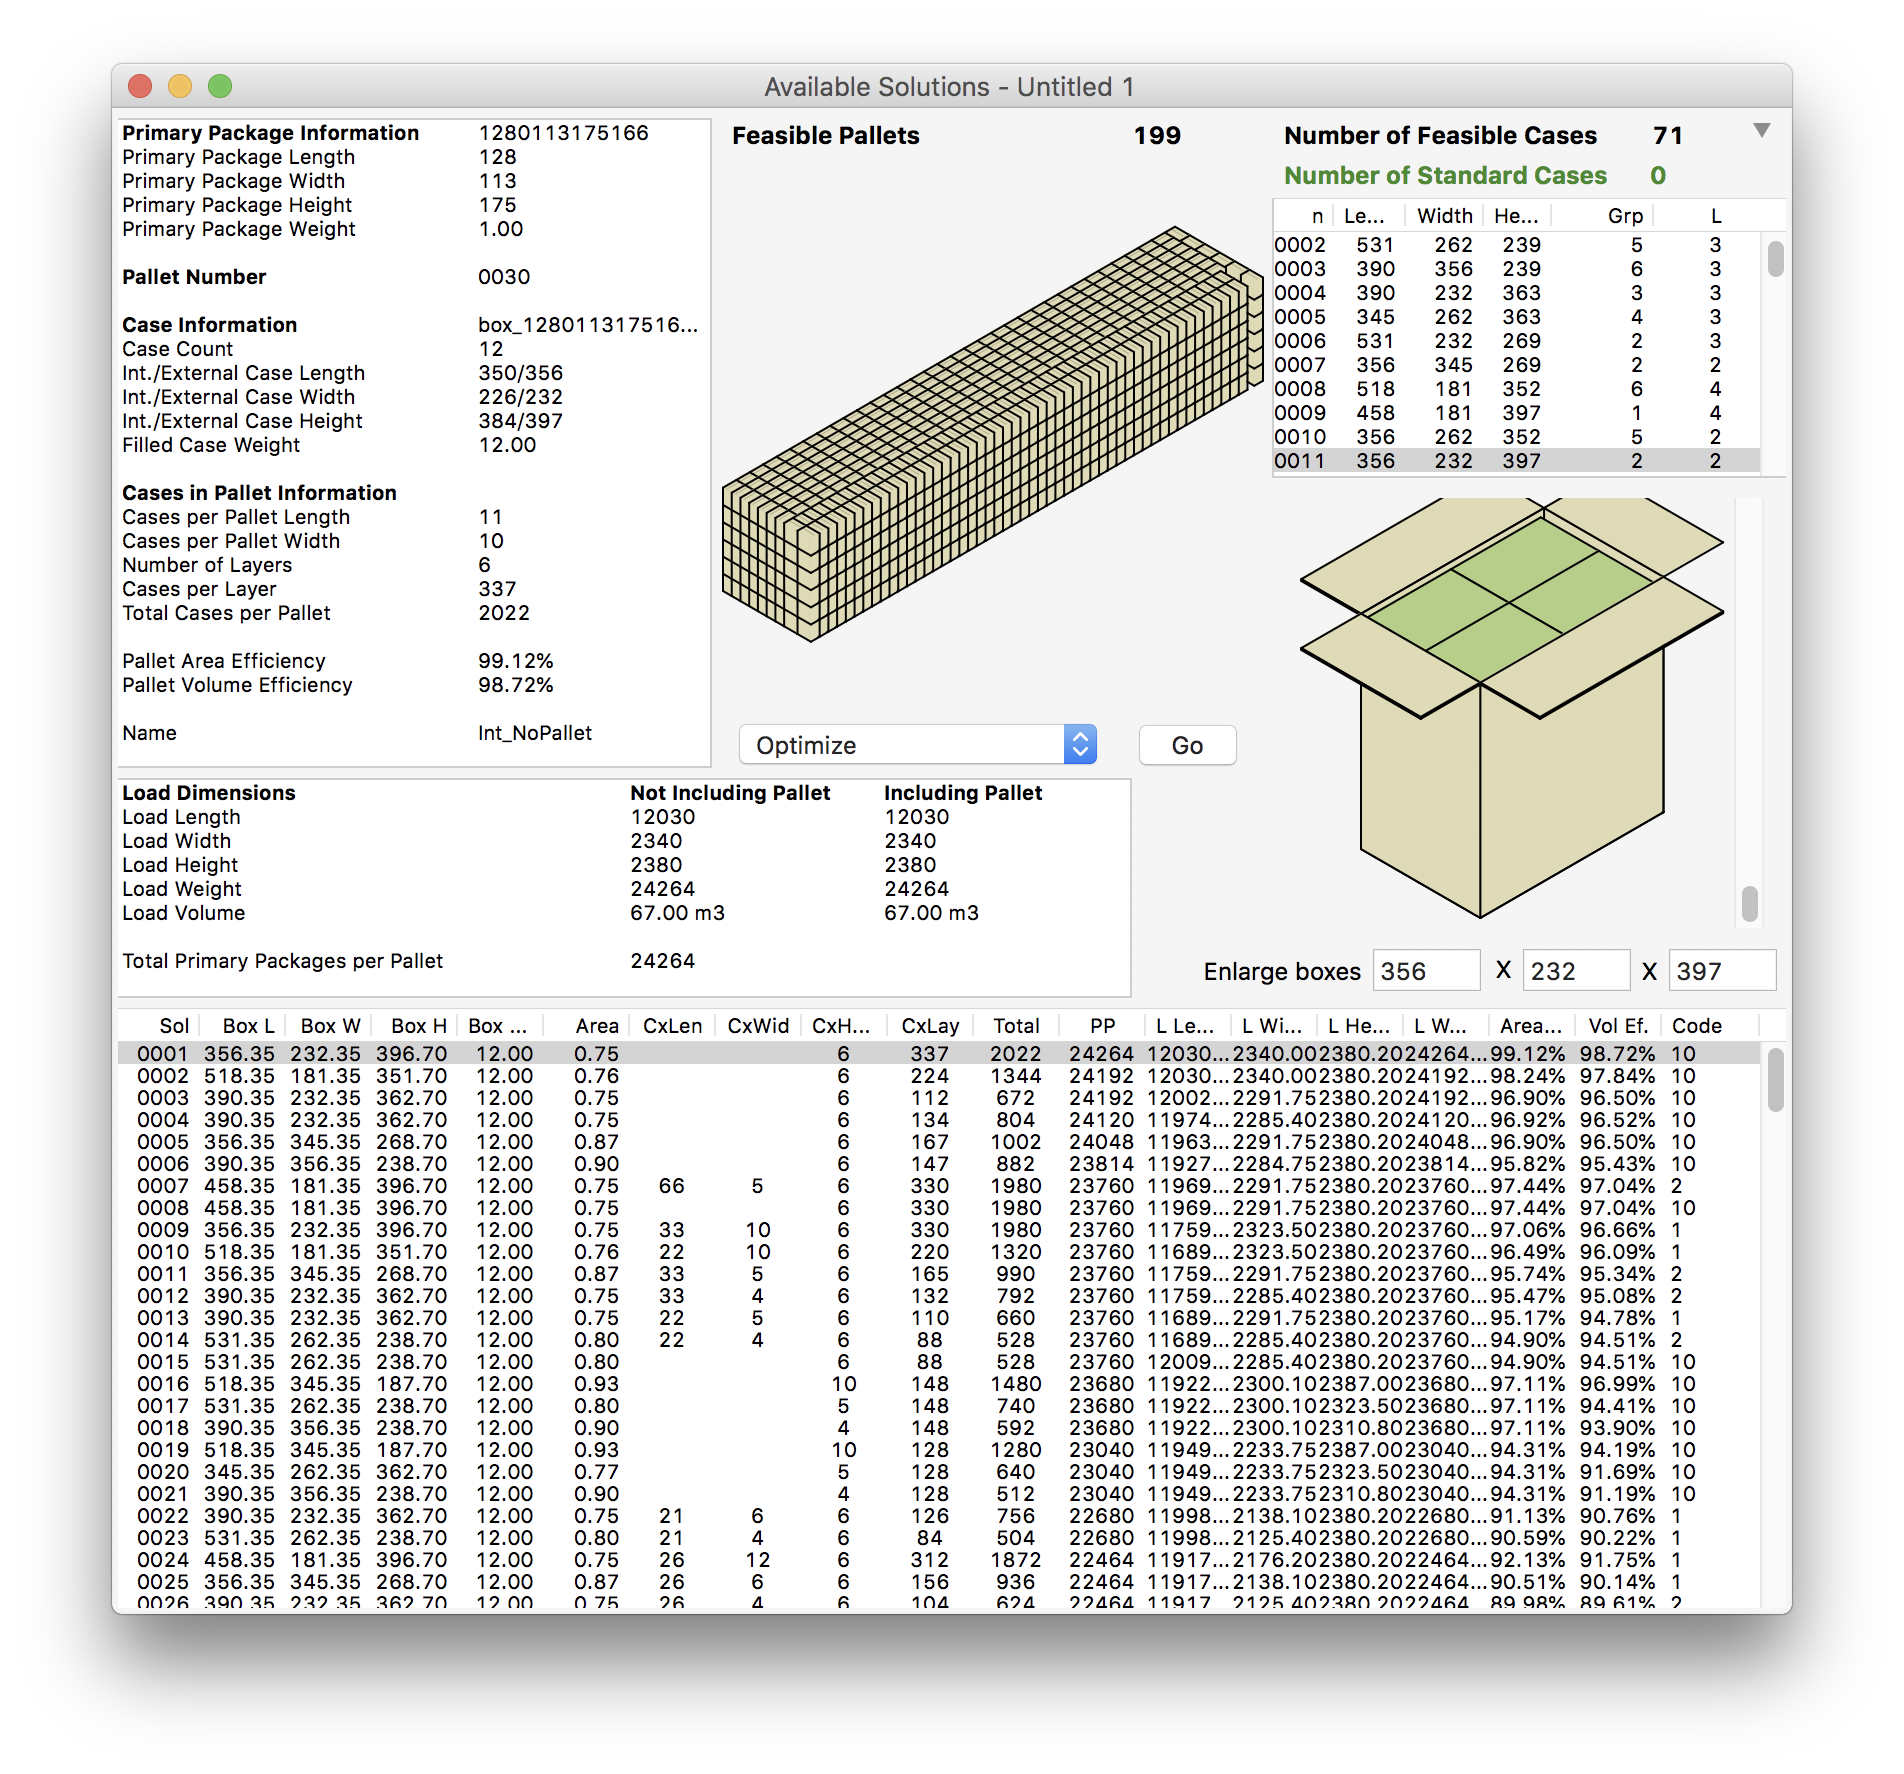
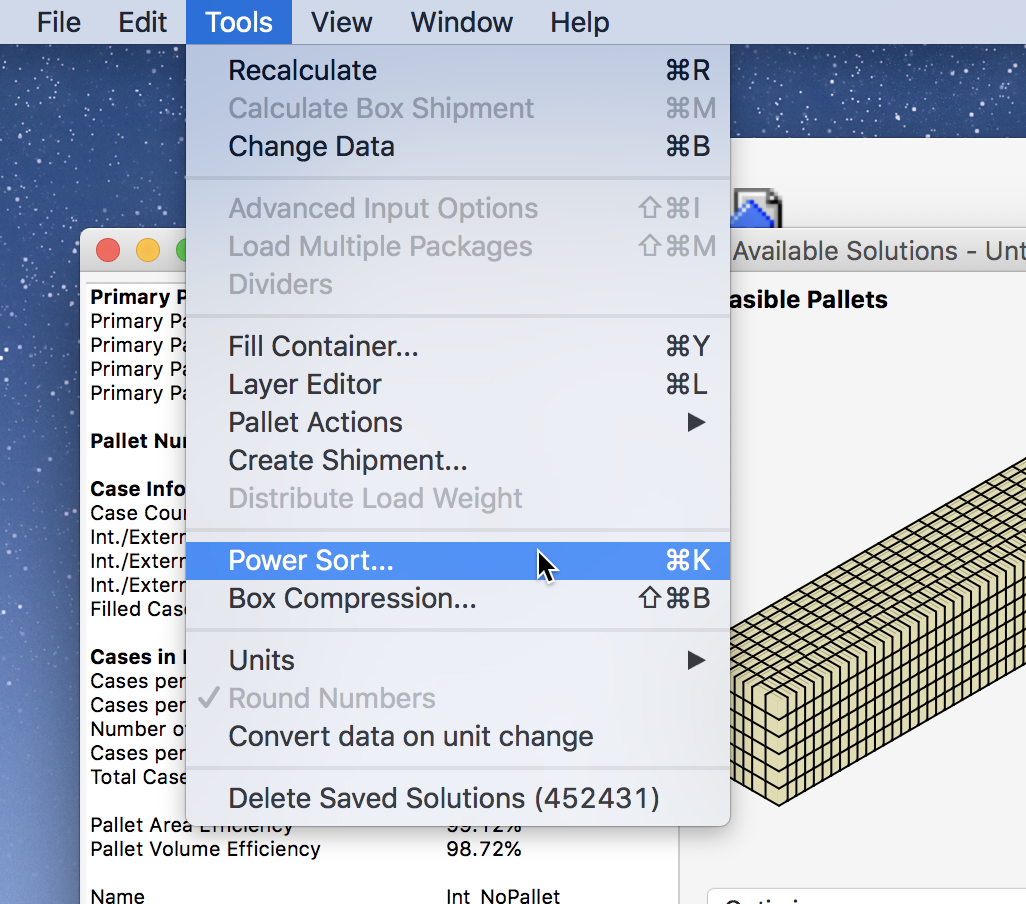
Although the application had already ordered the container loads by primary packages per pallet in decreasing order, we repeat the exercise for educational purposes. After selecting Power Sort... from the Tools menu, we see a small window in which we can select the ordering criteria. Since they had already been ordered, the result doesn't change much, as can be seen in the previous screenshot.
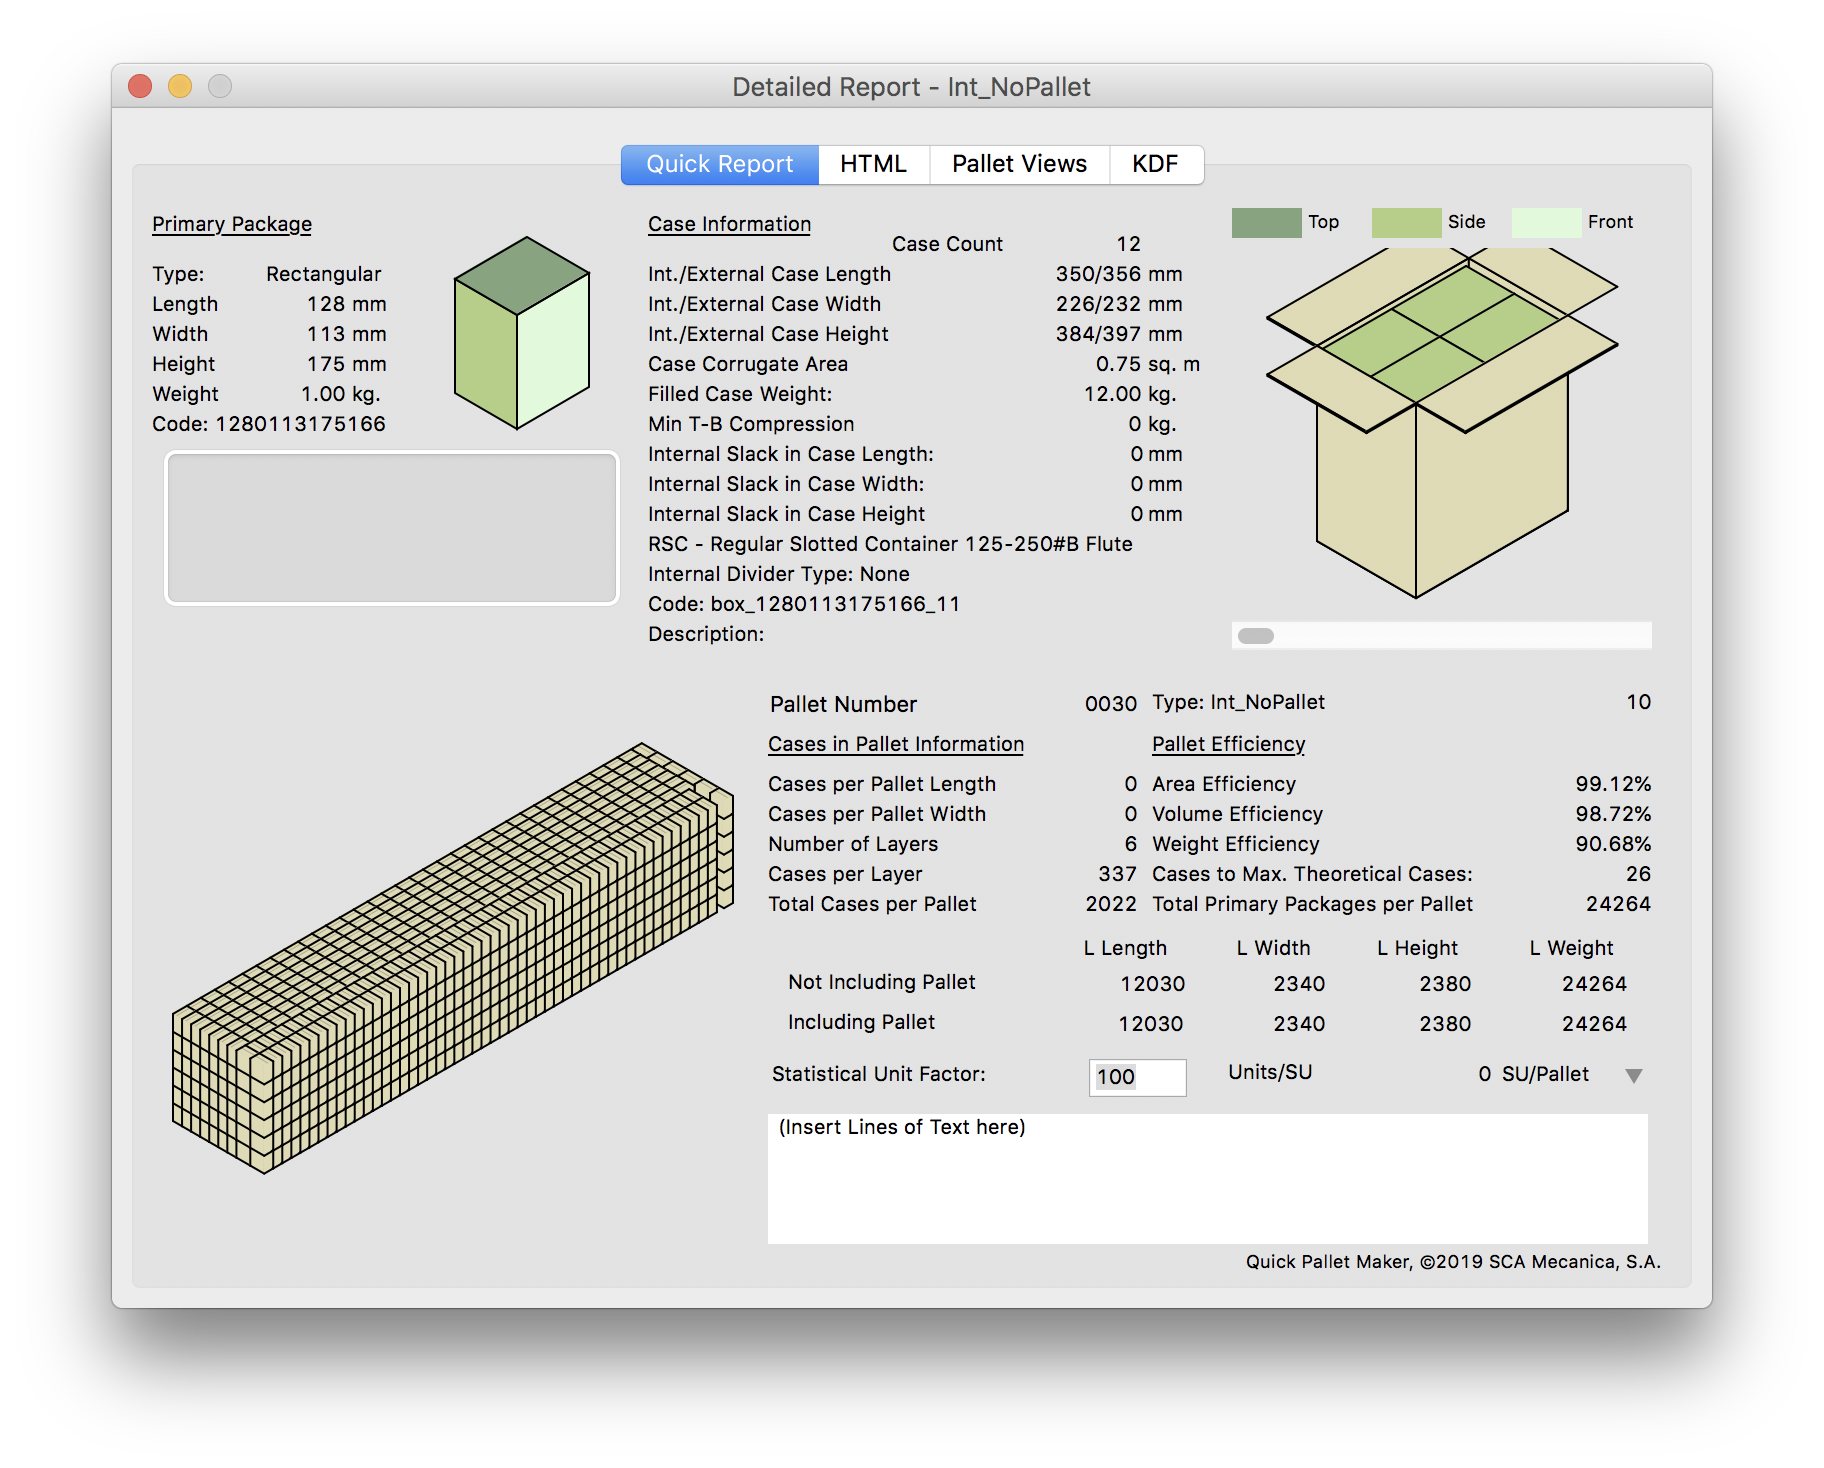
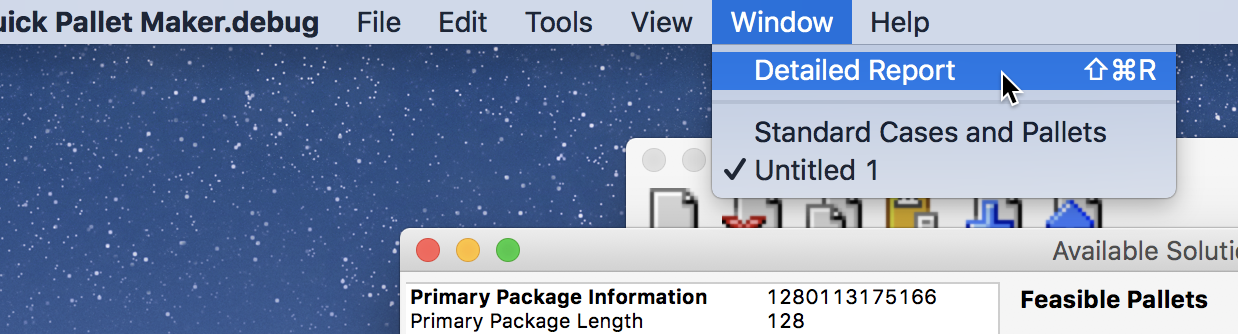
The final step is to select Window - Detailed Report to be able to see the data for the full container.
The final report can then be saved or exported in a graphics format to send to the packers and unpackers.