Quick Pallet Maker Example - Fill Boxes with Multiple Packages
This example explains how to select the best standard (off-the-shelf) box for filling with differently-sized primary packages and use it for a pallet load.
Go to Window > Standard Cases and Pallets and check the Standard Metric Unit Cases - External Dimensions table to make sure you have standard cases with all three dimensions. For convenience, we used 400 mm for most of the heights.

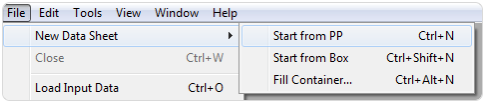
Open a new document starting from primary package on File > New Data Sheet > Start from Primary Package. If the units are not in millimeters, go to Tools > Units > mm/kg.
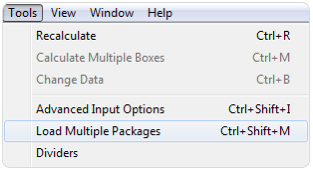
Select the Load Multiple Packages option from the Tools menu. This will allow you to calculate multiple package sizes at once.
To add an item, enter the dimensions and press Add Package. You can assign different colors to them. Once you have finished, press the Done button.
You can also download the linked spreadsheet and copy the three rows onto the central table in the window.
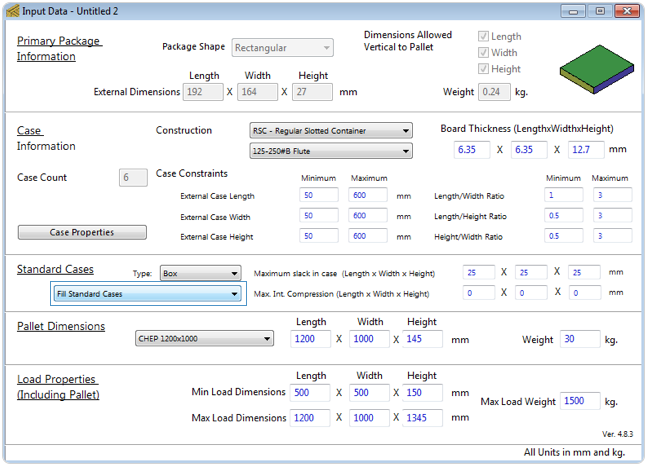
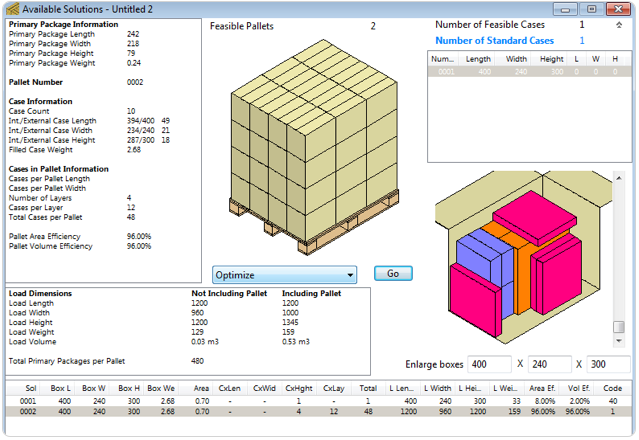
- 242x218x79 mm, weight 0.24 kg, amount 2.
- 143x121x50 mm, weight 0.24 kg, amount 4.
- 192x164x27 mm, weight 0.24 kg, amount 4.
You can also download the linked spreadsheet and copy the three rows onto the central table in the window.

What you have now is the primary package input window in which you have stored three packages to be use for filling boxes. The top part is grayed out. Choose Fill Standard Cases on the Standard Cases menu.
Select Recalculate from the Tools menu to begin the calculations. This process may take a few minutes as QPM checks how the packs fit in all of the boxes from the list.
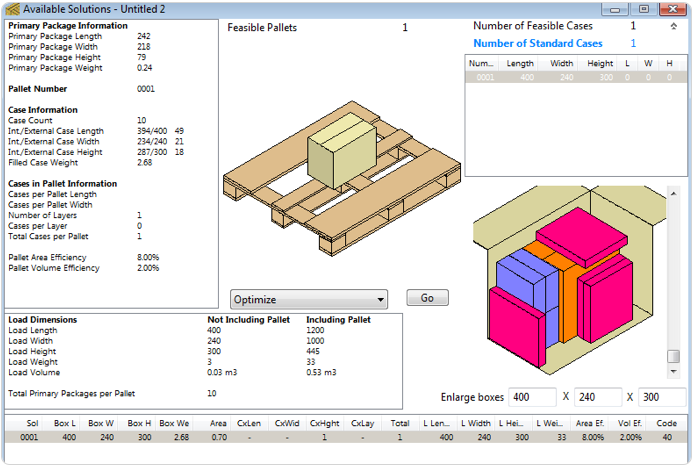
To get a full pallet with this box load, just select the optimal case from the Box List on the top-right table and then choose Tools > Recalculate.
Watch the video
This example is also available as a YouTube video.YouTube Video