Selecting Standard Boxes for Shipments
A QPM user needs to select which boxes to use for packing fish products and sending them using floor-loaded air freight. There are no restrictions in the air transport space. The only data the we have are the dimensions of the packages 220x180x48 mm and the amounts to ship per order: 25, 30, 45, 60, etc. Our objective is to calculate the package in box fit that will reduce as possible the space inside the boxes.
Create a short list of standard cases with rounded dimensions on Window > Standard Cases and Pallets > Standard Metric Unit Cases - External Dimensions. In our example, we created a list of boxes called YellowBox that includes, among others, boxes with the following dimensions:
- 600x200x400
- 330x200x400

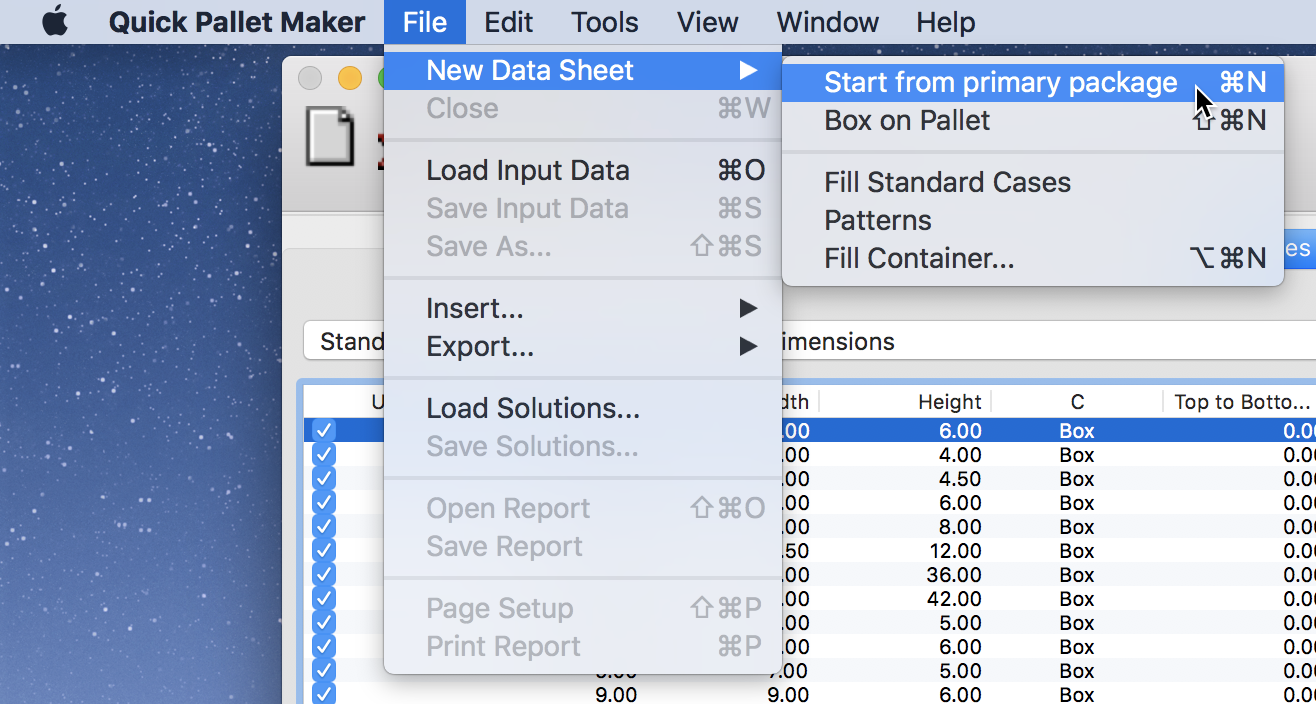
Open a new document window starting from primary package on New Data Sheet > Start from Primary Package.
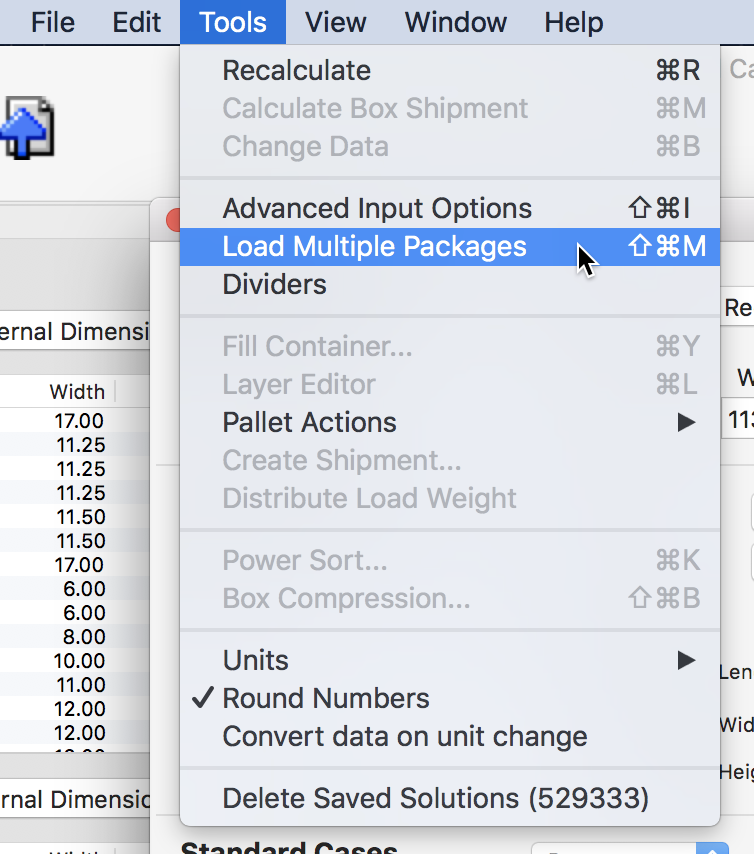
Then the Load Multiple Packages window through the Tools menu.
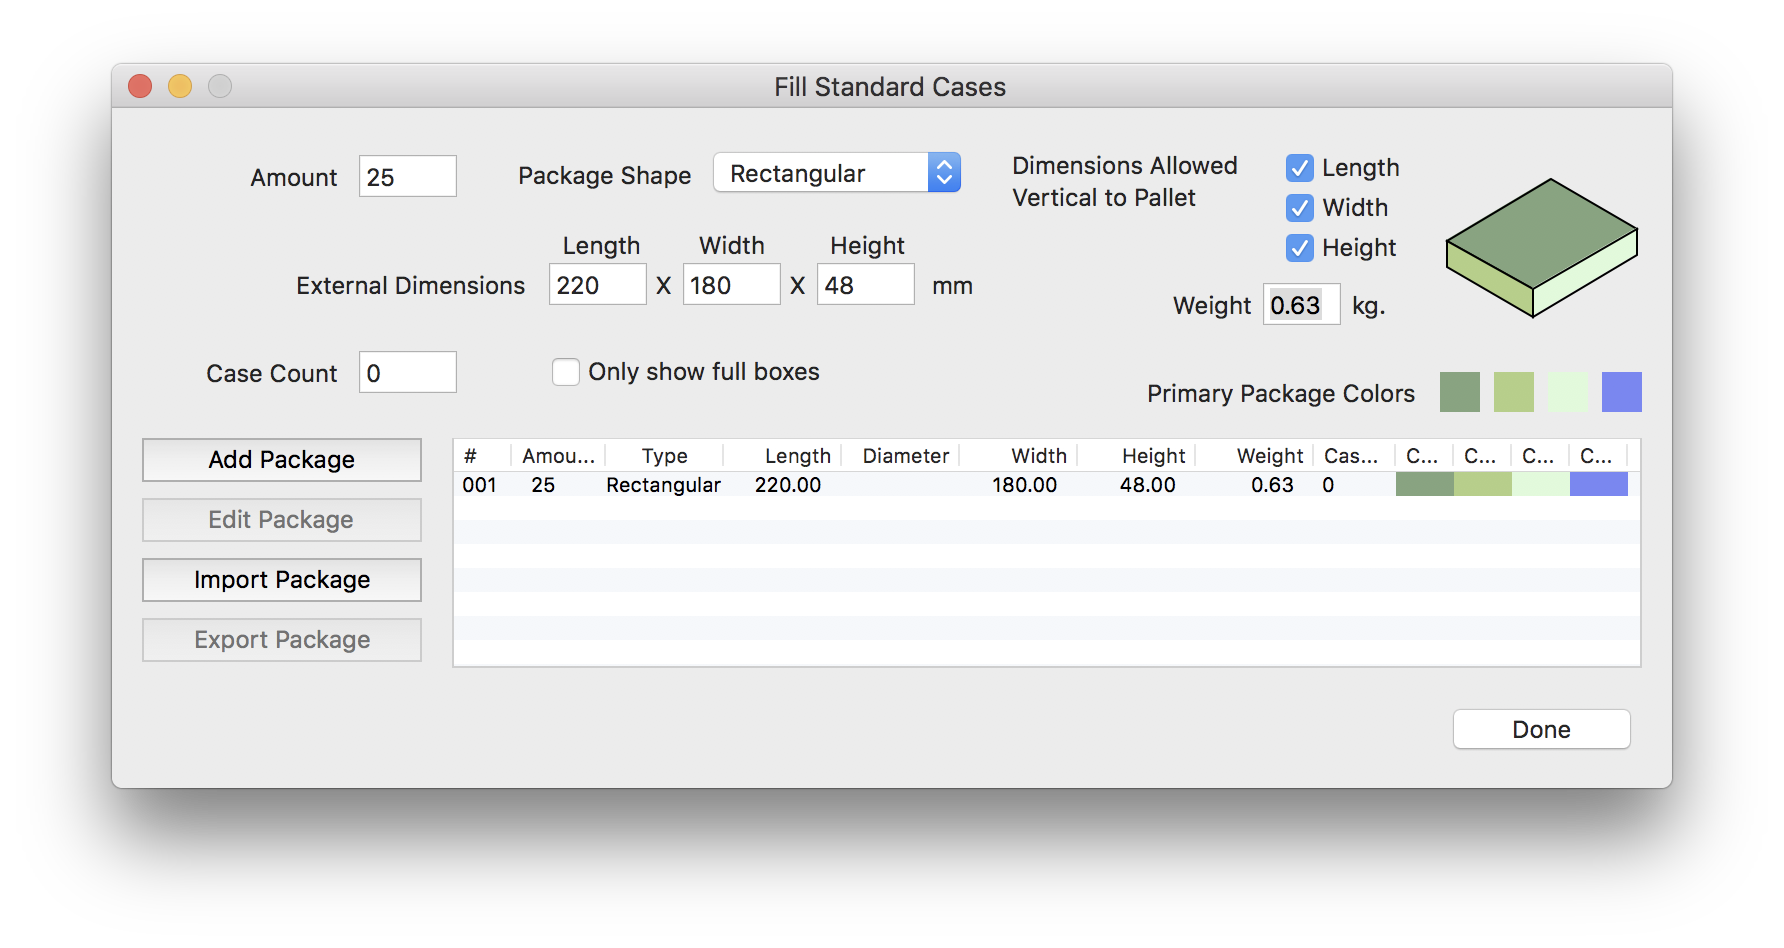
Enter the package dimensions and the amount that will be shipped. In this case, the dimensions are 220x180x48, the amount is 25 items and 0.63 kg. Click on the Add Package button to add the package to the list. Deselect the Only show full boxes checkbox. This will allow multiple boxes per package shipment instead of relying on one box to fit them all. When finished, click on Done.
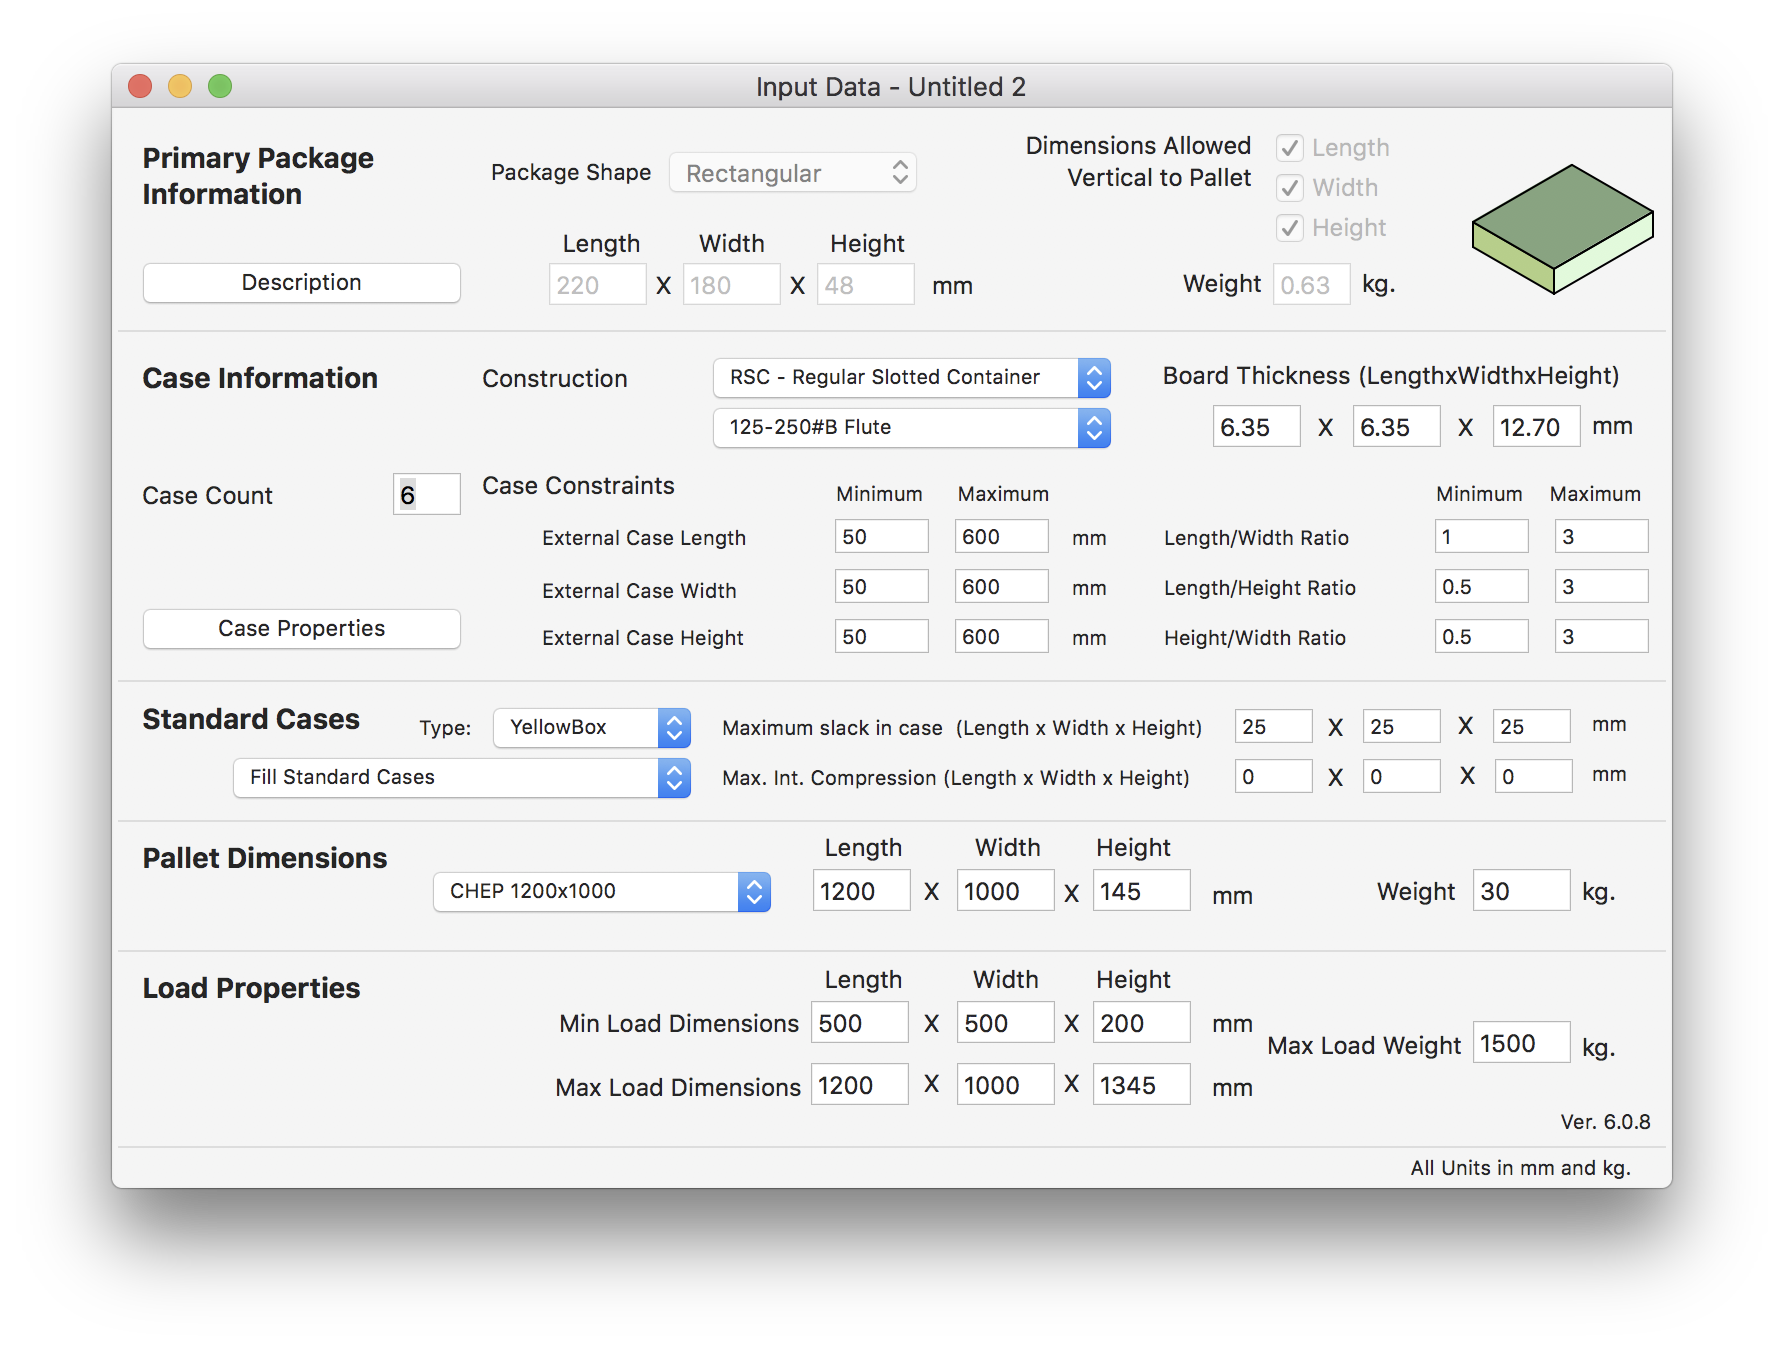
What you have now is the primary package input window in which you have stored the packages to be used for filling boxes. You will notice that the primary package area is greyed out, select Fill Standard Cases from the Standard Cases menu. The box type is YellowBox, which is the class we set previously.
Note that we have left the default values of maximum slack per case sides of 25 mm each.
Note that we have left the default values of maximum slack per case sides of 25 mm each.
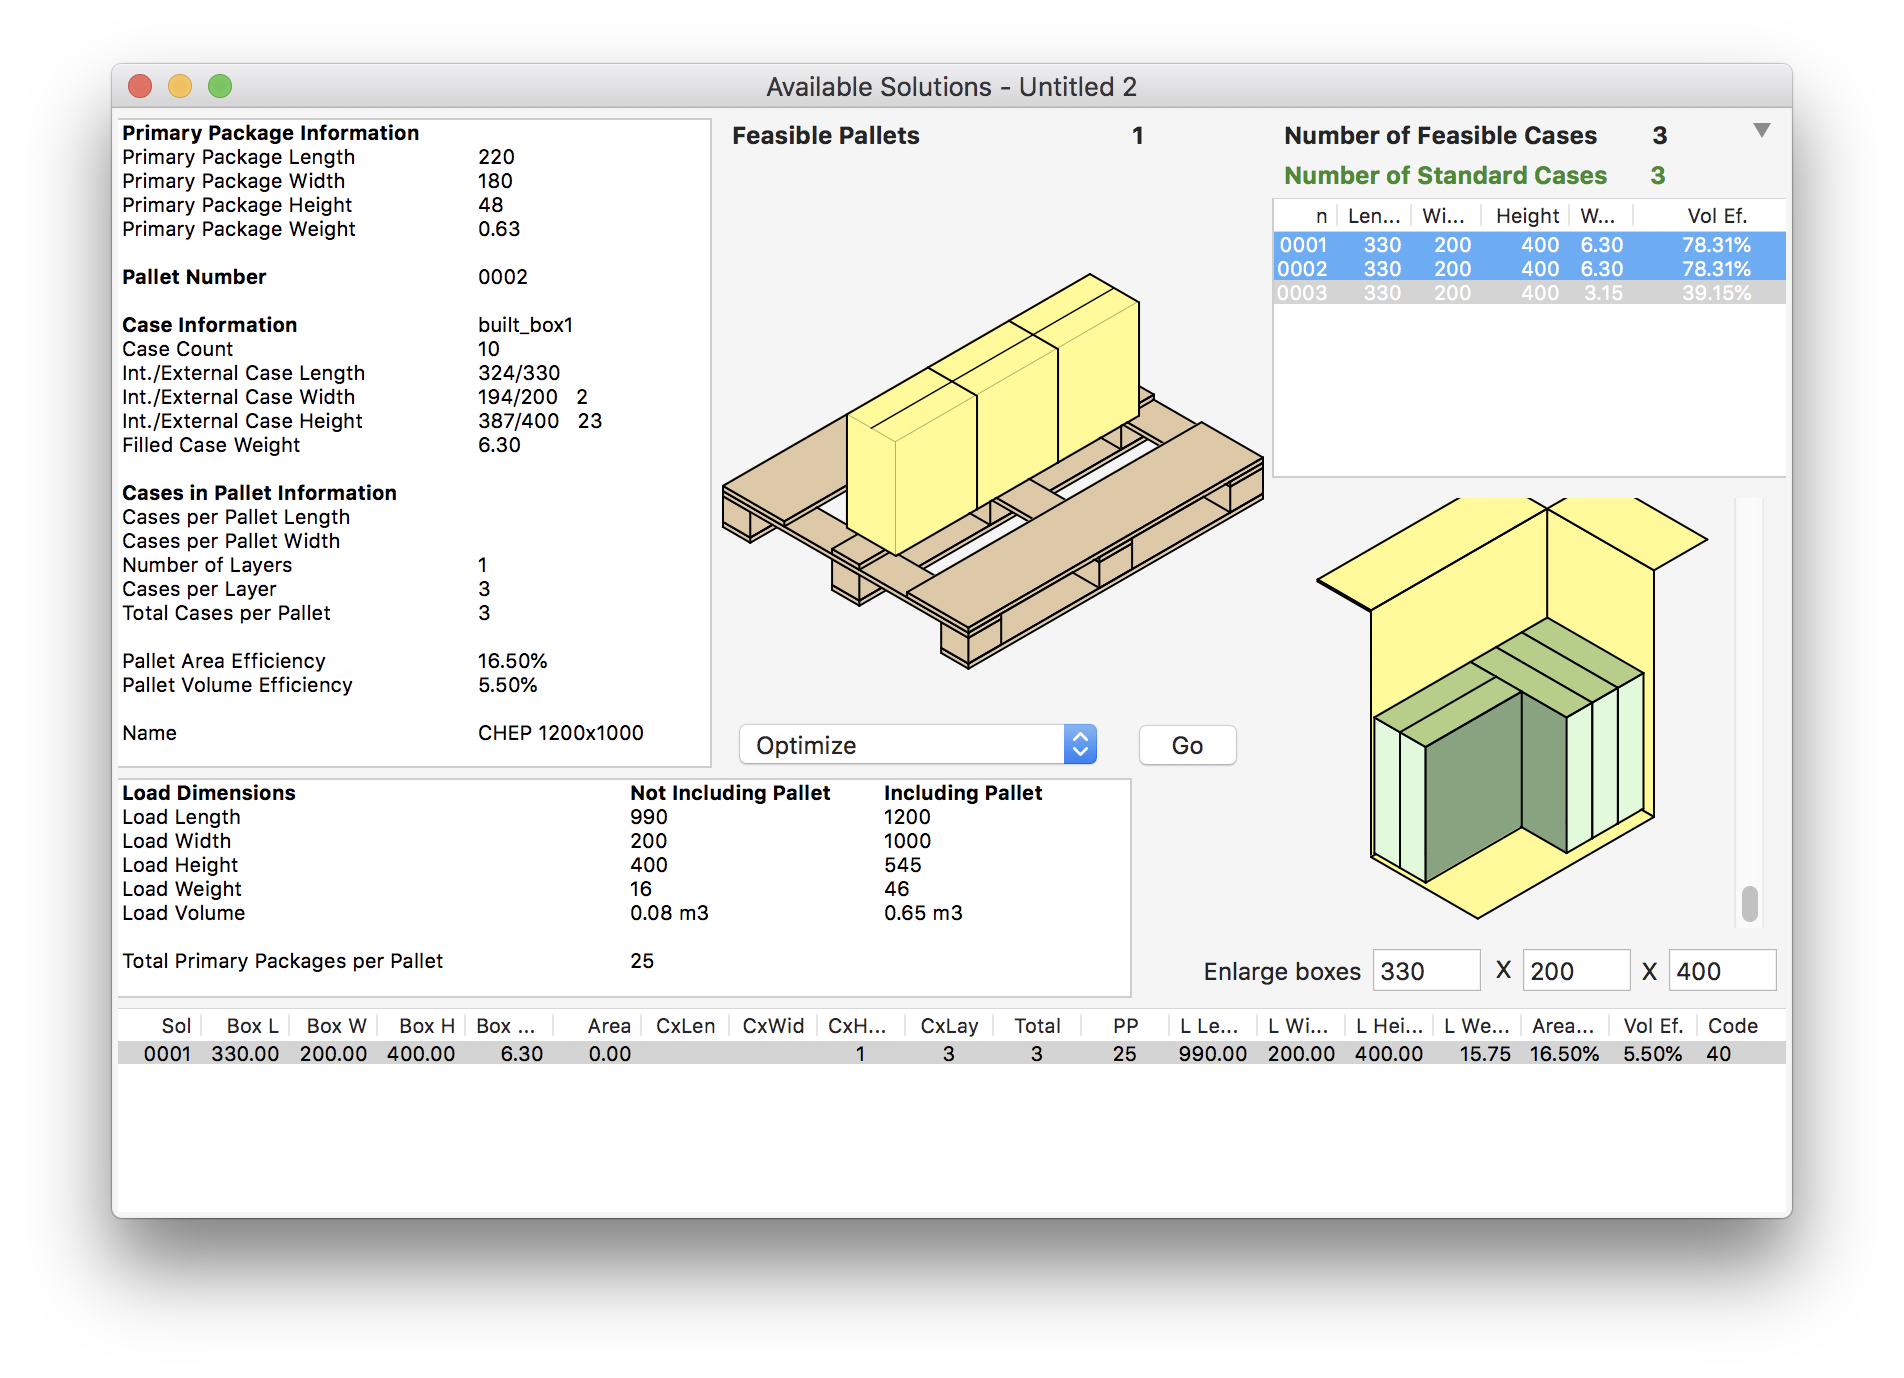
Select Recalculate from the Tools menu to see the results. The product will not be shipped on such an inefficient pallet, the user just need to know which boxes to use and how to pack the shipment he must deliver. In our example, given the maximum slack, we were able to calculate package shipments in two different types of boxes, two bigger ones and three smaller ones.
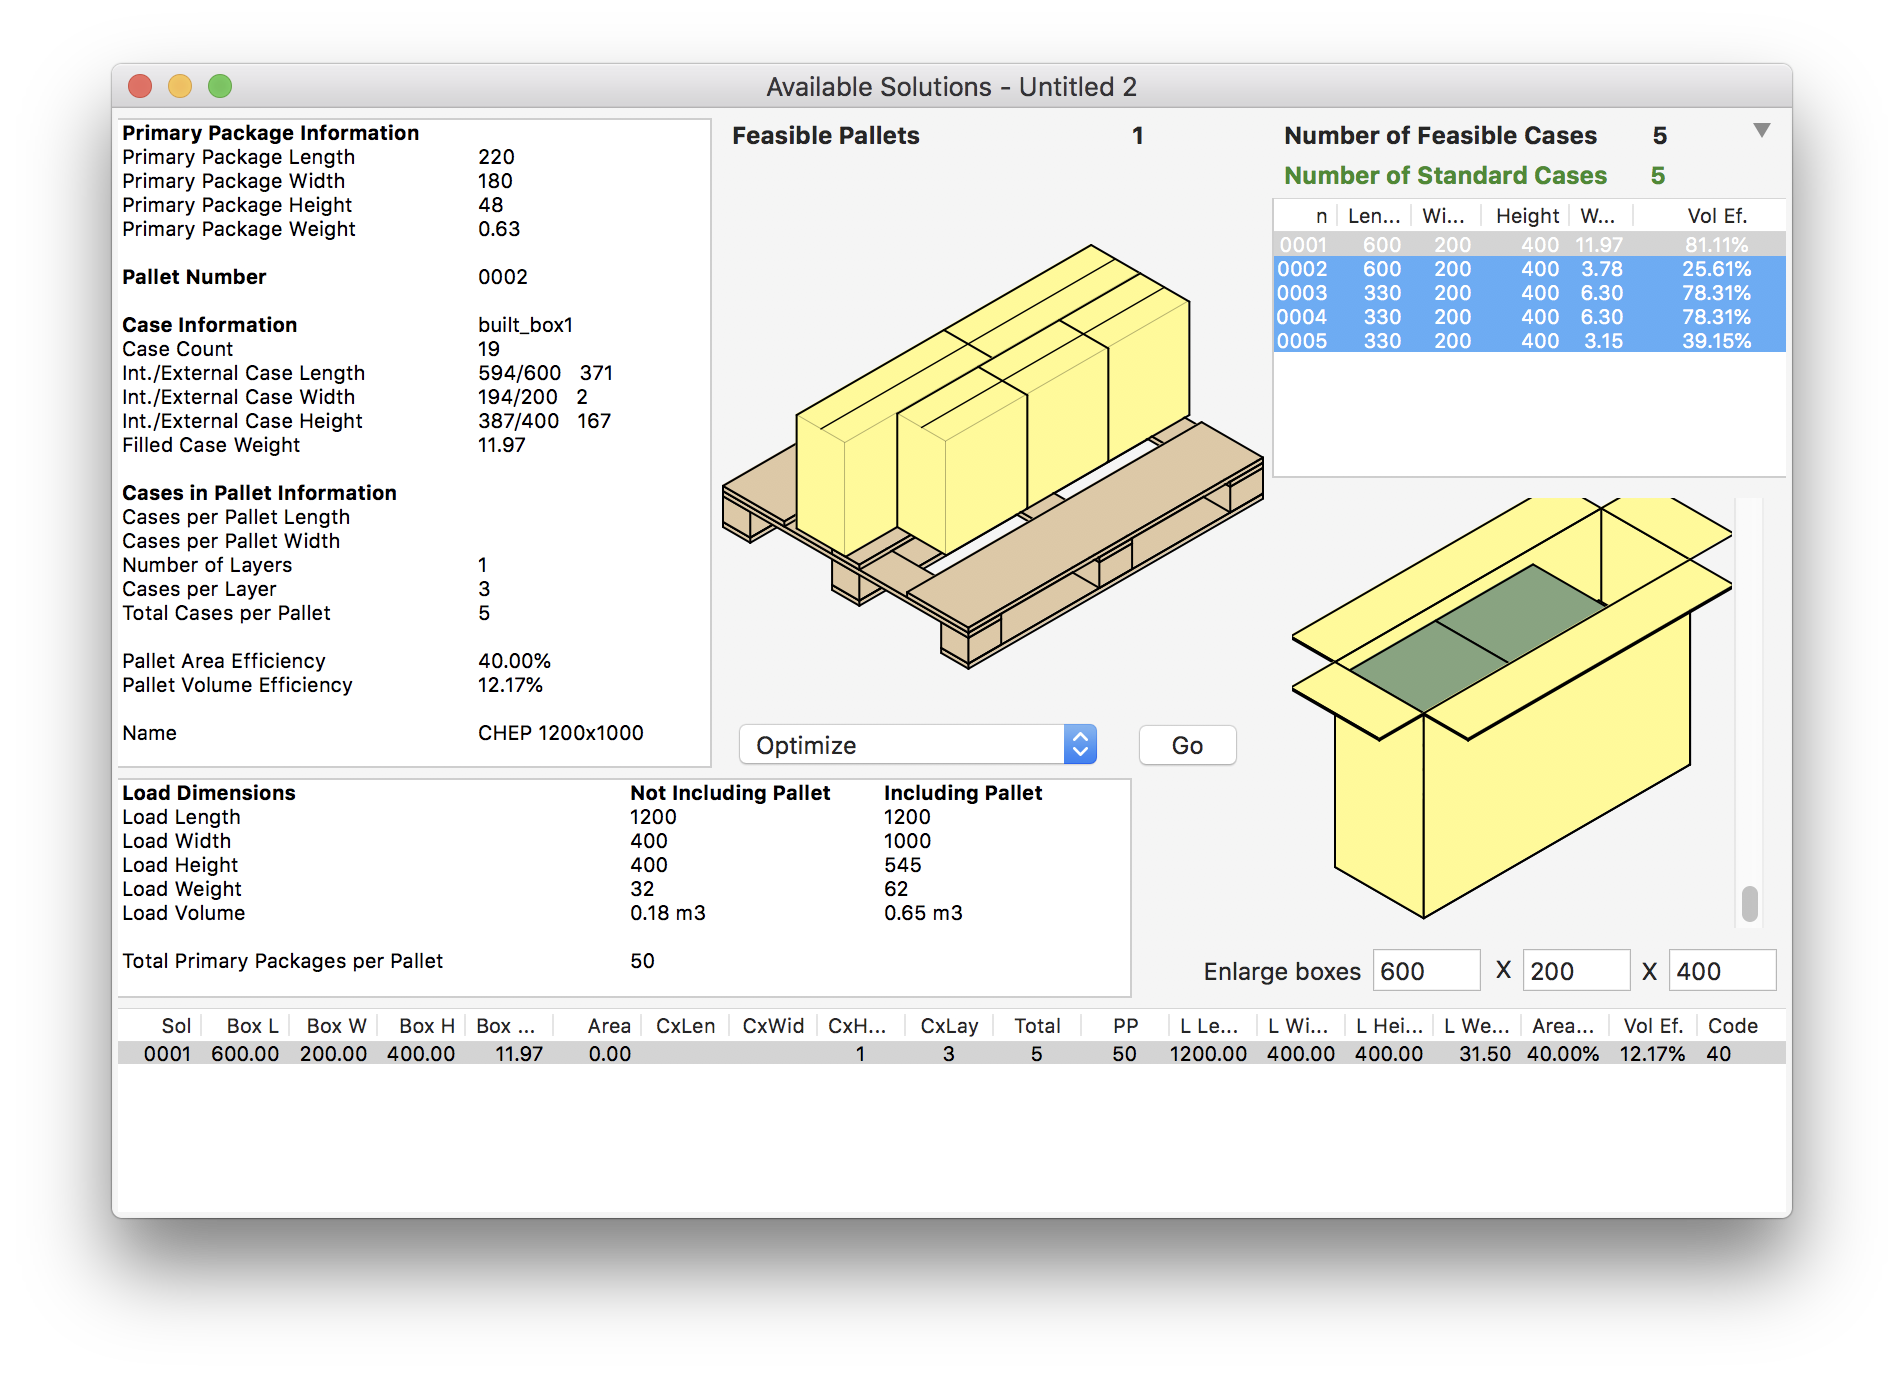
If you click with the right button on the box drawing, you can select View box contents and see the primary packages inside the first large box.

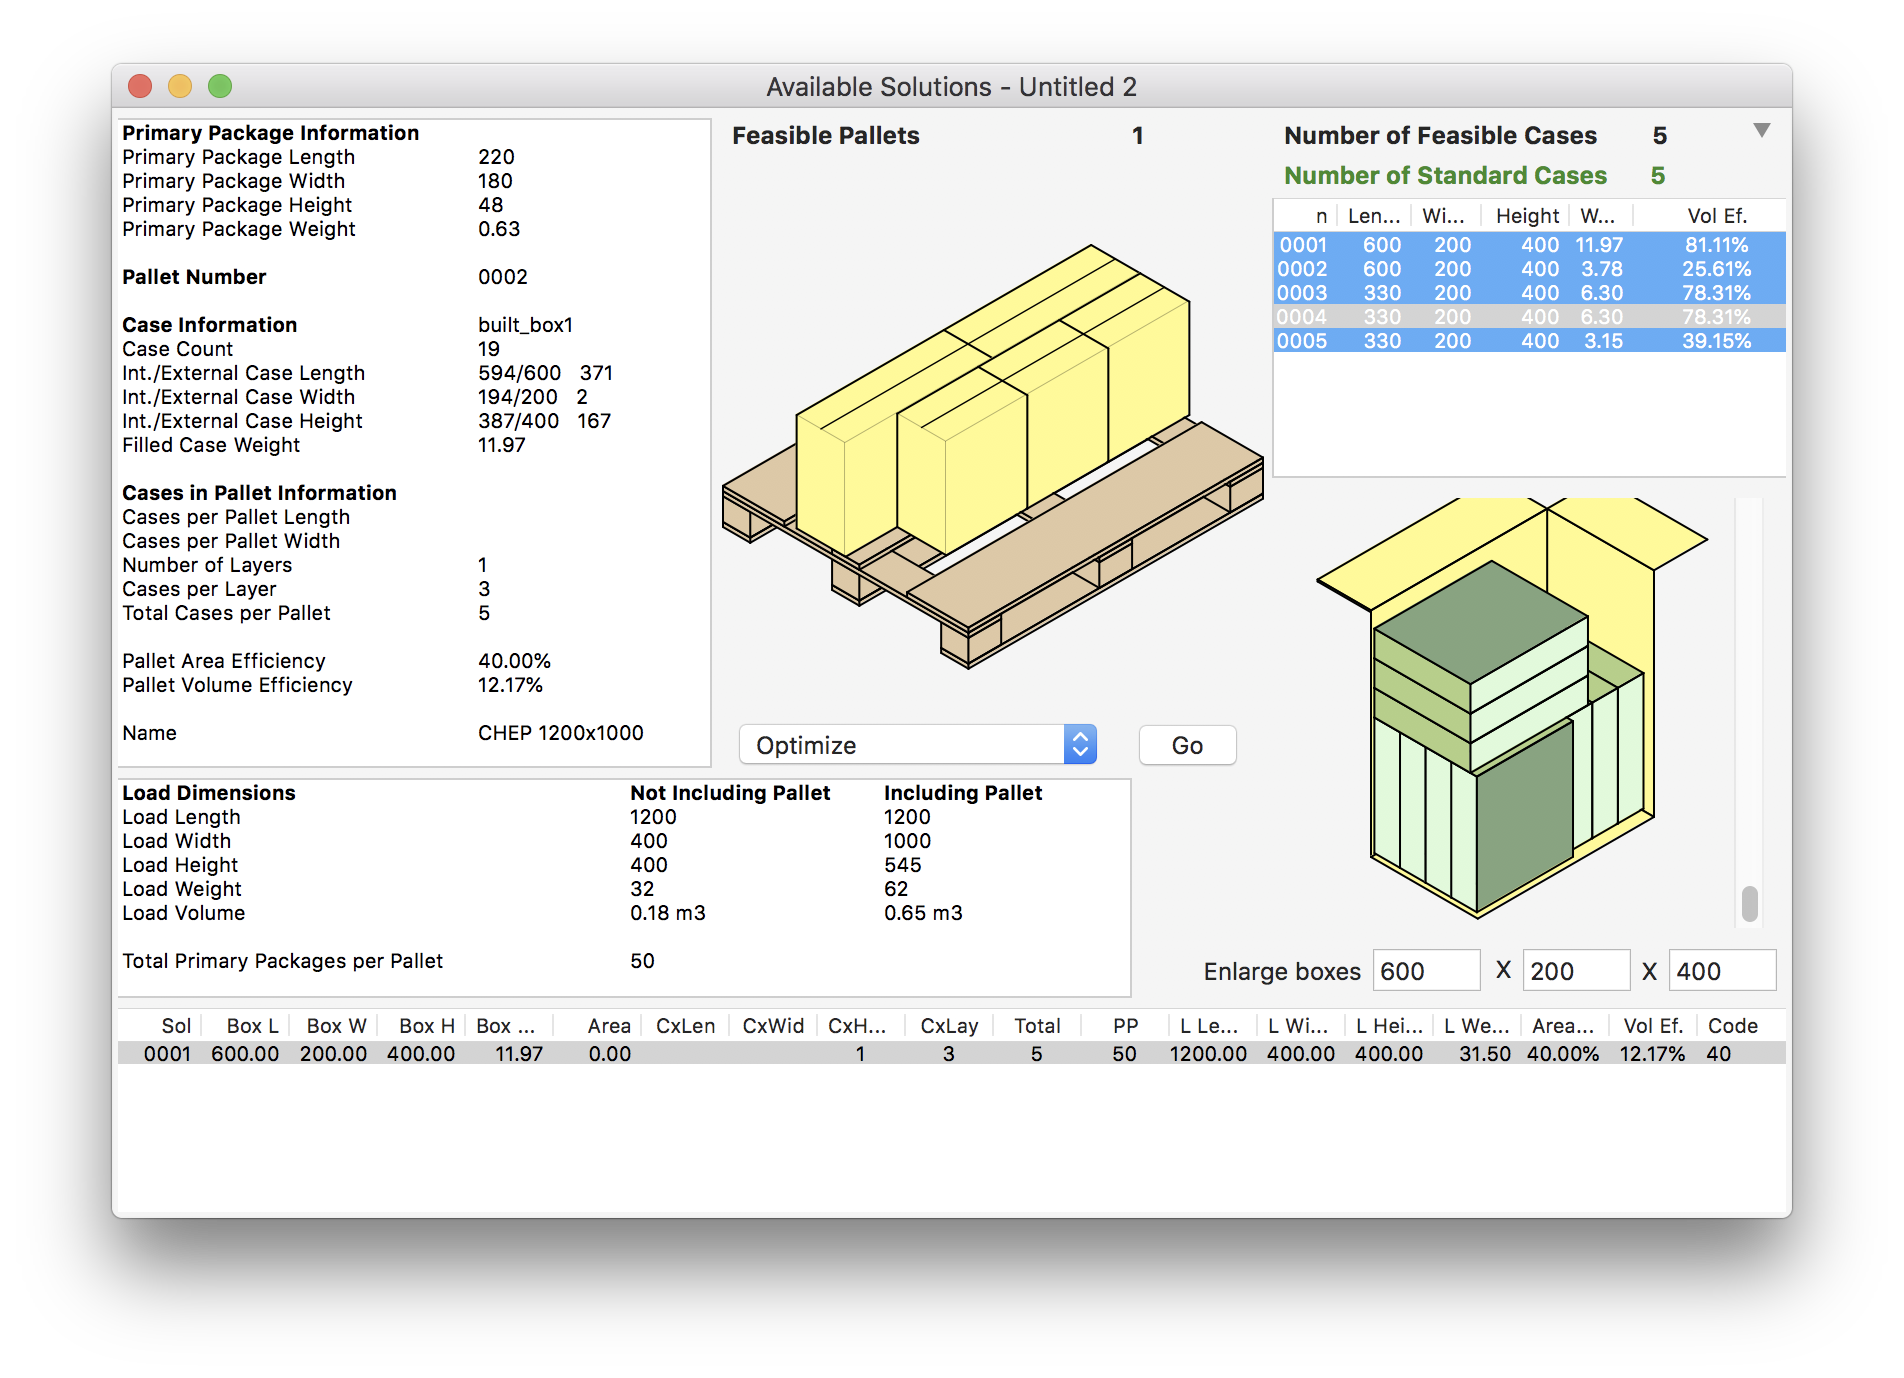
Clicking on the second box in the list leads to a view of the relatively empty box.

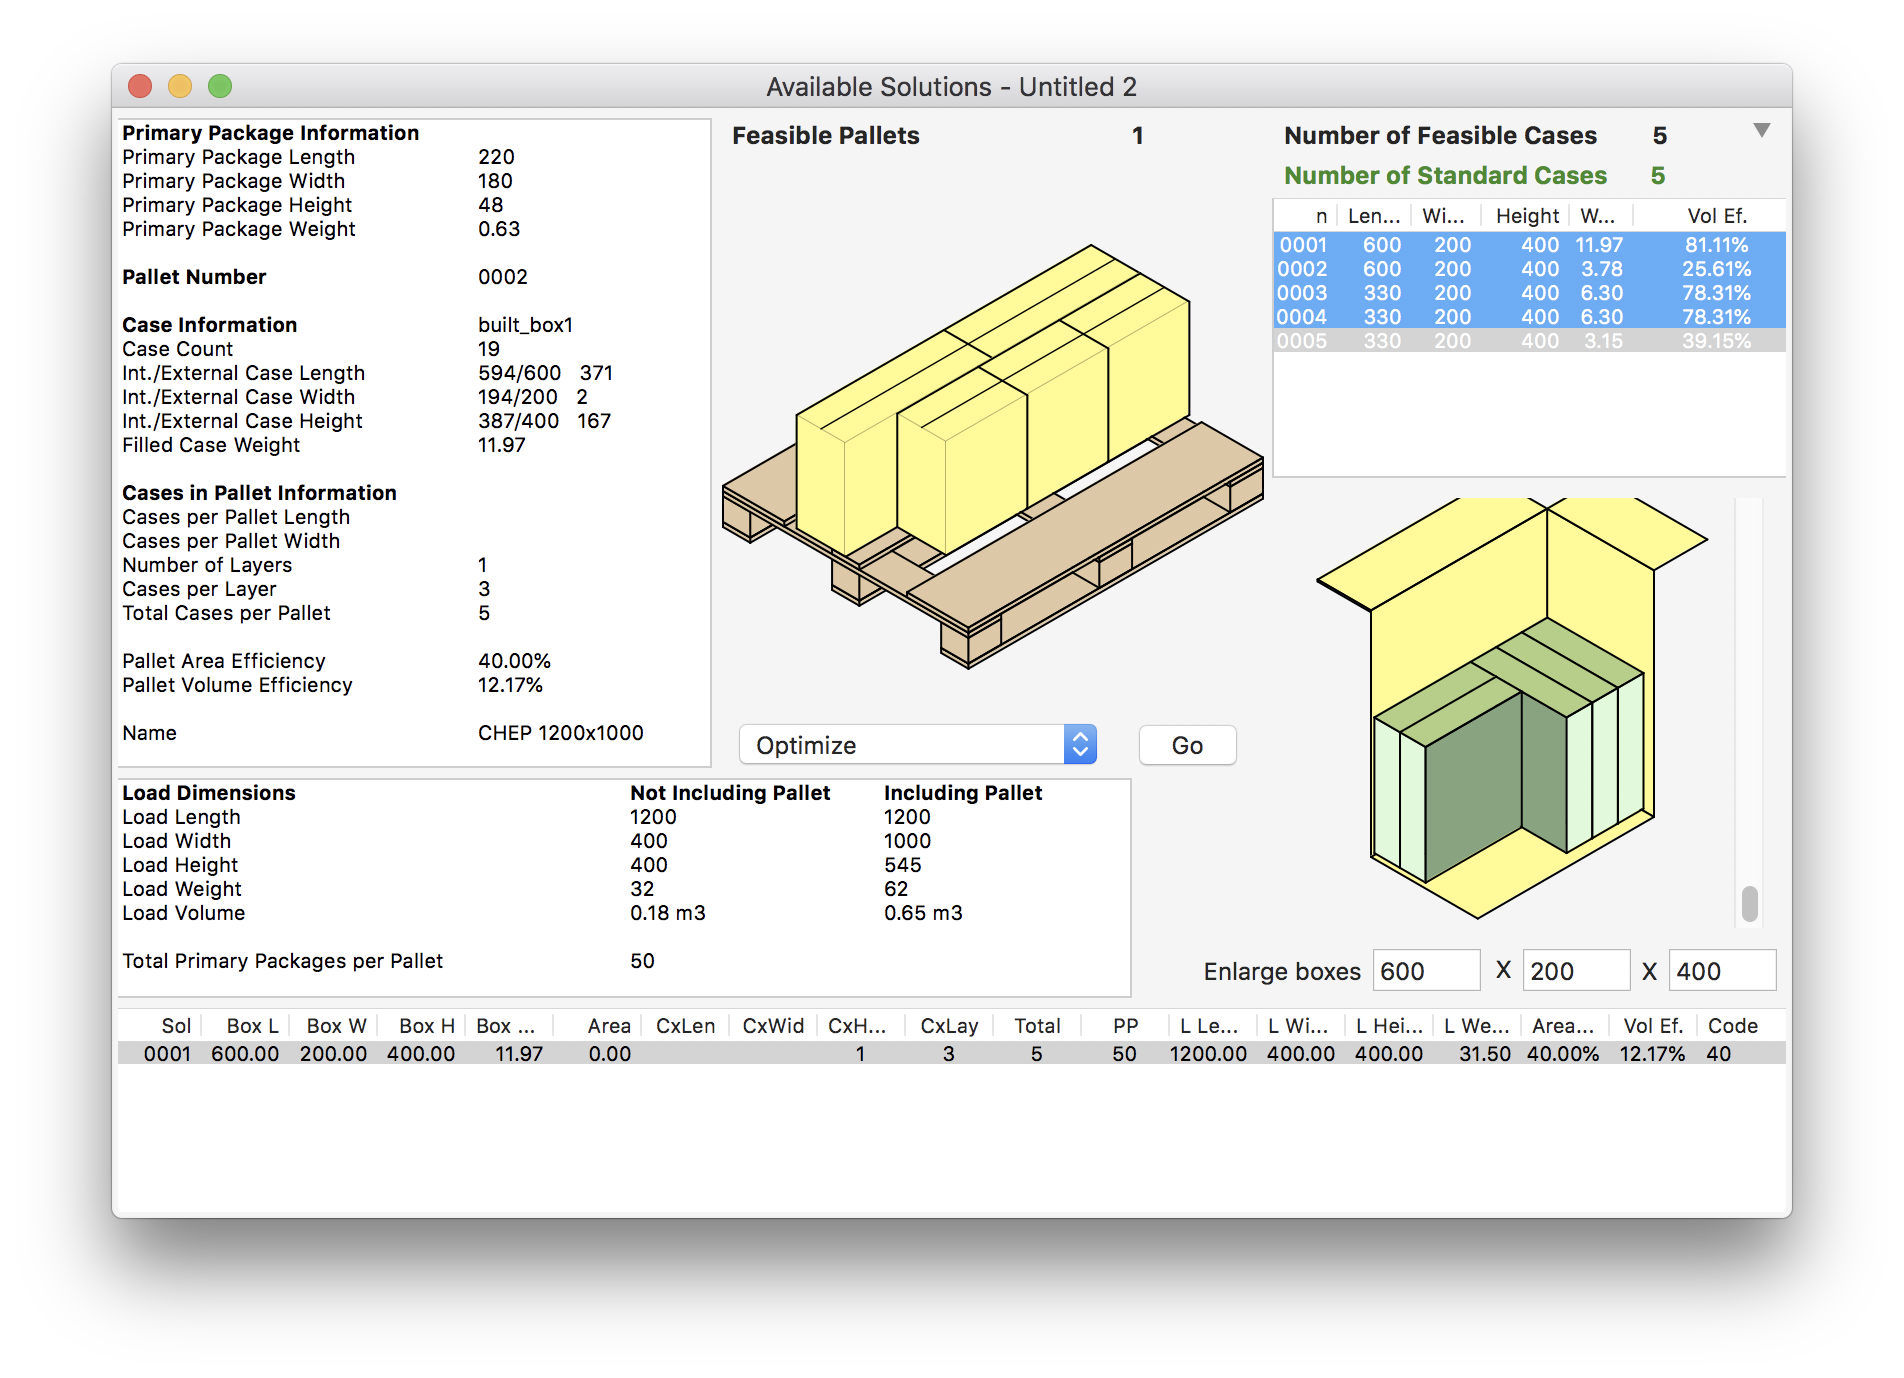
You can select the first smaller box.
And the third smaller box. There you conclude that the smaller boxes are better.
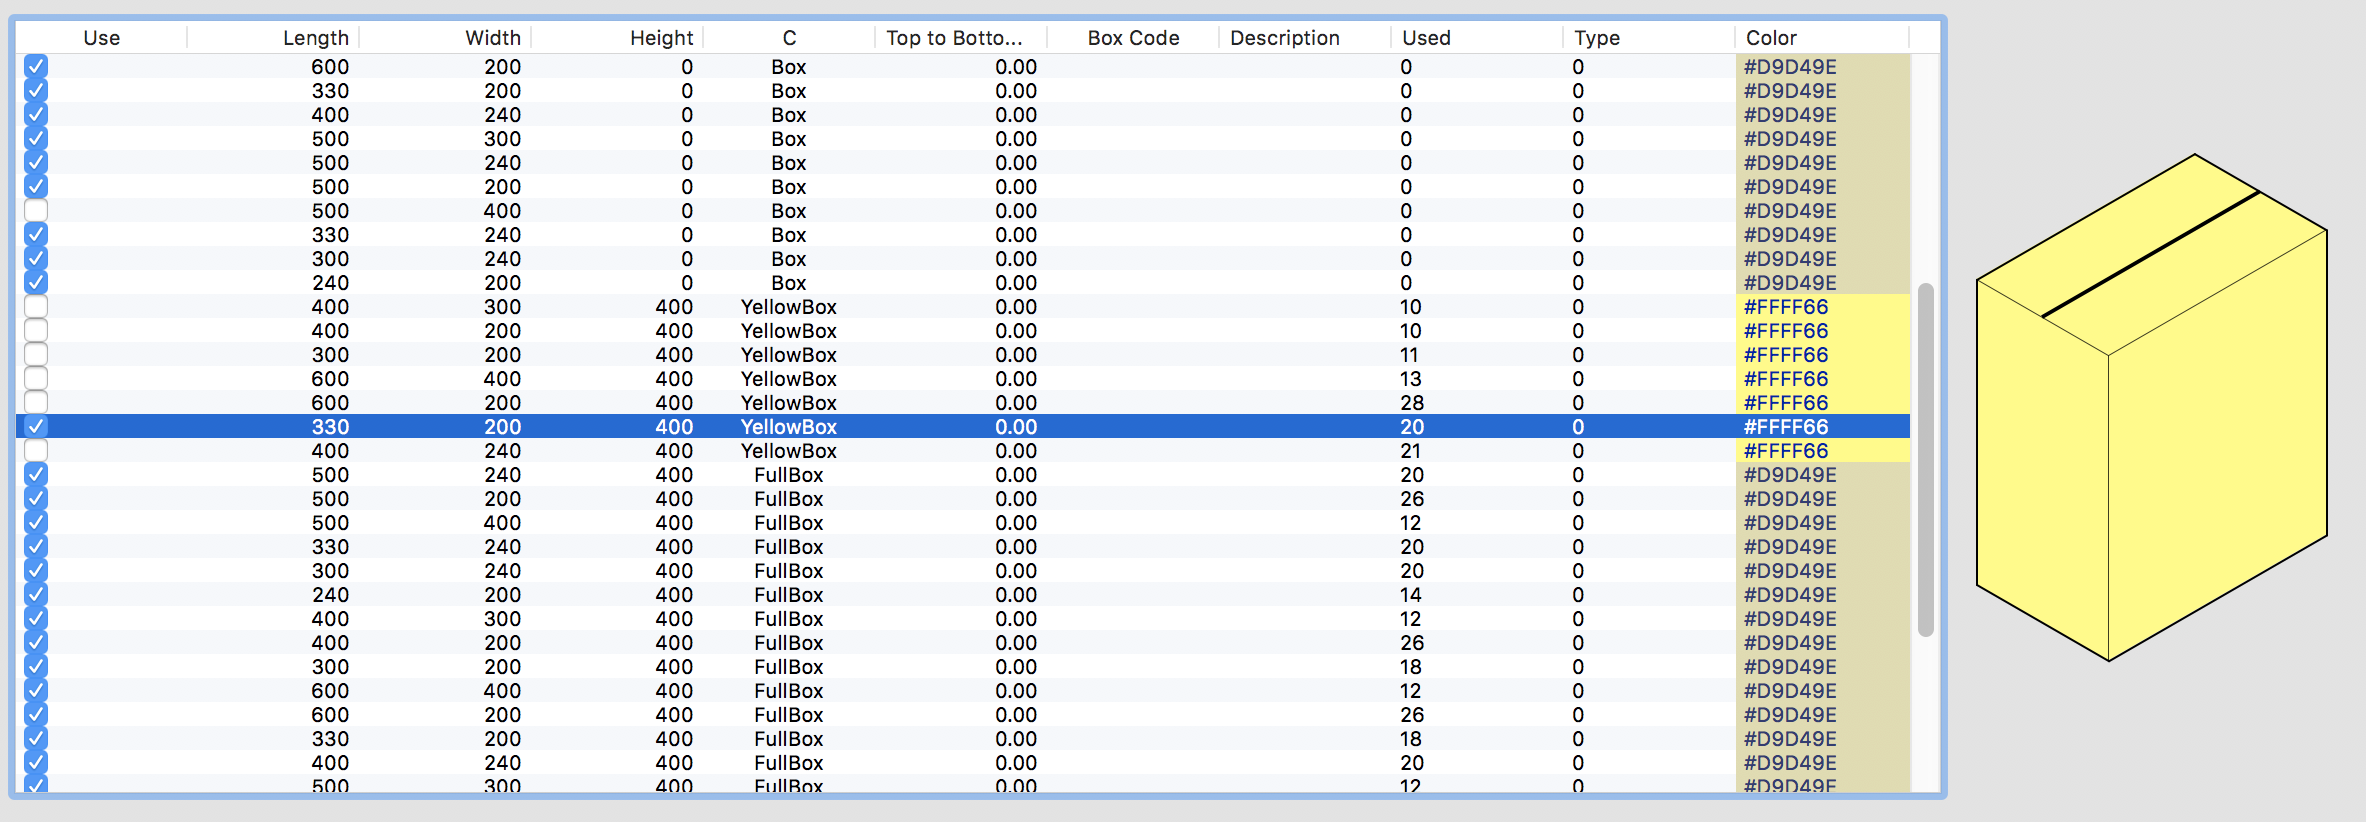
Hence, you go back to the Standard Cases and Pallets window and mark only the smaller (330x200x400) box for calculation. This is done by unchecking the rest of the boxes.
If you repeat the steps involving the Multiple Input window and then Tools > Recalculate, you will obtain just the boxes you need. This can be repeated for multiple shipment amounts, such as 30, 60, 100, etc.
Watch the video
This example is also available as a YouTube video.YouTube Video