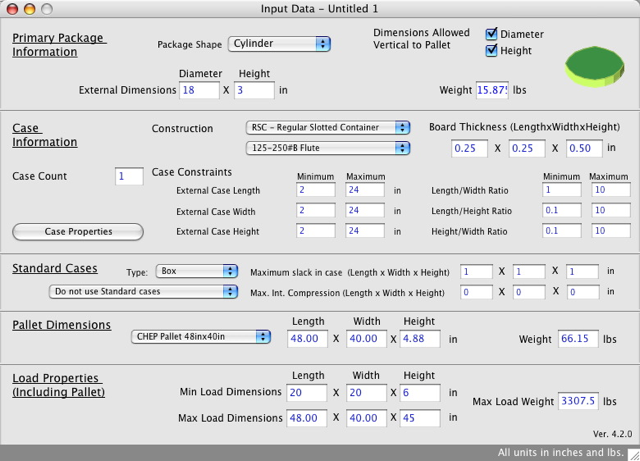
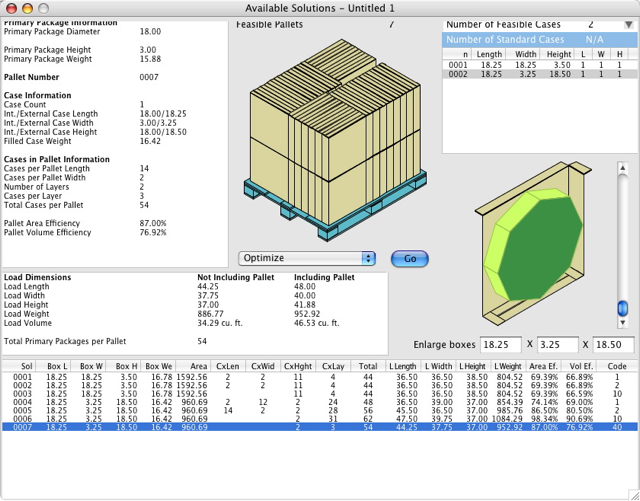
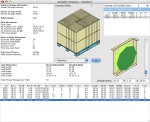
| A company needs to fill pallets with cylindrical blocks in display boxes but with a certain count per pallet. Their client is requesting that the pallets fit only 54 cases, even if they can include up to 60 items. To calculate this, we start by entering the primary package dimensions (using inches). Please note that the case constraints have been loosened to create the flat boxes. |
 |
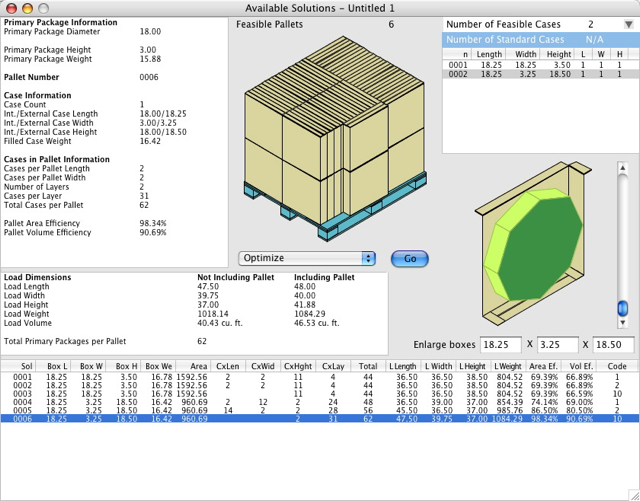
| When we choose "Recalculate" from the Tools menu, we will produce six pallets, which are a product of using the two different boxes. The first box places the block flat and the other box has it standing up. Note that the sixth pallet can ship 62 boxes with one block each. |
 |
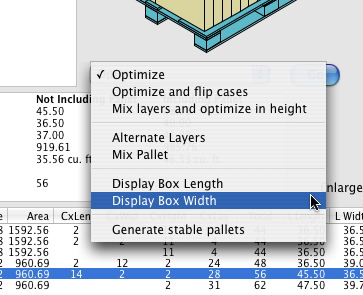
| We select any of the pallets with the vertical blocks (i.e. tall boxes) and then choose the option for creating Display Pallets. |
 |
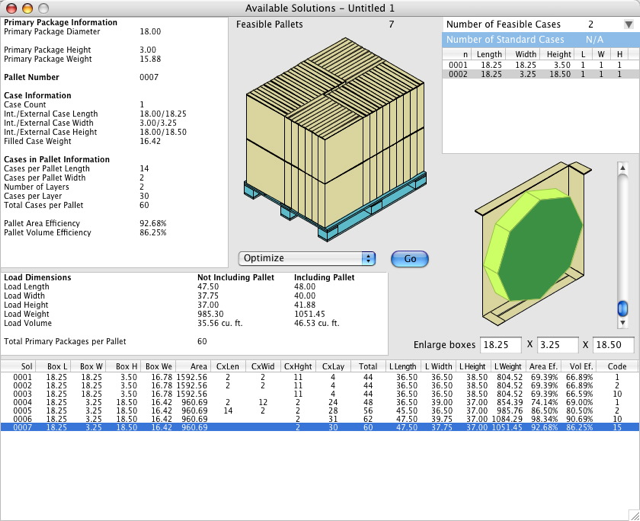
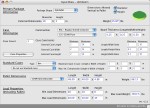
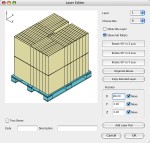
| The resulting pallet should look like the one in the screenshot at right. The problem with this pallet is that it ships 60 items instead of the required 54. Therefore, the next step is to use the Layer Editor to remove six boxes (3 per layer). We select "Layer Editor" from the Tools menu. |
 |
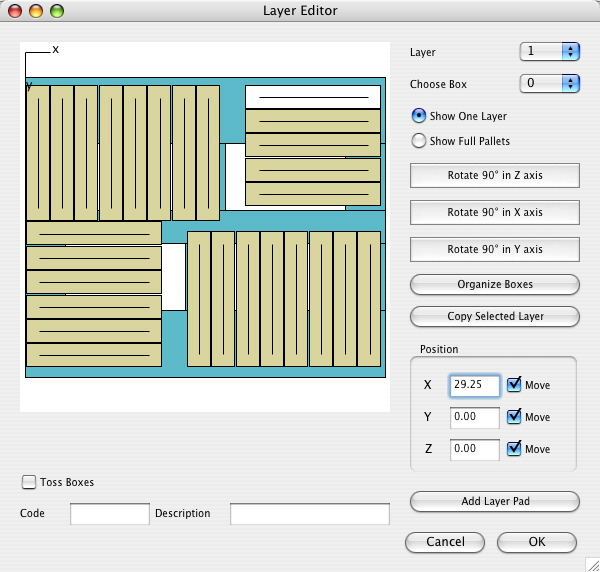
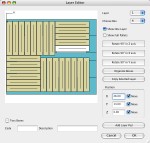
| When the Layer Editor window opens, the pallet drawing should look like the one in the screenshot to the right. |
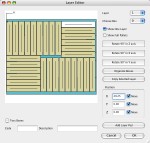 |
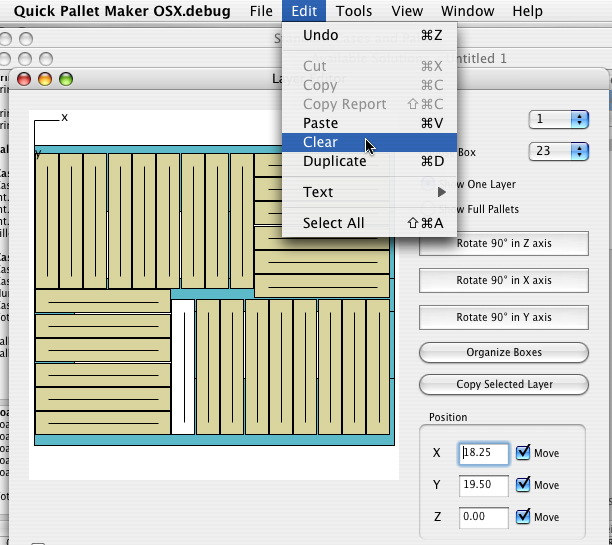
| The next step is to select the boxes that we will remove from the first layer. To keep the pallet corners as square as possible, we remove 3 boxes from the center. To do this, we click on a box and then choose "Clear" from the Edit menu. |
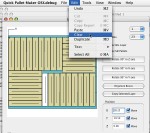 |
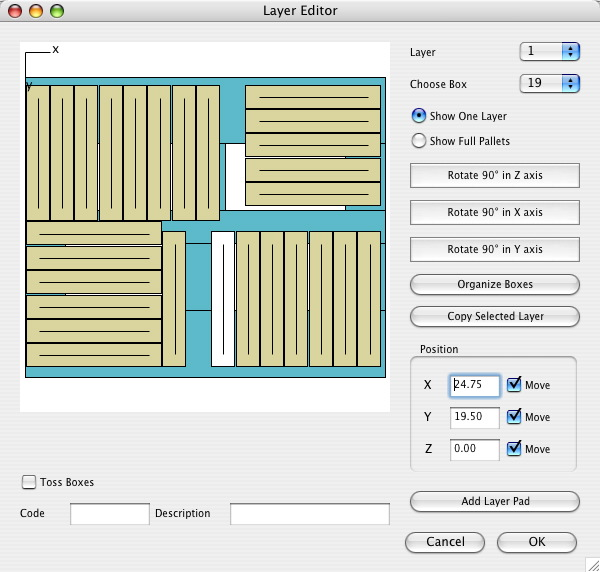
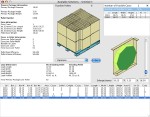
| The finished layer should look like the one in the screenshot to the right. |
 |
| We then start moving the boxes together to fill the gap in the middle. This is done by clicking on the boxes and then using the arrow keys to change their position. You can also enter the position manually but this is slightly more difficult as the final position would need to be calculated. |
 |
| The tighter pallet layer should look like the one in the drawing to the right. To not have to repeat the same box deletion and repositioning steps described previously for the second pallet layer, we click on "Copy Selected Layer". |
 |
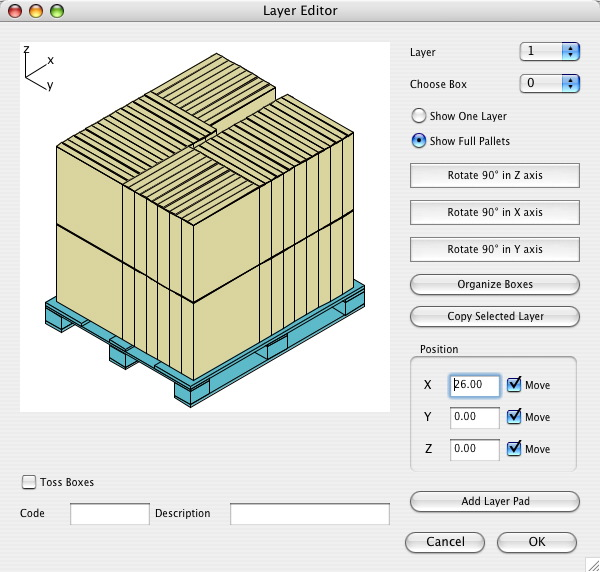
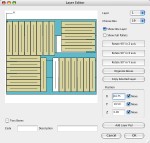
| This creates the final pallet configuration as can be seen still in the Layer Editor. |
 |
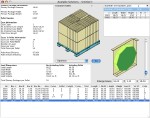
| The final pallet arrangement appears now in the Solutions Window, with 54 cases per pallet. |
 |