VSO Example - Create/Add New SKUs
This example explains how to create a new SKU (box) that will be used for calculating truck loads. There are two ways how to do this: using the box editor to configure individual boxes or pasting the data from a spreadsheet.
Creating SKUs individually

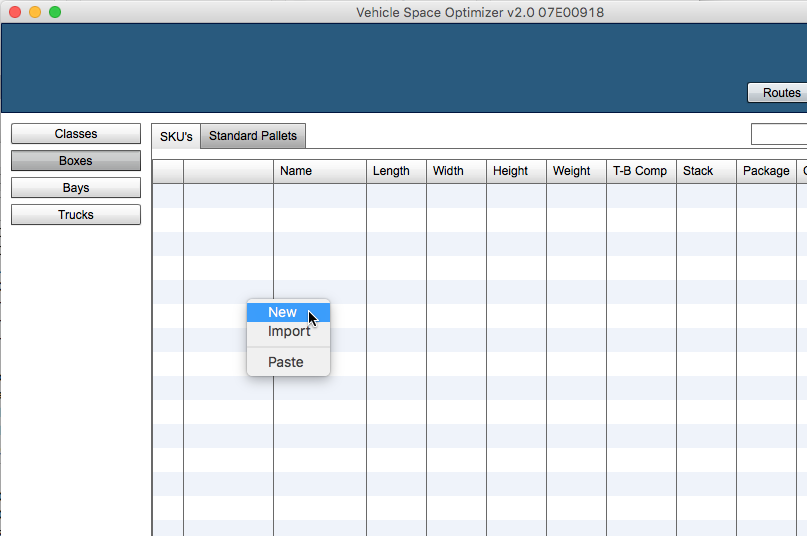
In VSO we can create new boxes by entering all of its properties in the box editor window. The first step is to run VSO and click on the Warehouse tab. If you do not see the Warehouse tab, then you need to ask your application administrator for Planner permissions. Once in the Warehouse window, click on the Boxes button on the left, click on the SKU's tab and then right-click the table to reveal a contextual menu like the one below.

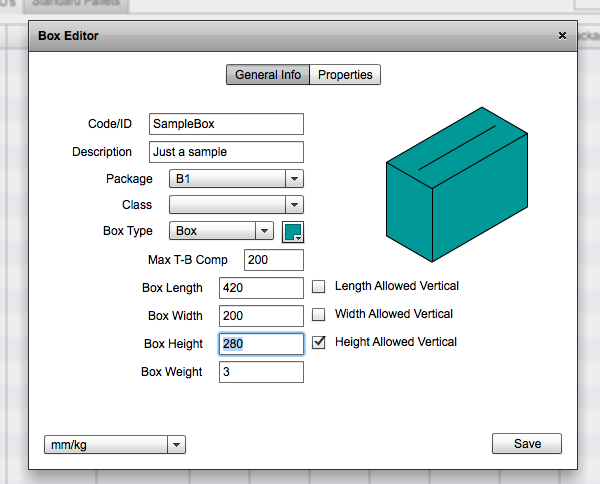
Once that's done, we should see the box editor window with the default values. The different input options are the following:

- Code/ID: this is where you enter the unique identifier for the SKU. Many consumer product companies use 8-digit codes for their products.
- Description: enter a description of the SKU up to 50 characters
- Package: pull-down menu where the user can select a primary class that will be associated with this SKU.
- Class: a pull-down menu for selecting the secondary class to associate this SKU.
- Box Type: can be either a covered RSC box (Box) or a tray (Tray).
- Box Color: a cell that can be clicked to bring up a palette of colors from which to pick the one that will represent the box on the pallet.
- Max T-B Comp: maximum top to bottom compression that the box can support. This value is represented in weight units (kg or lbs) and usually written under the box.
- Box Length: the external length of the box
- Length Allowed Vertical: if this box is checked, then the pallet fill calculations will be able to load boxes with the length pointing upwards.
- Box Width: in this cell, the width of the box is entered.
- Width Allowed Vertical: if this box is checked, then the pallet fill calculations will be able to load boxes with the width pointing upwards.
- Box Height: the height of the box.
- Height Allowed Vertical: if this box is checked, then the pallet fill calculations will be able to load boxes with the height pointing upwards (i.e. right-side-up). This is the default value.
- Box Weight: the gross weight of the box is entered here
- Units: a pull-down menu from which we can select the units in which the box dimensions are being entered. Conversion is done in each calculation as case dimensions are stored in their original units in the database.
In this example, we add some values and change the color. The result is as in the screenshot below.

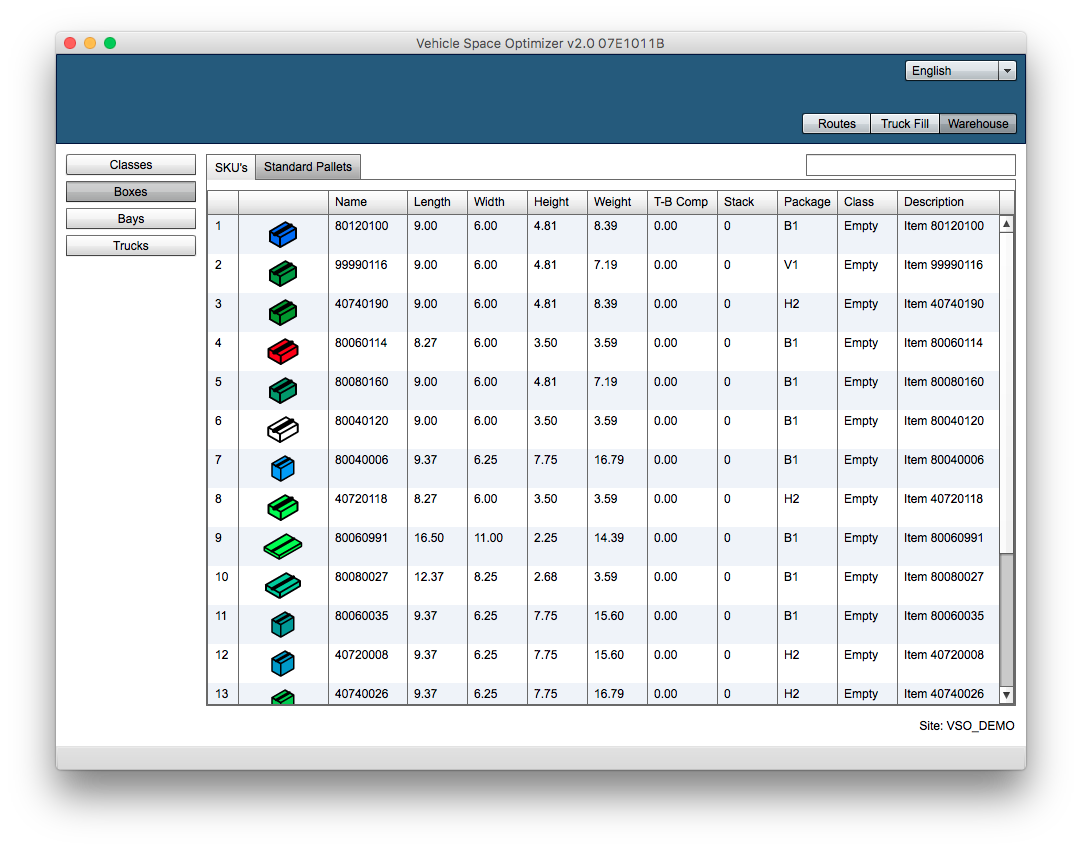
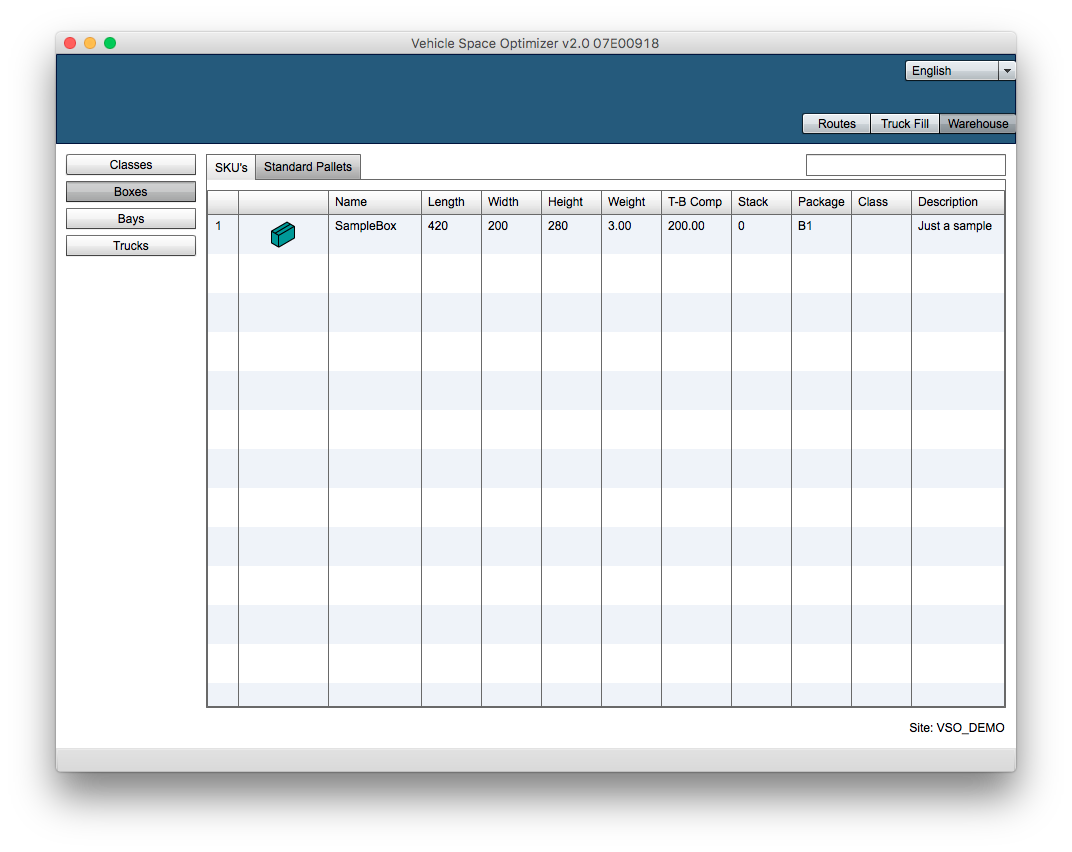
After editing the box values, we click on the "Save" button and the new box should appear in the table, as shown in the screenshot below.
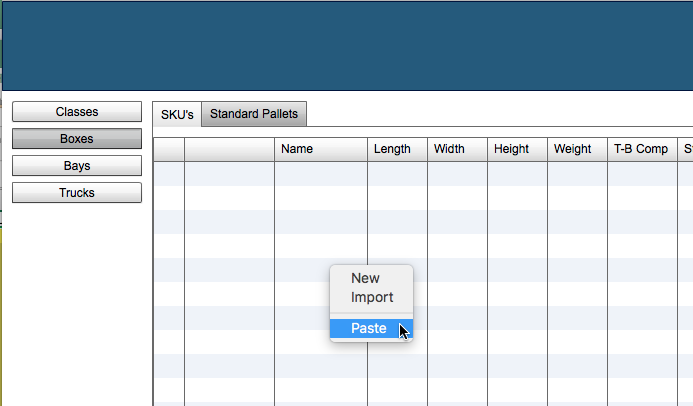
Pasting a List of Boxes
To add a long list of boxes to the database, we can paste a list of entries in a spreadsheet. The columns are the following:
- Unit:
- mm/kg
- cm/kg
- inches/lbs
- Pack Type: use 1 as the value
- Length: enter external box length in the appropriate units
- Width: box external width
- Height: external height of the box
- Weight: the gross weight of the box
- Color: the box color in web hexadecimal format (#RRGGBB)
- Amount: use 0 as the value
- Code: the unique identifier of the SKU in the database
- Description: no more than 50 characters describing the SKU
- Package: the name of the primary class for this SKU
- Class: the name of the secondary class