Creating Vertical Load Trucks
In this example is explained how to create and edit vertical load trucks. This is done following three single steps:
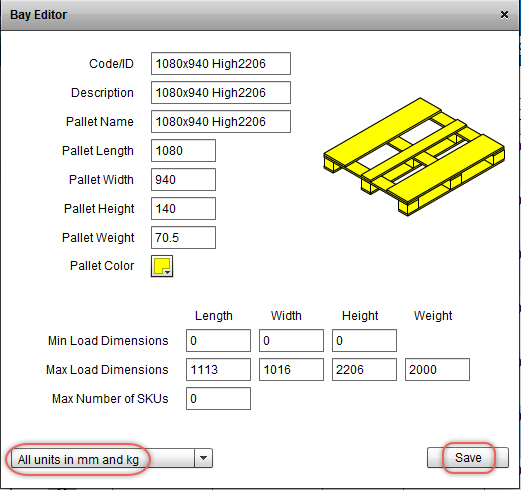
- Vertical Bays. The first step is to define the size of the Vertical Bays. in this example we will create two bays: one with 1080 mm length, 940 mm width and 2206 mm max high, other bay with 1506 as max high.
- Vertical Load Truck Types. In this step we will create a Vertical Load Truck Type with three axis an ten bays.
- Trucks. The last step is to fill the individual data of each truck.
Creating Vertical Bays

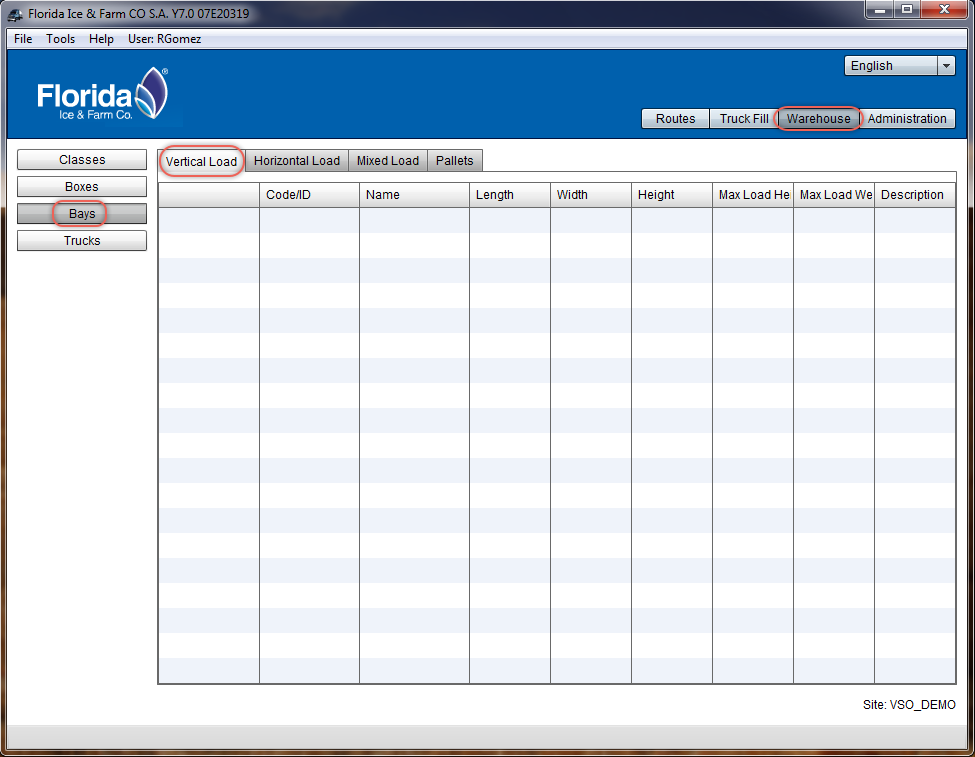
To access the option click Warehouse tab, then Bays buttom and Vertical Load tab.

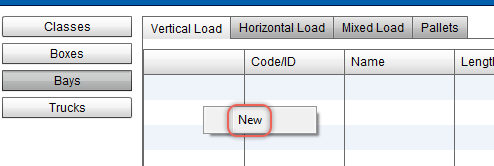
Right click and then select New.

Then, the Bay Editor window is shown, the different input options are the following:
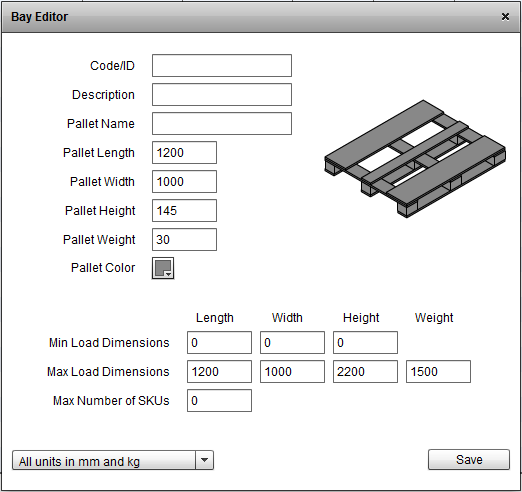
- Code/ID: Enter an appropiate unique identifier for this Vertical Bay.
- Description: enter a description of this Vertical Bay up to 50 characters
- Pallet Name: enter a Name for this Vertical Bay.
- Pallet Length: enter the length of the Pallet.In this example 1080.
- Pallet Width: enter the width of the Pallet. In this example 940.
- Pallet Height: enter the height of the Pallet. 140.
- Pallet Weight: enter the weight of the Pallet. 70.5.
- Pallet Color: a cell that can be clicked to bring up a palette of colors from which to pick the one that will represent the the Pallet. In this example yellow.
- Min Load Dimensions: Use these values to limit the minimum load in this bay. 0, 0, 0 in example.
- Max Load Dimensions: Use these values to limit the maximum load in this bay. 1113, 1016, 2206 and 2000 in this example.
- Max Number of SKUs: Use these values to limit the maximum amount of SKUs in this bay. 0 in this example
Then enter the Vartical Bay Constraints for Length, Width, Height and Weight.
Then select All units in mm and kg from the pull down menu and press Save buttom.

Now repeat the step three to create a Vartical Bay with this size:
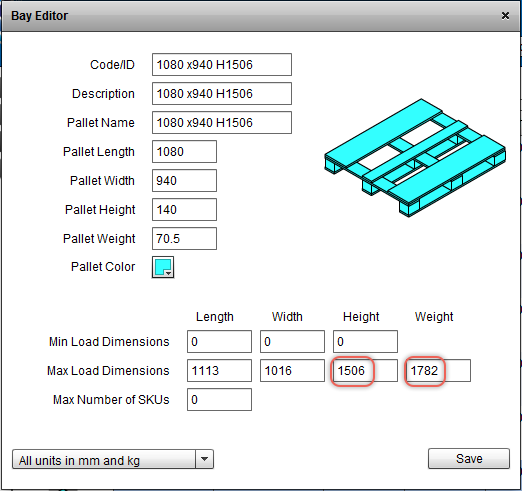
It is a bay similar to the previously created but with different max hight and max weight. Press Save buttom.
Creating Vertical Load Truck Types

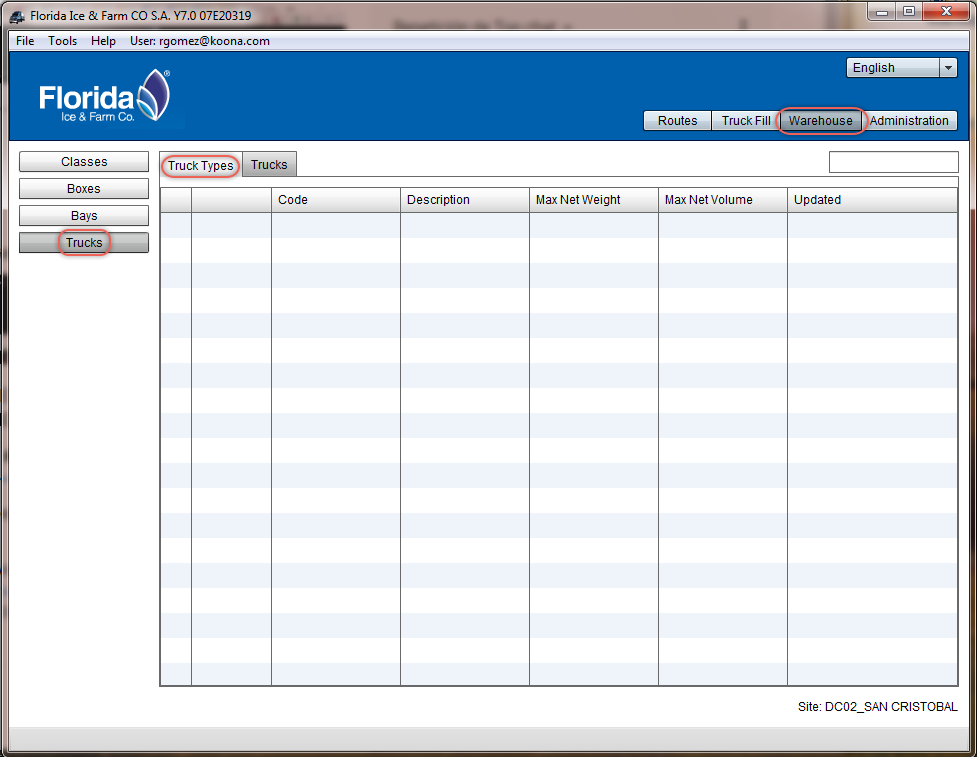
To access the option click Warehouse tab, then Trucks buttom and Truck Types tab.

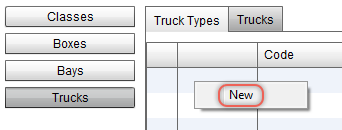
Right click to get the menu and click on New.

Then you get the Truck Type editor window with the default values. The different input options are the following:
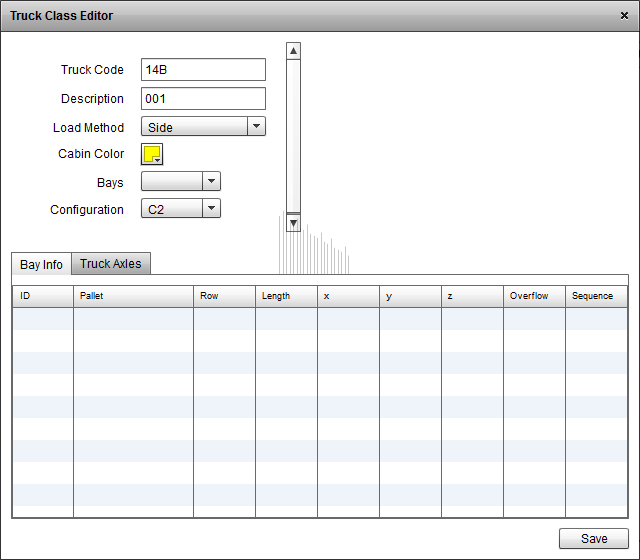
- Truck Code: enter the unique identifier for the Truck Type.
- Description: enter a description of the Truck Type.
- Load Method: a pull down menu with these options:
- Side. Centering the load weight.
- Back. For unloading products from the back.
- Volume. Filling bigger bays first.
- Weight. Filling bays with greater weight capacity first.
- Custom. Filling bays in an order specified by user.
- Mixed. This is used for those trucks with mobile partition screens, so the bay length is set according to the SKUs size. It is necessary to define pallets with the suitable size.
- Cabin Color: click on it to bring up a palette of colors from which to pick the one that will represent the cabin. Select green for this example.
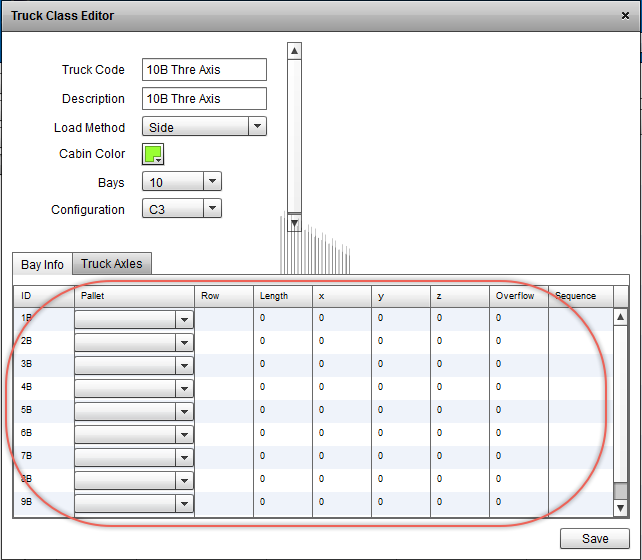
- Bays: a pull down menu to select the amount of bays. Select 10 for the example. When you select a value the Bay Info table is updated with new lines to define each bay individually
- Configuration: a pull down menu to select the axis. Select C3 for the example.
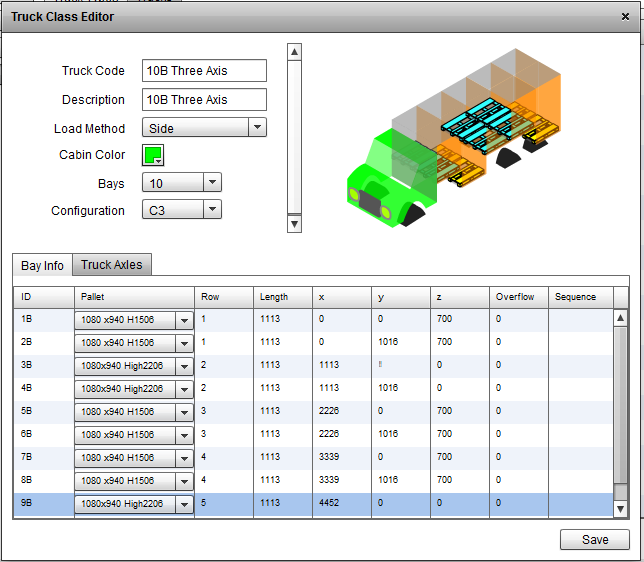
- Bay Info: a table with the bays data:
- ID. This is the identification of the bays. The number of the bay and the upper-capital B. When creating, IDs are ordered automatically, on editing they must be manually ordered.
- Pallet. Select one from the list. In this example we use the bays created in steps 3 and 4.
- Row. This is the bay row, ordered from the cabin to the back.
- Length. The bay length. This value is the same used in steps 3 and 4 to define the max load length.
- x (length). Distance from the bay to the cabin.
- y (width). Distance from the bay to the right side of the truck. In the example we use the values of Max Load Width from steps 3 and 4.
- z (height). Distance from the cabin to the bay.
- in this example the columns Overflow and Sequence are kept with zeroes and blankets.
Fill the table with the data shown on the picture.
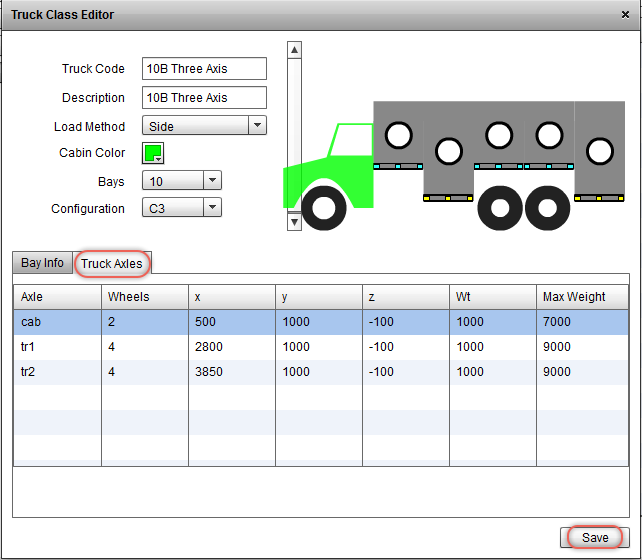
- Truck Axles: a table with details of each axis. This is very important because VSO uses this information to detect overweight on Axles.
- Axle. This is the identification of the axle.
- Wheels. Wheels per Axle.
- x (length). Distance from the front of the cabin to the axle.
- y (width). The axle width.
- z (height). Distance from the cabin to the wheels axis.
- wt. Weight.
- Max Weight. Maximum Weight per Axis.
Fill the table with the data shown on the picture.
Once the data is complete press the Save buttom .
Creating Trucks with Vertical Bays

To access the option click Warehouse tab, then Trucks buttom and Trucks tab.
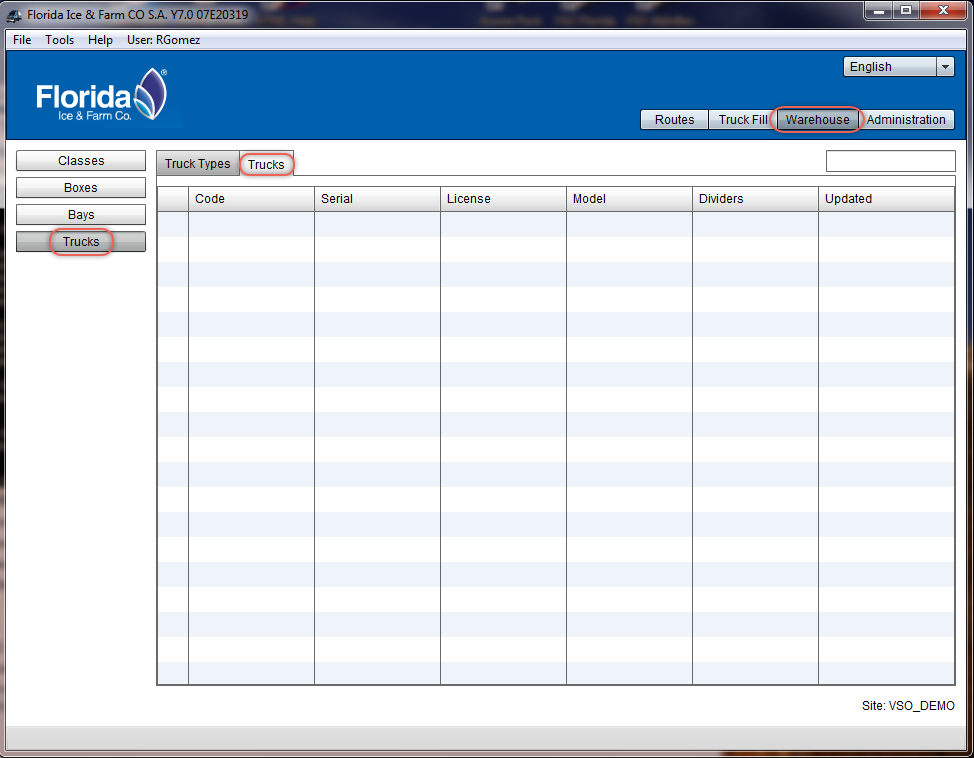

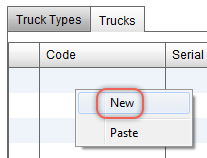
Right click to get the menu and click on New.

Then you get the Fleet Truck Editor window with the default values. The different input options are the following:
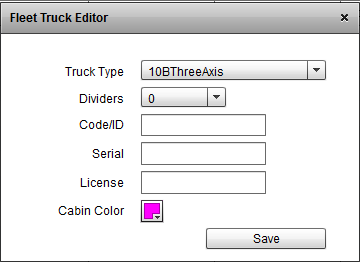
- Truck Type: select the type created on step 7 in this example .
- Dividers: how many dividers can be used into the bays.
- Code/ID: a unique code to identify the truck.
- Serial: identification for this truck.
- License: aditional identification for this truck.
- Cabin Color: click on it to bring up a palette of colors from which to pick the one that will represent the cabin. Select blue for this example.
Fill the table with the data shown on the picture.
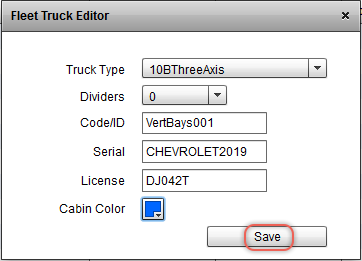
Once the data is complete press the Save buttom .