Editing full Truck Content
In this example we show how to manage the full load on the truck. Read the example Automatic Truck Calculation to review how to load the truck.

To access the option click on Routes tab.
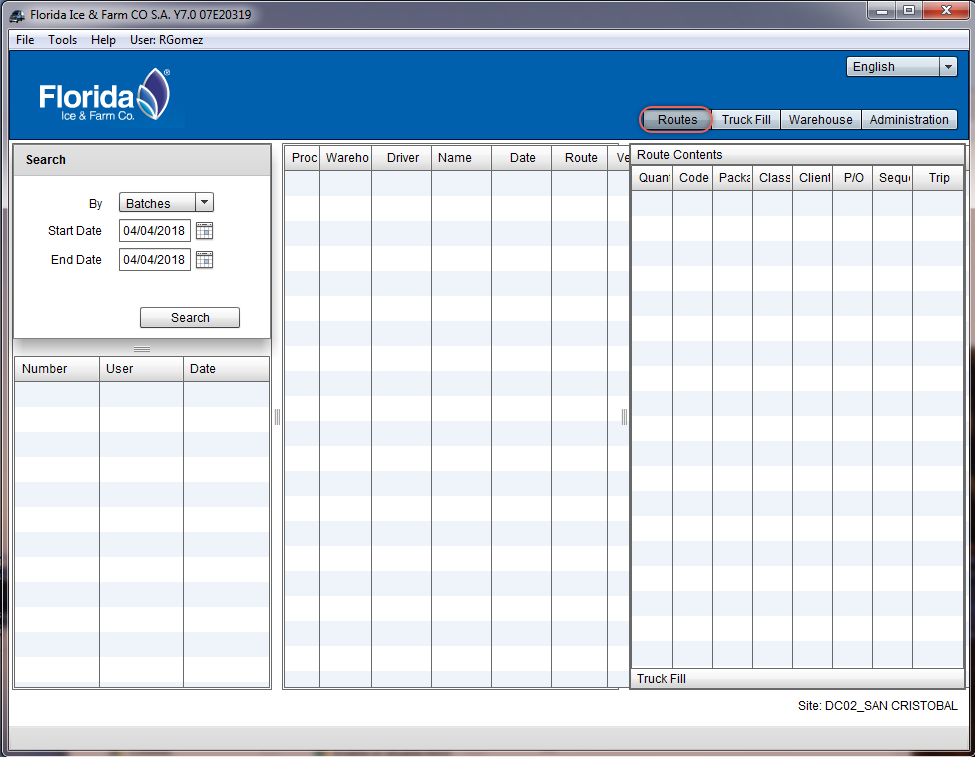

Then Select the range of dates to work by clicking on the date picking and selecting the appropiate date or wiriting the dates. when ready press the Search buttom.

Then VSO shows the loaded routes:


Click on a date to see the detail. VSO shows the detail by route.

Click on a route to see the detail of the SKUs.
 Step 4

To watch the loaded truck details right click on it and click Truck viewer.

The information about the load, bays and SKUs is showed ordered by bays. You can move SKUs between bays and reorganize the load distribution.

From now on you can access this window by pressing Truck Fill Buttom. Press the Routes buttom to go back to the routes screen

We have divided the screen on seven panels with different colors to explain you easier this window:

- Green: the SKUs data, on top there's a pull down menu with three options:
- Don't Group: orders data by bay.
- Group by Packages: orders data by packages.
- Group by Truck Sides: orders data by Truck Side.
- Blue: into this panel is the data from Bay 0. Packages not assigned to any physical bay are stayed into this virtual-temporary bay until you take actions.
- Orange: data for each bay.
- Purple: double click into this panel and VSO will show the the data by bay and the summary from the truck.
- Red: Main truck view from the pilot side (left side). Right click on the picture and select Toggle truck view to change to other trhee views.
- Pink: secondary truck view from the right side. Right click on the picture and select Toggle truck view to change to other trhee views
- Yellow: summary of the axle weight. Move the mouse hover above this panel and it will show a tip with the total weight on the truck
Additionally there are six handles to shorten / enlarge or hide / reveal the panels as you prefer, you only have to slide the handle to left or rigth, up or down:


There are products on Bay 0, we must move them to other bays, the bay 6B has more available space than other bays to receive packages, the product P2_01, in Bay 0, belongs to class P and into the bay 6B there is product P2_04 class P,

so we drag from bay 0 and drop on Bay 6B. We get the message:

This message is due to restrictions at packages level, if we see at Warehouse tab, Classes buttom, Packages tab, click on P2_04, right click and select edit option: there's a Product Rule with P2_01 Product to Avoid, type Loading; this means that both packages must not be together in the same bay when loading the truck.

These Product Variable Rules are filled when creating packages. it's the way to say to VSO how to dsitribute the load on the trucks.

In step 7 when we receive the message:
If we answer Yes, VSO asks about the quantity:

If we keep the suggested amount all the packages will be move from bay 0 to bay 6B.

The bay 6B background changes to red to warn about incompatible products into the same bay.

We can split the bay 6B: right click on bay 6B and select Split Bay option

VSO splits the bay 6B and now we have bay 6B (Bottom) and bay 6T (Top).

Now you can drag packages from bay 0 and drop on bay 6B or 6T, or you can click on Tools menu and select Recalculate Full Truck.

The bays have been loaded with products.


On Step 4 we got a right clik menu with these options:

- Update Information: This option is useful when working on a network team to refresh the screen with last changes made on other computers.
- Recalculate: use this option to calculate the truck load accordingly to route.
- Truck Viewer: after recalculating the truck use this option to watch and edit the bays load.
- Reassign Truck: Shows a list with the trucks previously defined into VSO. Select one from the list.
- Split Routes by Trip: you can divide the route in several trips.
- Properties: shows truck data.
- Group Routes in Batch: You can group several routes in a batch.
- Delete: Option to delete the route.

Select an item from Route Contents panel and right clik on it:

- Delete: use this option to delete an item from this list.
- Move to route: use this option to move an item to other route. A list is showed, pick one.
- Change Class 1: use this option to change the class 1 (Packages). A list is showed, pick one.
- Change Class 2: use this option to change the class 2 (Classes). A list is showed, pick one.
- Change Customer: you can change the customer. A list is showed, pick one.
- Change Purchase Order: use this option to change the Purchase Order.
- Change Secuence: use this option to change the class sequence of the item. A list is showed, pick one.
- Change Trip: use this option to change the trip. A list is showed, pick one.
- Refresh Properties: to refresh the box data.